Haircut guide
25 Short Hairstyles for Thin Hair and a Round Face
Updated June 13, 2026
A photo-first guide to straight short hairstyles for thin hair and a round face, including pixies, bixies, tapered crops, and smooth short bobs.
Straight short cuts that balance a round face and protect thin-hair density
The best short hairstyles for thin hair and a round face create shape in the cut itself. A side-swept pixie can add a diagonal line, a tapered crop can narrow the sides, and a smooth short bob can keep the lower edge looking fuller.
This page covers short styles beyond bobs. For a bob-only comparison, use the short bob hairstyles for thin fine hair with a round face guide. For every length and face shape, the broader haircuts for thin fine hair guide is the better starting point.
25 Short Hairstyles for Thin Hair and a Round Face photo ideas
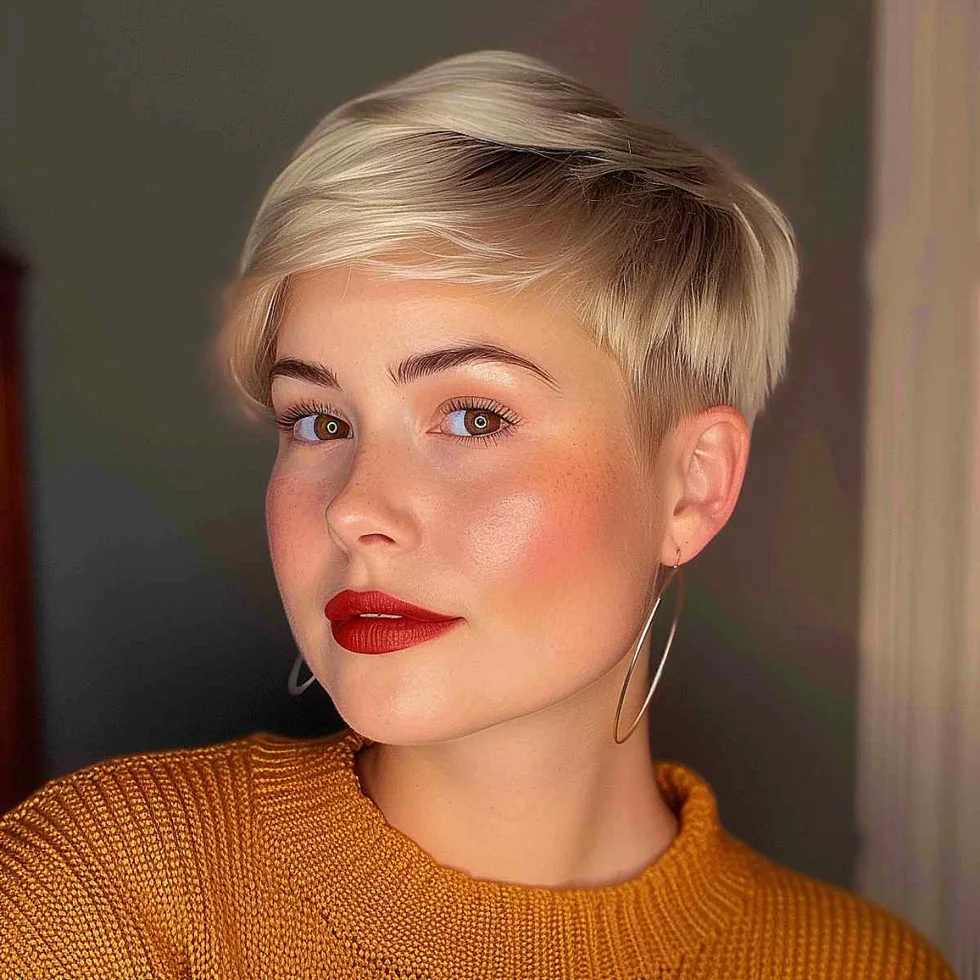
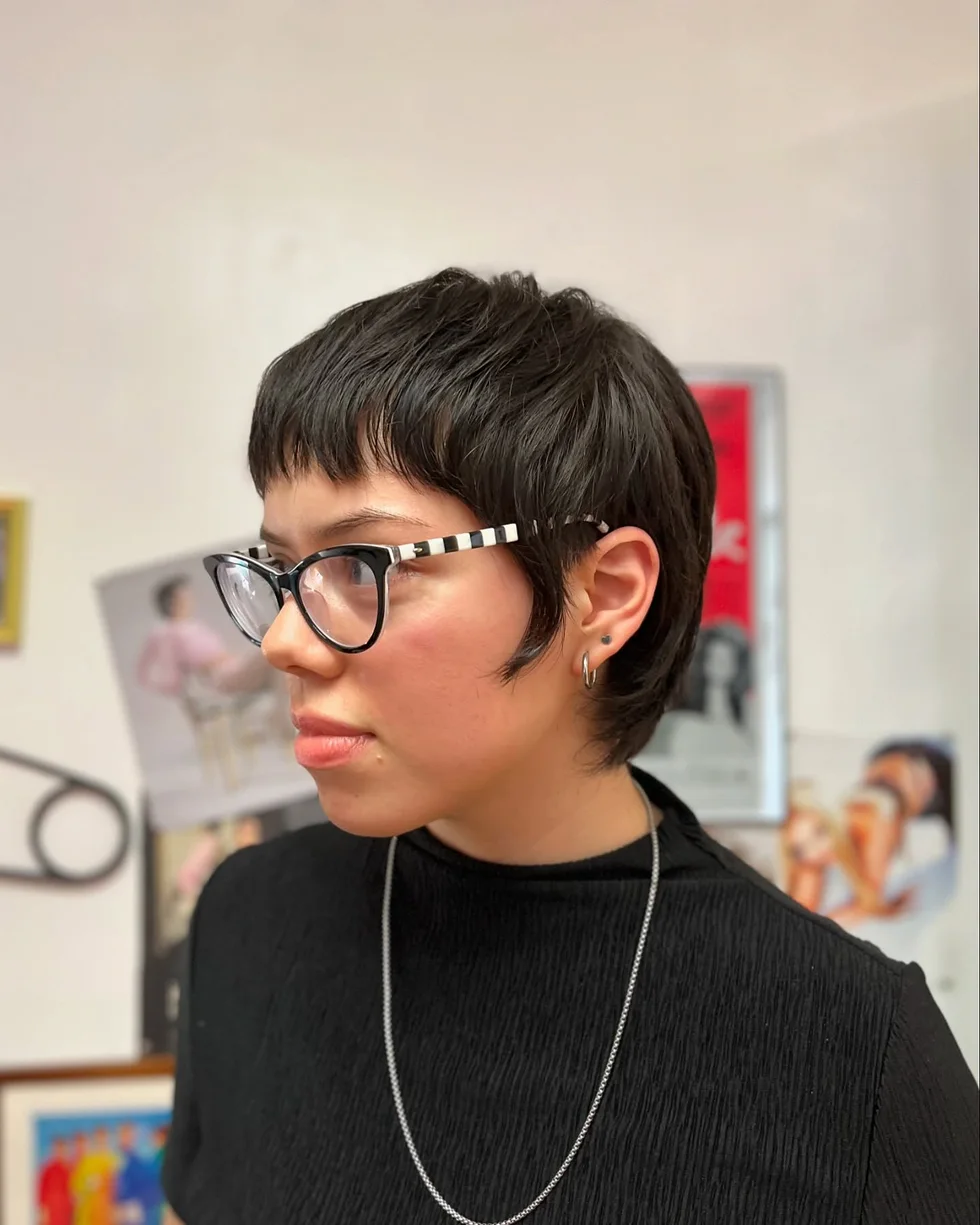
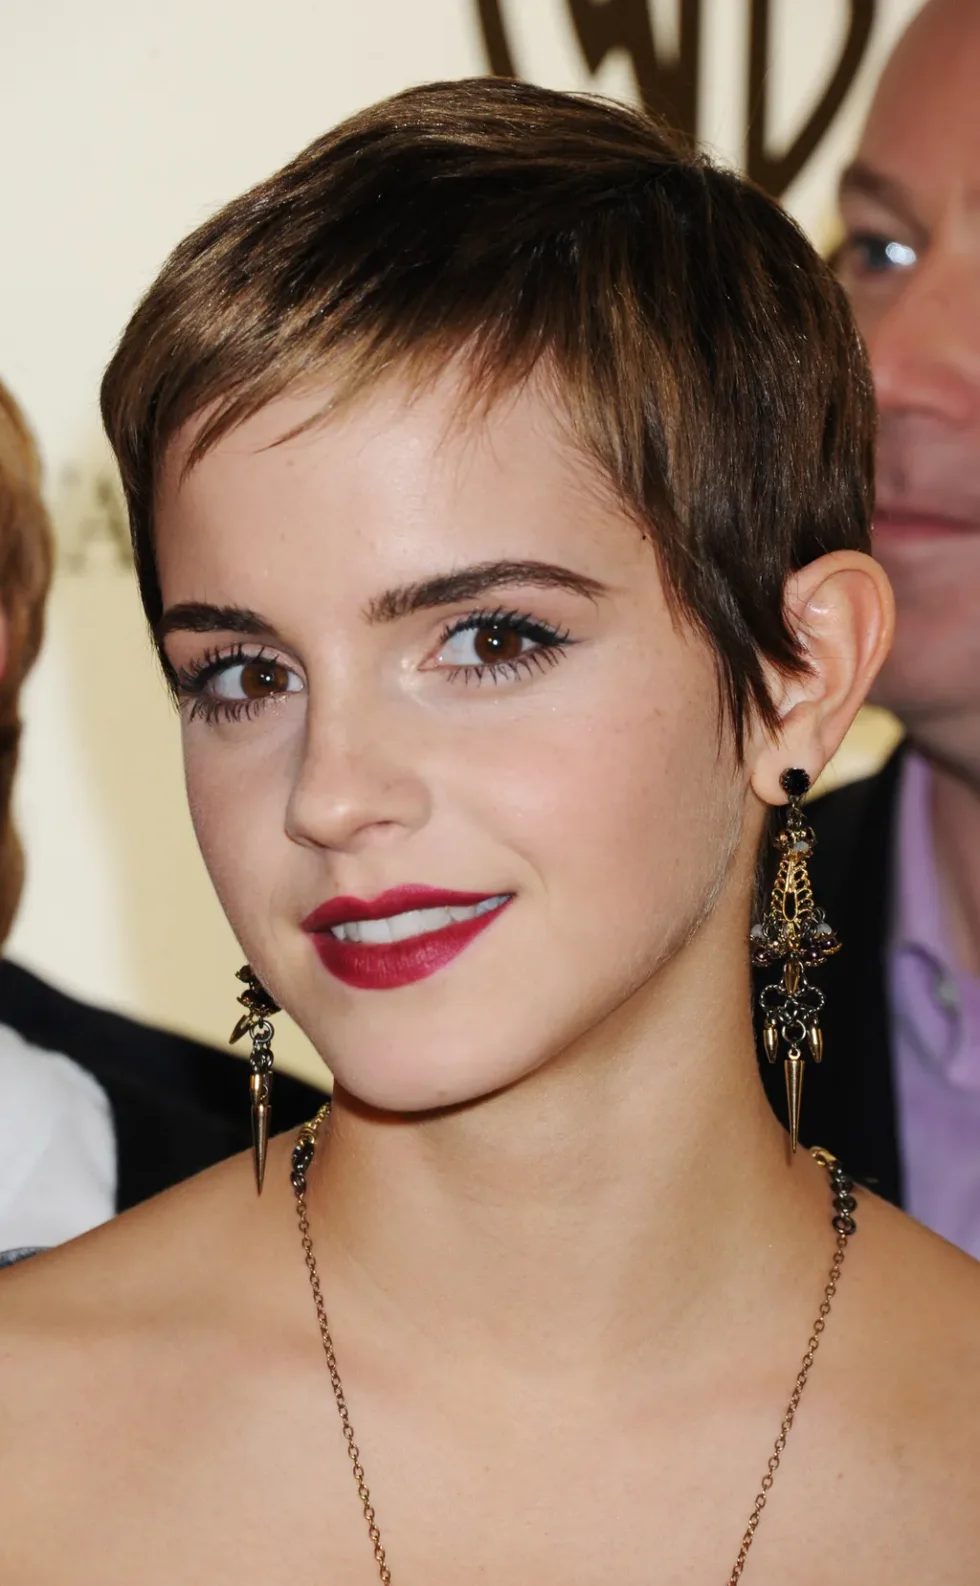
1. Copper Pixie With Glasses

Description
A straight copper pixie with a lifted top, close sides, and light fringe above black glasses.
Why it works
The height above the forehead lengthens the outline, while the close sides avoid adding width beside full cheeks.
Best for
Thin straight hair, round faces, glasses, and anyone who wants a warm cropped cut.
Maintenance
Lift the crown for a minute while drying and keep the sideburn area close to the face.
Try it yourself for Copper Pixie With Glasses
How to DIY
- Start copper pixie with glasses while damp and establish the part line before thin hair begins to dry flat.
- Direct the top of copper pixie with glasses upward or diagonally, then keep both sides close to the head.
- Apply root lift spray only where copper pixie with glasses needs support, never across the full root area.
- Check copper pixie with glasses from the front to confirm the cut adds height or a diagonal line instead of width beside the cheeks.
- Finish copper pixie with glasses with a light touch and stop before the strands separate or look coated.
2. Silver Side-Swept Pixie With Glasses

Description
A smooth silver pixie with a long diagonal top, tucked side, and softly tapered back.
Why it works
The diagonal fringe breaks up facial width and the neat side keeps the glasses and cheek line visible.
Best for
Thin silver hair, round faces, glasses, and a polished short routine.
Maintenance
Dry the long top across the forehead, then tuck the shorter side behind the glasses arm.
Try it yourself for Silver Side-Swept Pixie With Glasses
How to DIY
- Start silver side-swept pixie with glasses while damp and establish the center crown before thin hair begins to dry flat.
- Direct the top of silver side-swept pixie with glasses upward or diagonally, then keep both sides close to the head.
- Apply heat protectant only where silver side-swept pixie with glasses needs support, never across the full root area.
- Check silver side-swept pixie with glasses from the front to confirm the cut adds height or a diagonal line instead of width beside the cheeks.
- Finish silver side-swept pixie with glasses with a light touch and stop before the strands separate or look coated.
3. Tapered Gray Pixie With Side Fringe

Description
A tapered gray pixie with short sides, a soft side fringe, and subtle lift through the top.
Why it works
The taper narrows the silhouette near the cheeks, while the side fringe creates a useful diagonal line.
Best for
Thin straight gray hair, round faces, and compact cuts that need little product.
Maintenance
Brush the fringe diagonally and pinch only two or three crown pieces for height.
Try it yourself for Tapered Gray Pixie With Side Fringe
How to DIY
- Start tapered gray pixie with side fringe while damp and establish the front fringe before thin hair begins to dry flat.
- Direct the top of tapered gray pixie with side fringe upward or diagonally, then keep both sides close to the head.
- Apply root lift spray only where tapered gray pixie with side fringe needs support, never across the full root area.
- Check tapered gray pixie with side fringe from the front to confirm the cut adds height or a diagonal line instead of width beside the cheeks.
- Finish tapered gray pixie with side fringe with a light touch and stop before the strands separate or look coated.
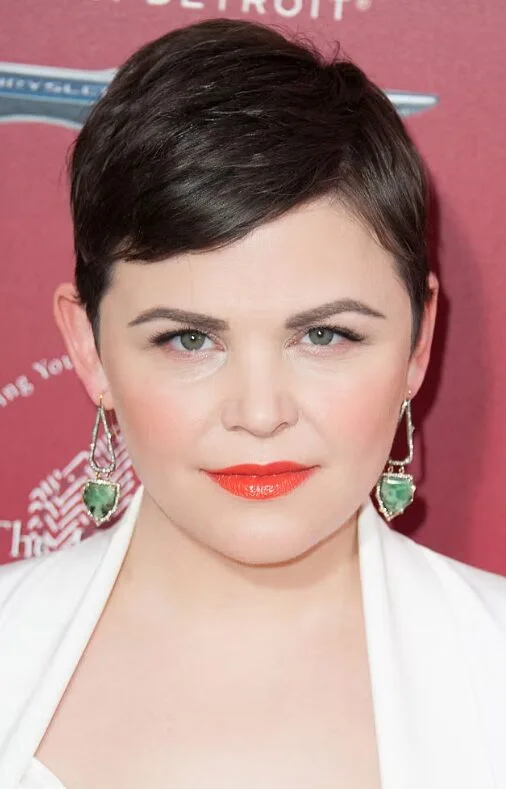
4. Soft Black Side-Swept Crop

Description
A soft black crop with a low side part, cheek-skimming front piece, and tidy neckline.
Why it works
The off-center part and longer front create asymmetry without using thick layers that can weaken thin hair.
Best for
Thin straight dark hair, round faces, and soft professional crops.
Maintenance
Set the part while damp and smooth the front piece toward the cheekbone rather than outward.
Try it yourself for Soft Black Side-Swept Crop
How to DIY
- Start soft black side-swept crop while damp and establish the temple before thin hair begins to dry flat.
- Direct the top of soft black side-swept crop upward or diagonally, then keep both sides close to the head.
- Apply heat protectant only where soft black side-swept crop needs support, never across the full root area.
- Check soft black side-swept crop from the front to confirm the cut adds height or a diagonal line instead of width beside the cheeks.
- Finish soft black side-swept crop with a light touch and stop before the strands separate or look coated.
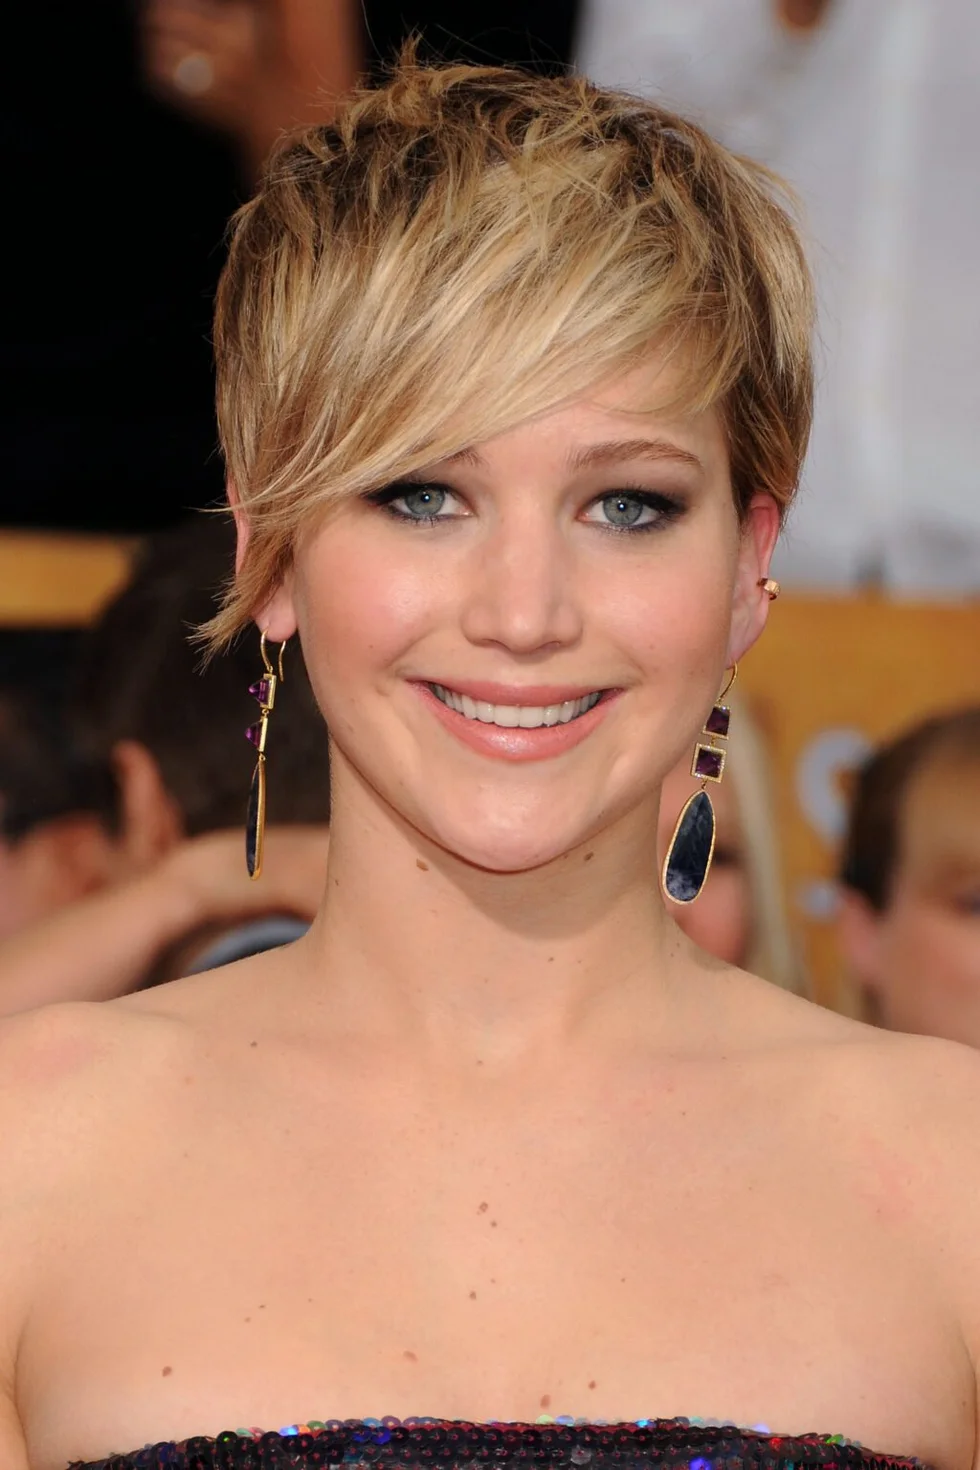
5. Blonde Side-Part Pixie
Description
A blonde pixie with a deep side part, longer top, and neatly cropped sides.
Why it works
The lifted side part adds vertical space and keeps the haircut from forming a wide circle around the face.
Best for
Thin straight blonde hair, round faces, and easy side-swept styling.
Maintenance
Dry against the part first, return the hair to place, and press the sides flat with fingertips.
Try it yourself for Blonde Side-Part Pixie
How to DIY
- Start blonde side-part pixie while damp and establish the top section before thin hair begins to dry flat.
- Direct the top of blonde side-part pixie upward or diagonally, then keep both sides close to the head.
- Apply root lift spray only where blonde side-part pixie needs support, never across the full root area.
- Check blonde side-part pixie from the front to confirm the cut adds height or a diagonal line instead of width beside the cheeks.
- Finish blonde side-part pixie with a light touch and stop before the strands separate or look coated.
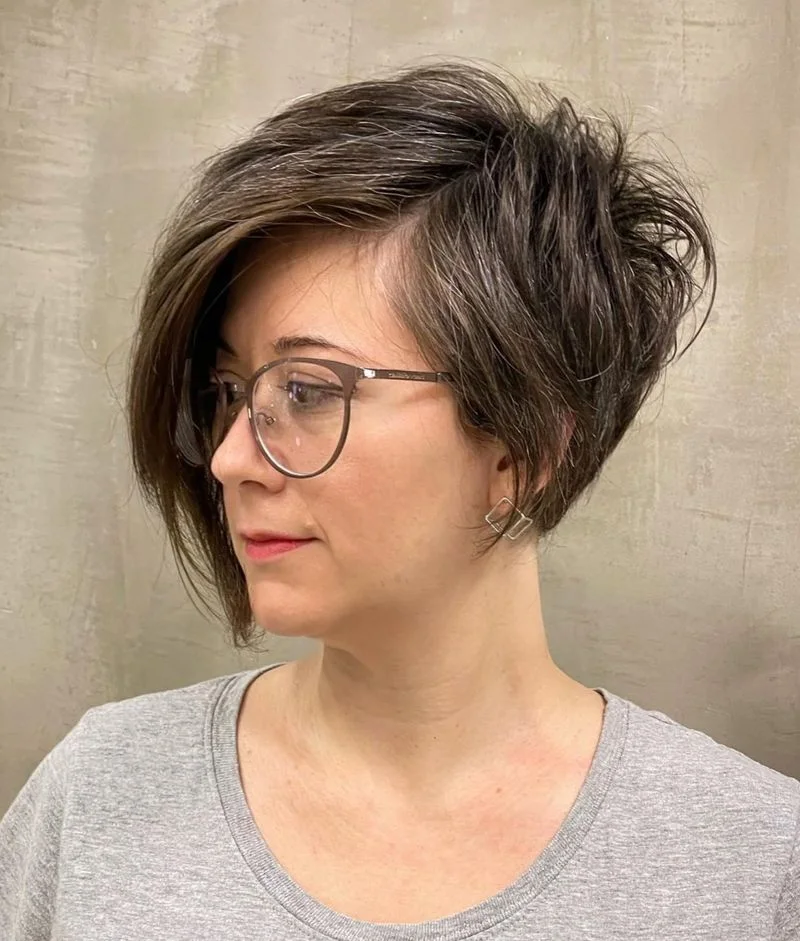
6. Brunette Bixie With Glasses
Description
A straight brunette bixie with glasses, a long side fringe, and a softly tapered nape.
Why it works
The longer top gives thin hair movement, while the diagonal fringe draws attention away from cheek width.
Best for
Thin straight hair, round faces, glasses, and anyone growing out a pixie.
Maintenance
Lift the root behind the part and guide the fringe over one eyebrow without curling the ends.
Try it yourself for Brunette Bixie With Glasses
How to DIY
- Start brunette bixie with glasses while damp and establish the nape before thin hair begins to dry flat.
- Direct the top of brunette bixie with glasses upward or diagonally, then keep both sides close to the head.
- Apply root lift mousse only where brunette bixie with glasses needs support, never across the full root area.
- Check brunette bixie with glasses from the front to confirm the cut adds height or a diagonal line instead of width beside the cheeks.
- Finish brunette bixie with glasses with a light touch and stop before the strands separate or look coated.
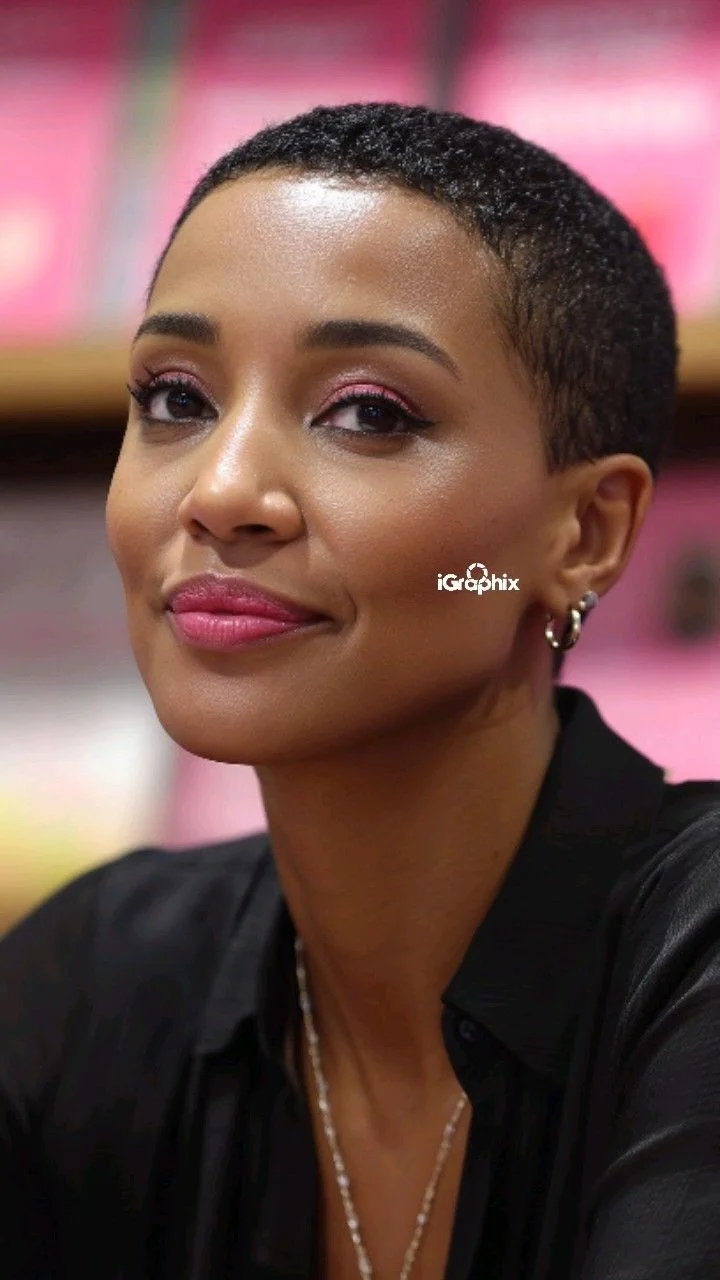
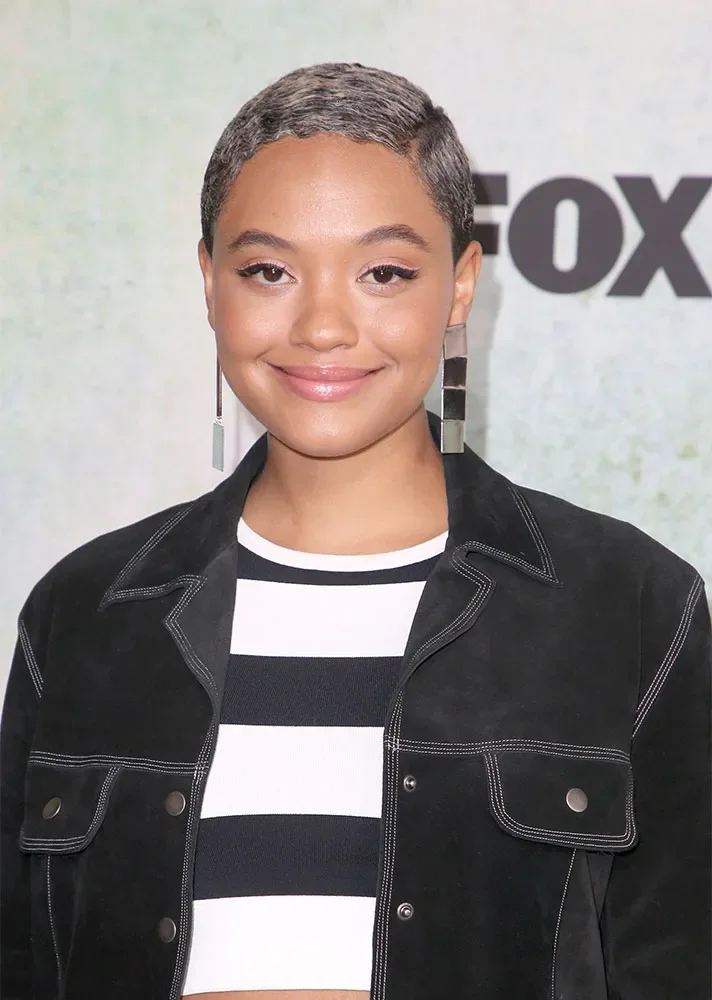
7. Ultra-Short Natural Crop
Description
An ultra-short dark crop with an even outline and a softly defined hairline.
Why it works
The open forehead and close sides make the face the focus while avoiding extra width around the cheeks.
Best for
Very short thin hair, round faces, and the simplest possible daily routine.
Maintenance
Brush the top forward with a drop of lightweight paste and leave the sides product-free.
Try it yourself for Ultra-Short Natural Crop
How to DIY
- Start ultra-short natural crop while damp and establish the ear area before thin hair begins to dry flat.
- Direct the top of ultra-short natural crop upward or diagonally, then keep both sides close to the head.
- Apply root lift spray only where ultra-short natural crop needs support, never across the full root area.
- Check ultra-short natural crop from the front to confirm the cut adds height or a diagonal line instead of width beside the cheeks.
- Finish ultra-short natural crop with a light touch and stop before the strands separate or look coated.
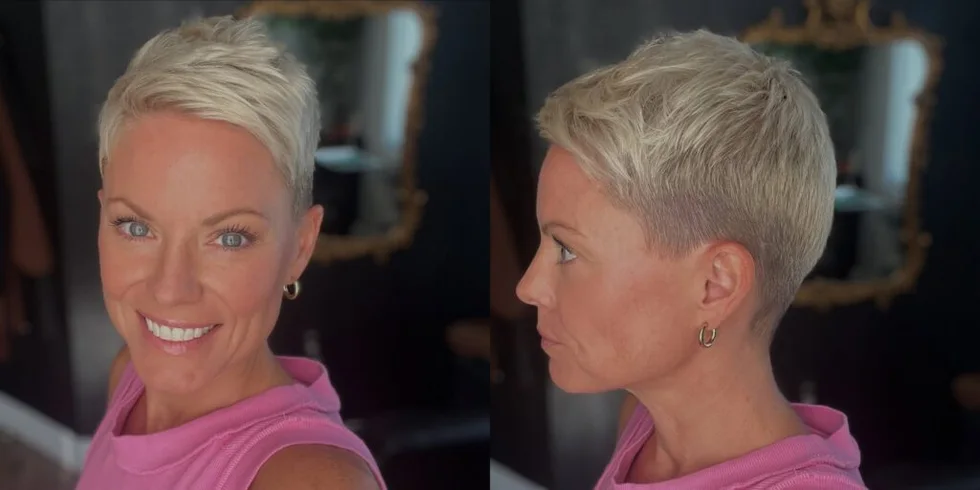
8. Platinum Tapered Pixie
Description
A platinum pixie with a lifted top, close sides, and a clean tapered neckline.
Why it works
Crown height gives a round face more vertical balance, and the taper makes thin hair look deliberately shaped.
Best for
Thin straight blonde hair, round faces, and short salon-maintained cuts.
Maintenance
Aim airflow upward at the crown and use paste only on the longest top section.
Try it yourself for Platinum Tapered Pixie
How to DIY
- Start platinum tapered pixie while damp and establish the part line before thin hair begins to dry flat.
- Direct the top of platinum tapered pixie upward or diagonally, then keep both sides close to the head.
- Apply root lift spray only where platinum tapered pixie needs support, never across the full root area.
- Check platinum tapered pixie from the front to confirm the cut adds height or a diagonal line instead of width beside the cheeks.
- Finish platinum tapered pixie with a light touch and stop before the strands separate or look coated.
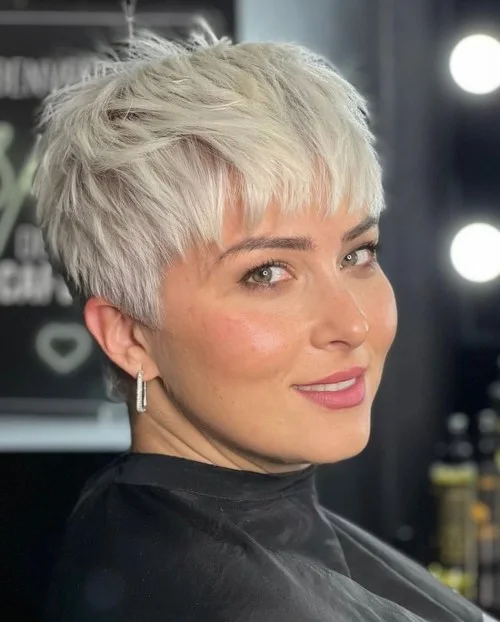
9. Blunt Platinum Bowl Pixie

Description
A platinum bowl pixie with a short blunt fringe, rounded top, and closely cropped sides.
Why it works
The exposed sides stop the rounded top from widening the cheeks, while the strong fringe makes thin hair look denser.
Best for
Thin straight hair, round faces, and bold compact fringe shapes.
Maintenance
Comb the fringe straight down while damp and keep the sides tucked tightly behind the ears.
Try it yourself for Blunt Platinum Bowl Pixie
How to DIY
- Start blunt platinum bowl pixie while damp and establish the center crown before thin hair begins to dry flat.
- Direct the top of blunt platinum bowl pixie upward or diagonally, then keep both sides close to the head.
- Apply root lift mousse only where blunt platinum bowl pixie needs support, never across the full root area.
- Check blunt platinum bowl pixie from the front to confirm the cut adds height or a diagonal line instead of width beside the cheeks.
- Finish blunt platinum bowl pixie with a light touch and stop before the strands separate or look coated.
10. Blonde Diagonal Fringe Pixie
Description
A blonde pixie with a long diagonal fringe and a closely shaped side.
Why it works
The slanted fringe creates length across the forehead and gives thin hair a fuller-looking focal point.
Best for
Thin straight blonde hair, round faces, and soft side-fringe cuts.
Maintenance
Dry the fringe from the opposite side first, then sweep it diagonally and mist underneath.
Try it yourself for Blonde Diagonal Fringe Pixie
How to DIY
- Start blonde diagonal fringe pixie while damp and establish the front fringe before thin hair begins to dry flat.
- Direct the top of blonde diagonal fringe pixie upward or diagonally, then keep both sides close to the head.
- Apply root lift mousse only where blonde diagonal fringe pixie needs support, never across the full root area.
- Check blonde diagonal fringe pixie from the front to confirm the cut adds height or a diagonal line instead of width beside the cheeks.
- Finish blonde diagonal fringe pixie with a light touch and stop before the strands separate or look coated.
11. Auburn Crown-Lift Pixie

Description
An auburn pixie with short piecey layers, a lifted crown, and neat sides.
Why it works
Height is concentrated above the head instead of beside the cheeks, which suits a round face and fine density.
Best for
Thin straight auburn hair, round faces, and lightly textured crops.
Maintenance
Use root lift only at the crown and separate the short top pieces with clean fingertips.
Try it yourself for Auburn Crown-Lift Pixie
How to DIY
- Start auburn crown-lift pixie while damp and establish the temple before thin hair begins to dry flat.
- Direct the top of auburn crown-lift pixie upward or diagonally, then keep both sides close to the head.
- Apply root lift spray only where auburn crown-lift pixie needs support, never across the full root area.
- Check auburn crown-lift pixie from the front to confirm the cut adds height or a diagonal line instead of width beside the cheeks.
- Finish auburn crown-lift pixie with a light touch and stop before the strands separate or look coated.
12. Silver Close-Cropped Pixie
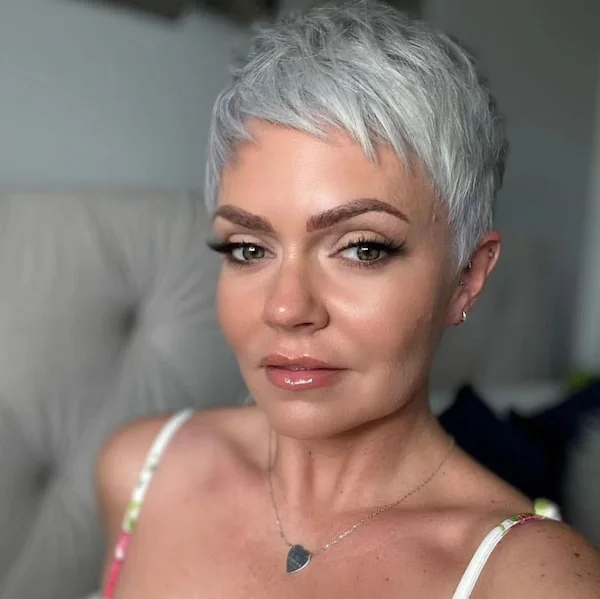
Description
A silver close crop with a soft forward fringe and a clean, narrow outline.
Why it works
The compact sides reduce width and the pale texture makes the short layers visible without heavy styling.
Best for
Thin straight silver hair, round faces, and very short wash-and-wear cuts.
Maintenance
Dry the fringe forward, then lift the center top slightly instead of creating side volume.
Try it yourself for Silver Close-Cropped Pixie
How to DIY
- Start silver close-cropped pixie while damp and establish the top section before thin hair begins to dry flat.
- Direct the top of silver close-cropped pixie upward or diagonally, then keep both sides close to the head.
- Apply root lift spray only where silver close-cropped pixie needs support, never across the full root area.
- Check silver close-cropped pixie from the front to confirm the cut adds height or a diagonal line instead of width beside the cheeks.
- Finish silver close-cropped pixie with a light touch and stop before the strands separate or look coated.
13. White Feathered Pixie
Description
A white feathered pixie with wispy bangs, short sides, and light top separation.
Why it works
The airy fringe avoids a heavy horizontal line and the top texture keeps thin hair from lying flat.
Best for
Thin straight white hair, round faces, and soft feathered crops.
Maintenance
Direct the fringe in small sections and use texture spray through the top, not around the cheeks.
Try it yourself for White Feathered Pixie
How to DIY
- Start white feathered pixie while damp and establish the nape before thin hair begins to dry flat.
- Direct the top of white feathered pixie upward or diagonally, then keep both sides close to the head.
- Apply root lift mousse only where white feathered pixie needs support, never across the full root area.
- Check white feathered pixie from the front to confirm the cut adds height or a diagonal line instead of width beside the cheeks.
- Finish white feathered pixie with a light touch and stop before the strands separate or look coated.
14. Brunette Pixie With Long Fringe
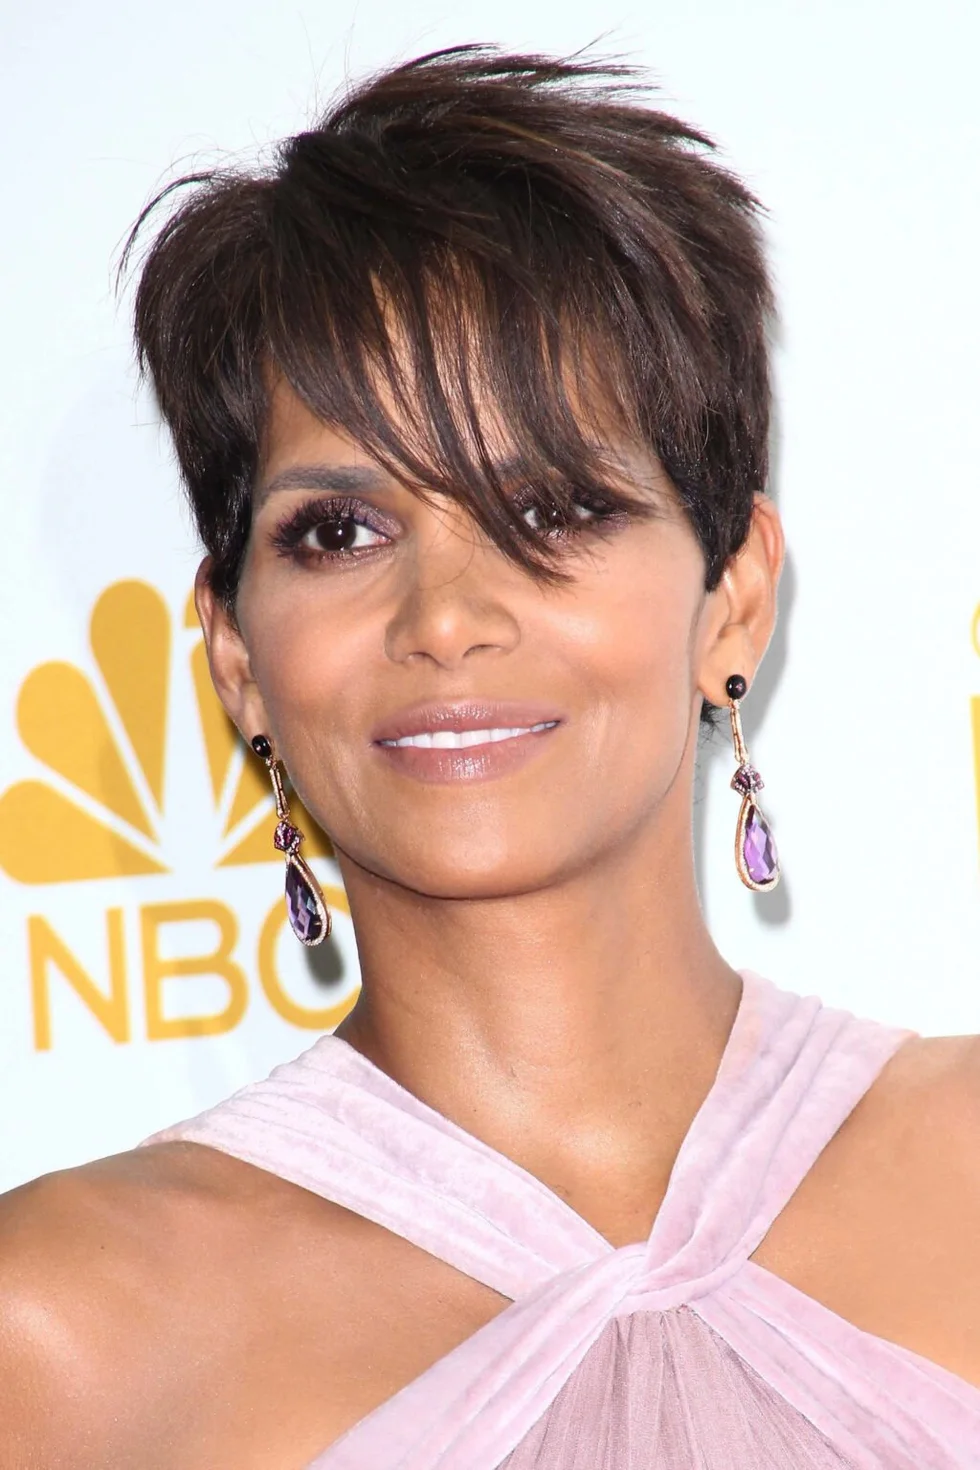
Description
A dark brunette pixie with a long sweeping fringe and closely cropped sides.
Why it works
The long diagonal top visually stretches the forehead while the narrow sides keep the face from looking wider.
Best for
Thin straight brunette hair, round faces, and dramatic side-swept fringe.
Maintenance
Smooth the fringe across one eyebrow and keep the opposite temple clean and close.
Try it yourself for Brunette Pixie With Long Fringe
How to DIY
- Start brunette pixie with long fringe while damp and establish the ear area before thin hair begins to dry flat.
- Direct the top of brunette pixie with long fringe upward or diagonally, then keep both sides close to the head.
- Apply root lift mousse only where brunette pixie with long fringe needs support, never across the full root area.
- Check brunette pixie with long fringe from the front to confirm the cut adds height or a diagonal line instead of width beside the cheeks.
- Finish brunette pixie with long fringe with a light touch and stop before the strands separate or look coated.
15. Silver Side-Swept Crop

Description
A silver crop with an angled side fringe, tapered temple, and smooth crown.
Why it works
Asymmetry gives a round face definition, and the controlled surface keeps thin hair looking polished rather than separated.
Best for
Thin straight gray hair, round faces, and tidy everyday crops.
Maintenance
Use a vent brush to lift the part line, then smooth only the outer layer of the fringe.
Try it yourself for Silver Side-Swept Crop
How to DIY
- Start silver side-swept crop while damp and establish the part line before thin hair begins to dry flat.
- Direct the top of silver side-swept crop upward or diagonally, then keep both sides close to the head.
- Apply heat protectant only where silver side-swept crop needs support, never across the full root area.
- Check silver side-swept crop from the front to confirm the cut adds height or a diagonal line instead of width beside the cheeks.
- Finish silver side-swept crop with a light touch and stop before the strands separate or look coated.
16. Dark Micro Pixie With Glasses
Description
A dark micro pixie with glasses, tiny bangs, and short pointed pieces at the ears.
Why it works
The small fringe leaves forehead space visible and the close outline prevents width around the frames and cheeks.
Best for
Thin straight dark hair, round faces, glasses, and compact alternative cuts.
Maintenance
Comb the micro fringe forward and press the ear pieces inward with a trace of paste.
Try it yourself for Dark Micro Pixie With Glasses
How to DIY
- Start dark micro pixie with glasses while damp and establish the center crown before thin hair begins to dry flat.
- Direct the top of dark micro pixie with glasses upward or diagonally, then keep both sides close to the head.
- Apply root lift mousse only where dark micro pixie with glasses needs support, never across the full root area.
- Check dark micro pixie with glasses from the front to confirm the cut adds height or a diagonal line instead of width beside the cheeks.
- Finish dark micro pixie with glasses with a light touch and stop before the strands separate or look coated.
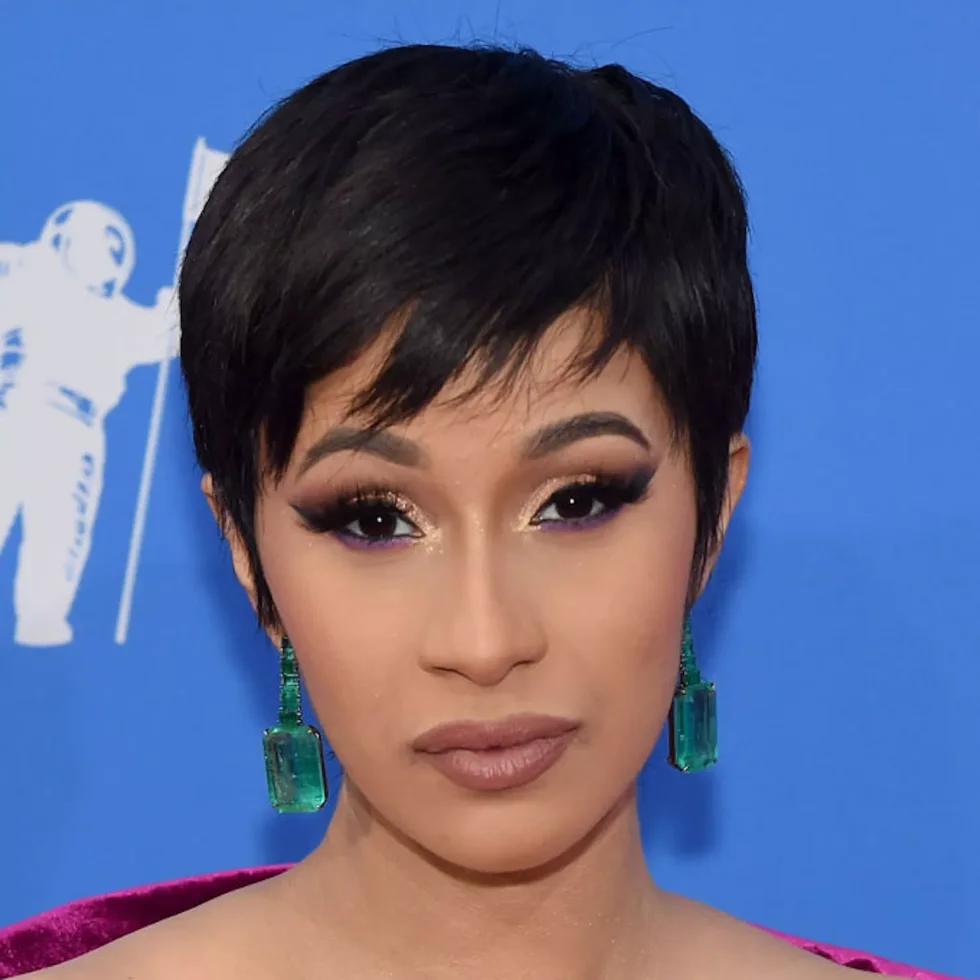
17. Black Tapered Side-Part Pixie
Description
A sleek black pixie with a precise side part, short fringe, and tapered sides.
Why it works
The side part interrupts facial symmetry and the clean taper gives thin hair a firm, intentional edge.
Best for
Thin straight black hair, round faces, and polished minimalist cuts.
Maintenance
Define the side part with a comb and smooth the fringe diagonally without flattening the crown.
Try it yourself for Black Tapered Side-Part Pixie
How to DIY
- Start black tapered side-part pixie while damp and establish the front fringe before thin hair begins to dry flat.
- Direct the top of black tapered side-part pixie upward or diagonally, then keep both sides close to the head.
- Apply heat protectant only where black tapered side-part pixie needs support, never across the full root area.
- Check black tapered side-part pixie from the front to confirm the cut adds height or a diagonal line instead of width beside the cheeks.
- Finish black tapered side-part pixie with a light touch and stop before the strands separate or look coated.
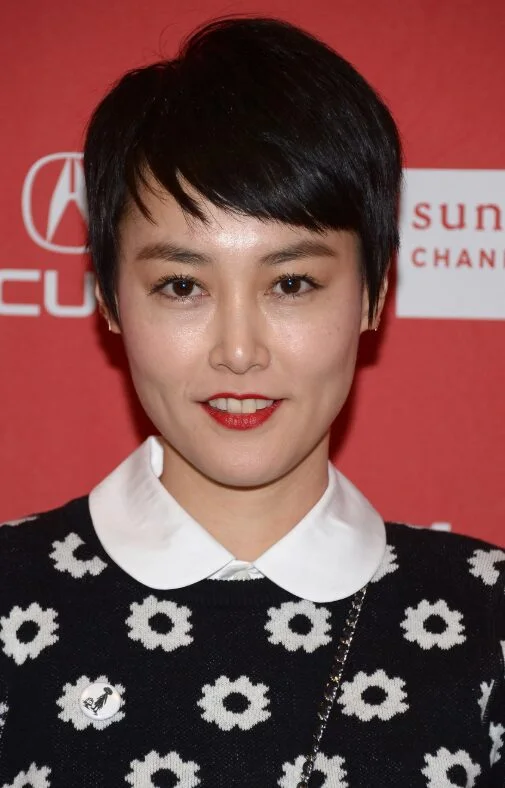
18. Black Micro Pixie With Short Fringe
Description
A black micro pixie with a short uneven fringe and close sides around the ears.
Why it works
The broken fringe keeps the forehead open, while the narrow shape avoids adding bulk beside a round face.
Best for
Thin straight black hair, round faces, and low-volume cropped styles.
Maintenance
Place the fringe with fingertips and use no more than a rice-grain amount of texture paste.
Try it yourself for Black Micro Pixie With Short Fringe
How to DIY
- Start black micro pixie with short fringe while damp and establish the temple before thin hair begins to dry flat.
- Direct the top of black micro pixie with short fringe upward or diagonally, then keep both sides close to the head.
- Apply root lift mousse only where black micro pixie with short fringe needs support, never across the full root area.
- Check black micro pixie with short fringe from the front to confirm the cut adds height or a diagonal line instead of width beside the cheeks.
- Finish black micro pixie with short fringe with a light touch and stop before the strands separate or look coated.
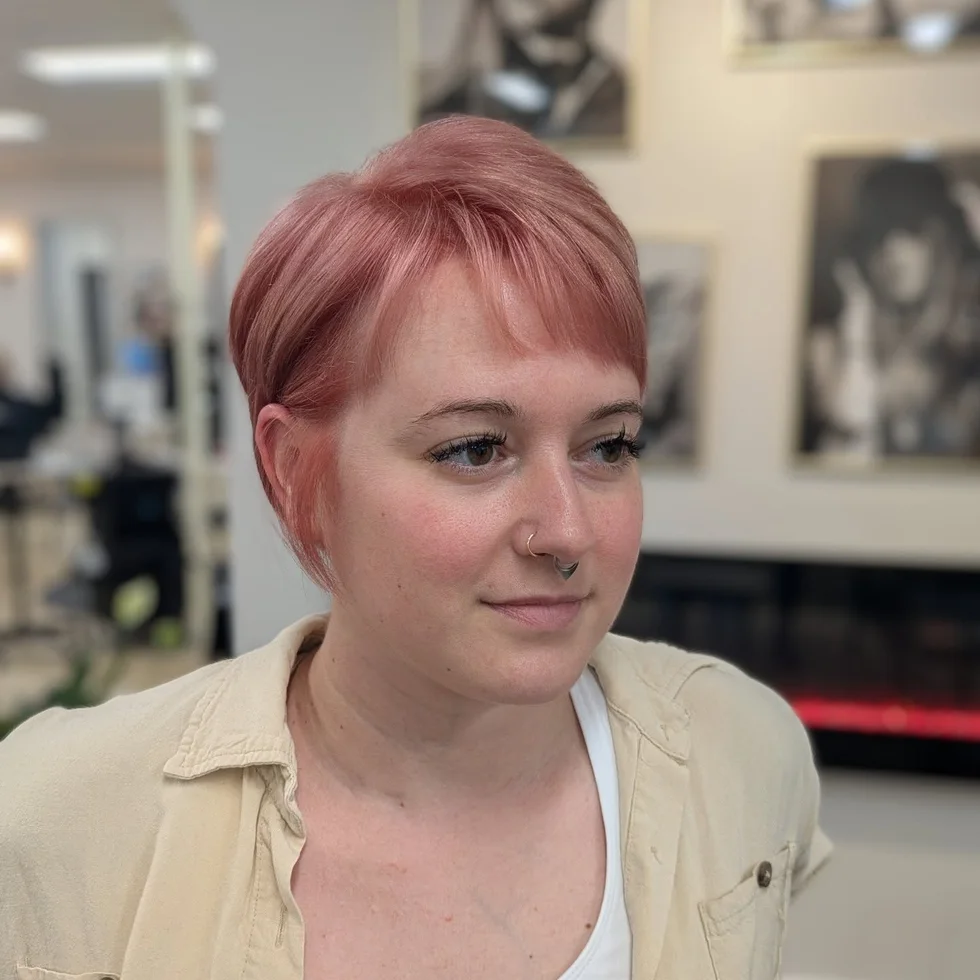
19. Pastel Pink Cropped Pixie
Description
A pastel pink crop with short straight bangs, neat sides, and a softly rounded crown.
Why it works
The fringe stays light enough to show forehead, and the close sides balance the roundness of the crown.
Best for
Thin straight hair, round faces, and subtle fashion color on a simple cut.
Maintenance
Dry the bangs flat, lift the center crown slightly, and keep shine product away from the roots.
Try it yourself for Pastel Pink Cropped Pixie
How to DIY
- Start pastel pink cropped pixie while damp and establish the top section before thin hair begins to dry flat.
- Direct the top of pastel pink cropped pixie upward or diagonally, then keep both sides close to the head.
- Apply root lift mousse only where pastel pink cropped pixie needs support, never across the full root area.
- Check pastel pink cropped pixie from the front to confirm the cut adds height or a diagonal line instead of width beside the cheeks.
- Finish pastel pink cropped pixie with a light touch and stop before the strands separate or look coated.
20. Brunette Neat Side-Swept Pixie
Description
A neat brunette pixie with a short side sweep, tucked temple, and clean ear line.
Why it works
The diagonal top gives a full face structure without relying on curls or wide side volume.
Best for
Thin straight brunette hair, round faces, and classic short styling.
Maintenance
Sweep the front toward one temple and use flexible spray at the part rather than over the whole cut.
Try it yourself for Brunette Neat Side-Swept Pixie
How to DIY
- Start brunette neat side-swept pixie while damp and establish the nape before thin hair begins to dry flat.
- Direct the top of brunette neat side-swept pixie upward or diagonally, then keep both sides close to the head.
- Apply heat protectant only where brunette neat side-swept pixie needs support, never across the full root area.
- Check brunette neat side-swept pixie from the front to confirm the cut adds height or a diagonal line instead of width beside the cheeks.
- Finish brunette neat side-swept pixie with a light touch and stop before the strands separate or look coated.
21. Close Black Pixie Crop
Description
A close black pixie with soft top texture and short clean sides.
Why it works
The cropped perimeter opens the face and lets a small amount of top texture create vertical balance.
Best for
Thin straight black hair, round faces, and clean low-effort cuts.
Maintenance
Lift the center top with fingers and leave the hairline and sides smooth and natural.
Try it yourself for Close Black Pixie Crop
How to DIY
- Start close black pixie crop while damp and establish the ear area before thin hair begins to dry flat.
- Direct the top of close black pixie crop upward or diagonally, then keep both sides close to the head.
- Apply root lift spray only where close black pixie crop needs support, never across the full root area.
- Check close black pixie crop from the front to confirm the cut adds height or a diagonal line instead of width beside the cheeks.
- Finish close black pixie crop with a light touch and stop before the strands separate or look coated.
22. Black Side-Swept Pixie
Description
A black pixie with a long side-swept fringe, lifted crown, and closely shaped sides.
Why it works
The crown and diagonal fringe add length, while the dark close sides visually narrow the haircut around the cheeks.
Best for
Thin straight black hair, round faces, and glamorous pixies without curls.
Maintenance
Dry the crown upward, sweep the fringe to one side, and pin the shape with light spray underneath.
Try it yourself for Black Side-Swept Pixie
How to DIY
- Start black side-swept pixie while damp and establish the part line before thin hair begins to dry flat.
- Direct the top of black side-swept pixie upward or diagonally, then keep both sides close to the head.
- Apply root lift mousse only where black side-swept pixie needs support, never across the full root area.
- Check black side-swept pixie from the front to confirm the cut adds height or a diagonal line instead of width beside the cheeks.
- Finish black side-swept pixie with a light touch and stop before the strands separate or look coated.
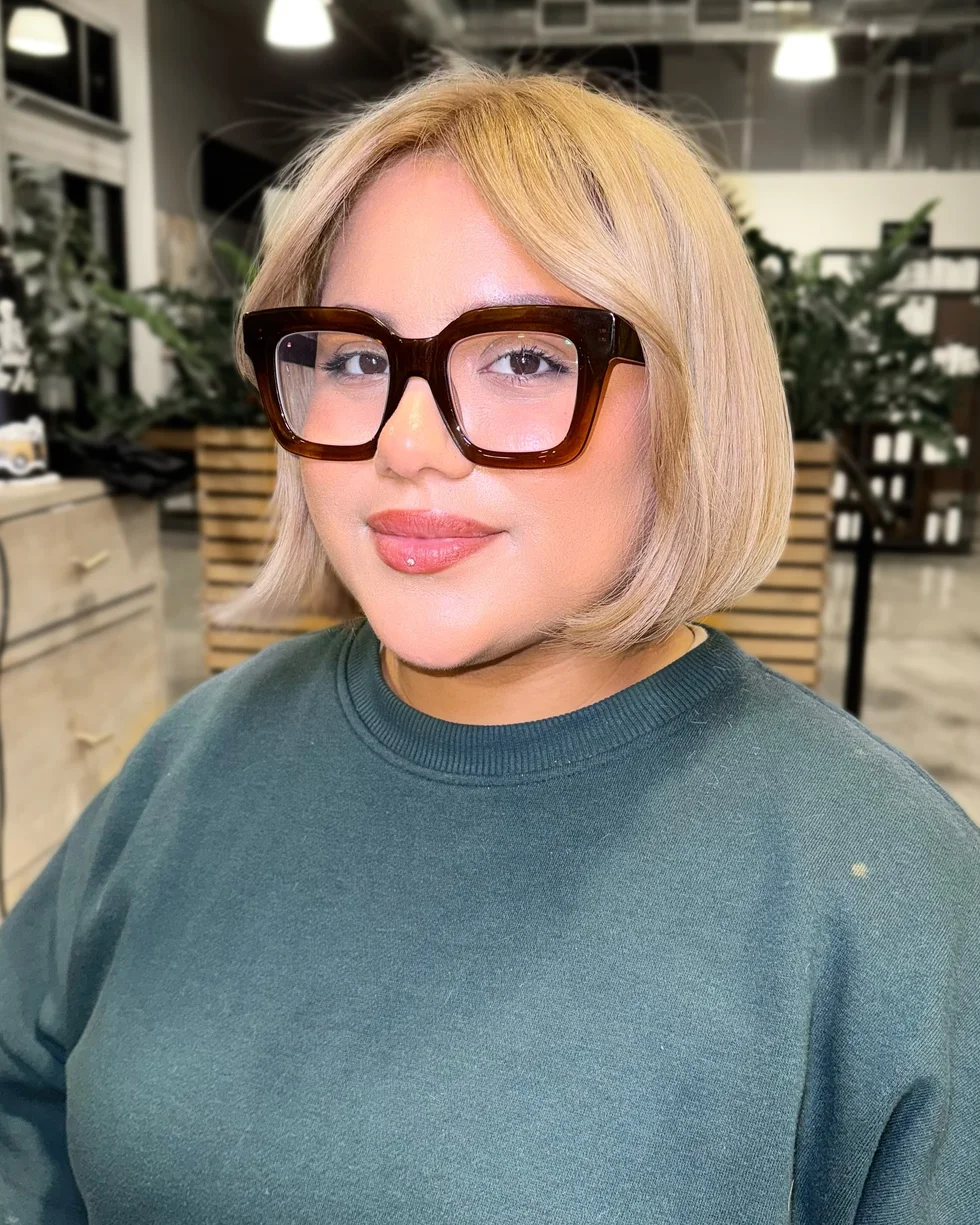
23. Blonde Rounded Bob With Glasses
Description
A smooth blonde short bob with glasses, a side part, and a rounded jaw-skimming edge.
Why it works
The side part creates asymmetry and the clean perimeter helps thin hair look fuller without fluffy side volume.
Best for
Thin straight blonde hair, round faces, glasses, and smooth short bobs.
Maintenance
Lift the part line, curve only the bottom inch inward, and keep the sides clear of the frames.
Try it yourself for Blonde Rounded Bob With Glasses
How to DIY
- Start blonde rounded bob with glasses while damp and establish the center crown before thin hair begins to dry flat.
- Guide the lower edge of blonde rounded bob with glasses with a round brush, keeping the widest point below the cheeks.
- Apply volumizing mousse only where blonde rounded bob with glasses needs support, never across the full root area.
- Check blonde rounded bob with glasses from the front to confirm the cut adds height or a diagonal line instead of width beside the cheeks.
- Finish blonde rounded bob with glasses with a light touch and stop before the strands separate or look coated.
24. Sleek Black Angled Bob

Description
A sleek black angled bob with a deep side part and a longer front panel.
Why it works
The diagonal front creates a lengthening line beside a round face, while the smooth edge preserves thin-hair density.
Best for
Thin straight black hair, round faces, and sharp side-part bobs.
Maintenance
Dry the back close to the head and smooth the longer front panel downward last.
Try it yourself for Sleek Black Angled Bob
How to DIY
- Start sleek black angled bob while damp and establish the front fringe before thin hair begins to dry flat.
- Guide the lower edge of sleek black angled bob with a round brush, keeping the widest point below the cheeks.
- Apply volumizing mousse only where sleek black angled bob needs support, never across the full root area.
- Check sleek black angled bob from the front to confirm the cut adds height or a diagonal line instead of width beside the cheeks.
- Finish sleek black angled bob with a light touch and stop before the strands separate or look coated.
25. Brunette Rounded Bob With Wispy Bangs

Description
A brunette short bob with wispy bangs, a rounded edge, and lightly tucked sides.
Why it works
The fringe is separated rather than heavy, and the tucked sides stop the rounded bob from widening the cheeks.
Best for
Thin straight brunette hair, round faces, and soft short bobs with light bangs.
Maintenance
Dry the wispy fringe first, tuck the sides inward, and avoid lifting the hair directly beside the cheeks.
Try it yourself for Brunette Rounded Bob With Wispy Bangs
How to DIY
- Start brunette rounded bob with wispy bangs while damp and establish the temple before thin hair begins to dry flat.
- Guide the lower edge of brunette rounded bob with wispy bangs with a round brush, keeping the widest point below the cheeks.
- Apply volumizing mousse only where brunette rounded bob with wispy bangs needs support, never across the full root area.
- Check brunette rounded bob with wispy bangs from the front to confirm the cut adds height or a diagonal line instead of width beside the cheeks.
- Finish brunette rounded bob with wispy bangs with a light touch and stop before the strands separate or look coated.
Which short hairstyle is best for thin hair and a round face
A side-part pixie, tapered crop, or compact bixie is usually the strongest starting point. These cuts can place volume above the forehead and keep the sides narrow, which gives a round face more definition without asking thin hair to hold a large style.
A smooth short bob also works when the edge stays dense and the part creates asymmetry. Avoid removing too much hair around the perimeter because thin ends can make the haircut look wider and weaker at the same time.
How short fringe can flatter a round face
Side-swept and wispy fringe creates a diagonal or broken line across the forehead. That is usually easier on a round face than a heavy, wide bang that forms one solid horizontal block.
Short blunt fringe can still work when the sides are closely tapered. The important detail is keeping some forehead visible or adding height through the center top.
How to style thin short hair without making it flat
Use root lift in one small zone, usually the part line or center crown. Coating every root can separate thin hair and make the scalp more visible.
Dry the top first, keep the sides close, and stop styling once the shape is in place. Lightweight mousse, flexible spray, and a small amount of paste are usually enough for these straight short cuts.

About the author
Bella Ross
Bella Ross is the hairstyle editor behind Latest Easy Hairstyles. She curates practical haircut, braid, color, and styling ideas with a focus on looks that are easy to browse, realistic to recreate, and useful for everyday hair decisions.