Haircut guide
30 Short Pixie Cut Ideas for Fresh, Easy Short Hair
Updated June 13, 2026
A photo-first guide to short pixie cut ideas, from sleek tapered crops and side-swept pixies to curly, coily, gray, blonde, and textured short cuts.
Short pixie cuts with shape, texture, and polish
Short pixie cuts are not all the same. Some are soft and side-swept, some are cropped and tapered, and others use curls, color, or piecey texture to make the short shape feel more personal.
If the fringe is your main decision, compare this gallery with pixie cuts with bangs. If you want a deliberately undone finish, messy pixie cuts with bangs is the closer next guide.
30 Short Pixie Cut Ideas for Fresh, Easy Short Hair photo ideas
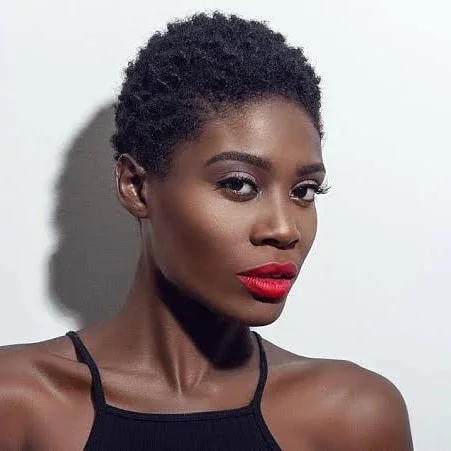
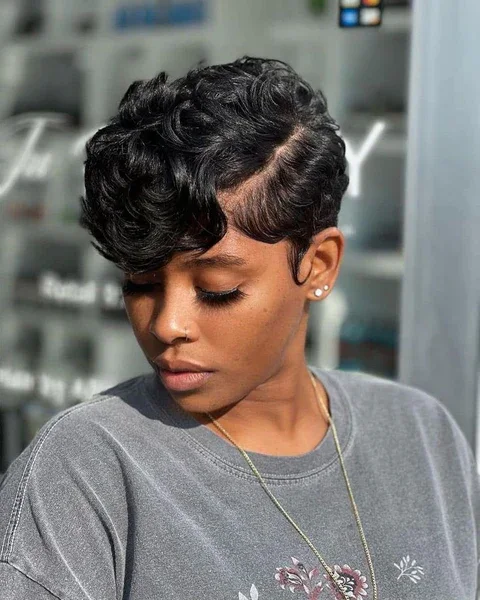
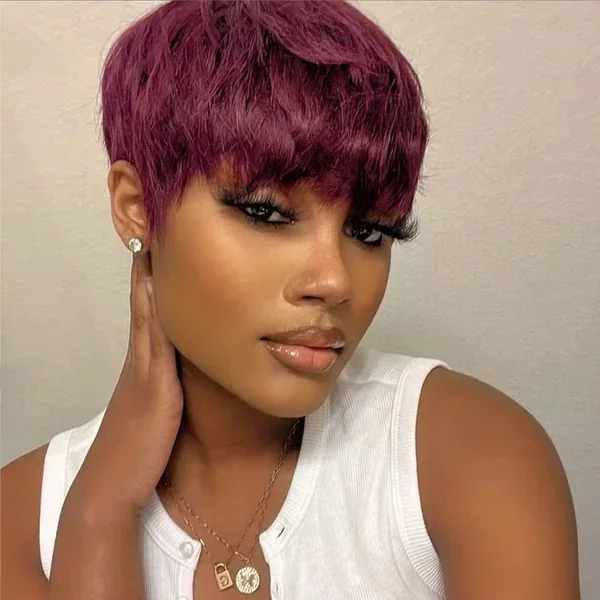
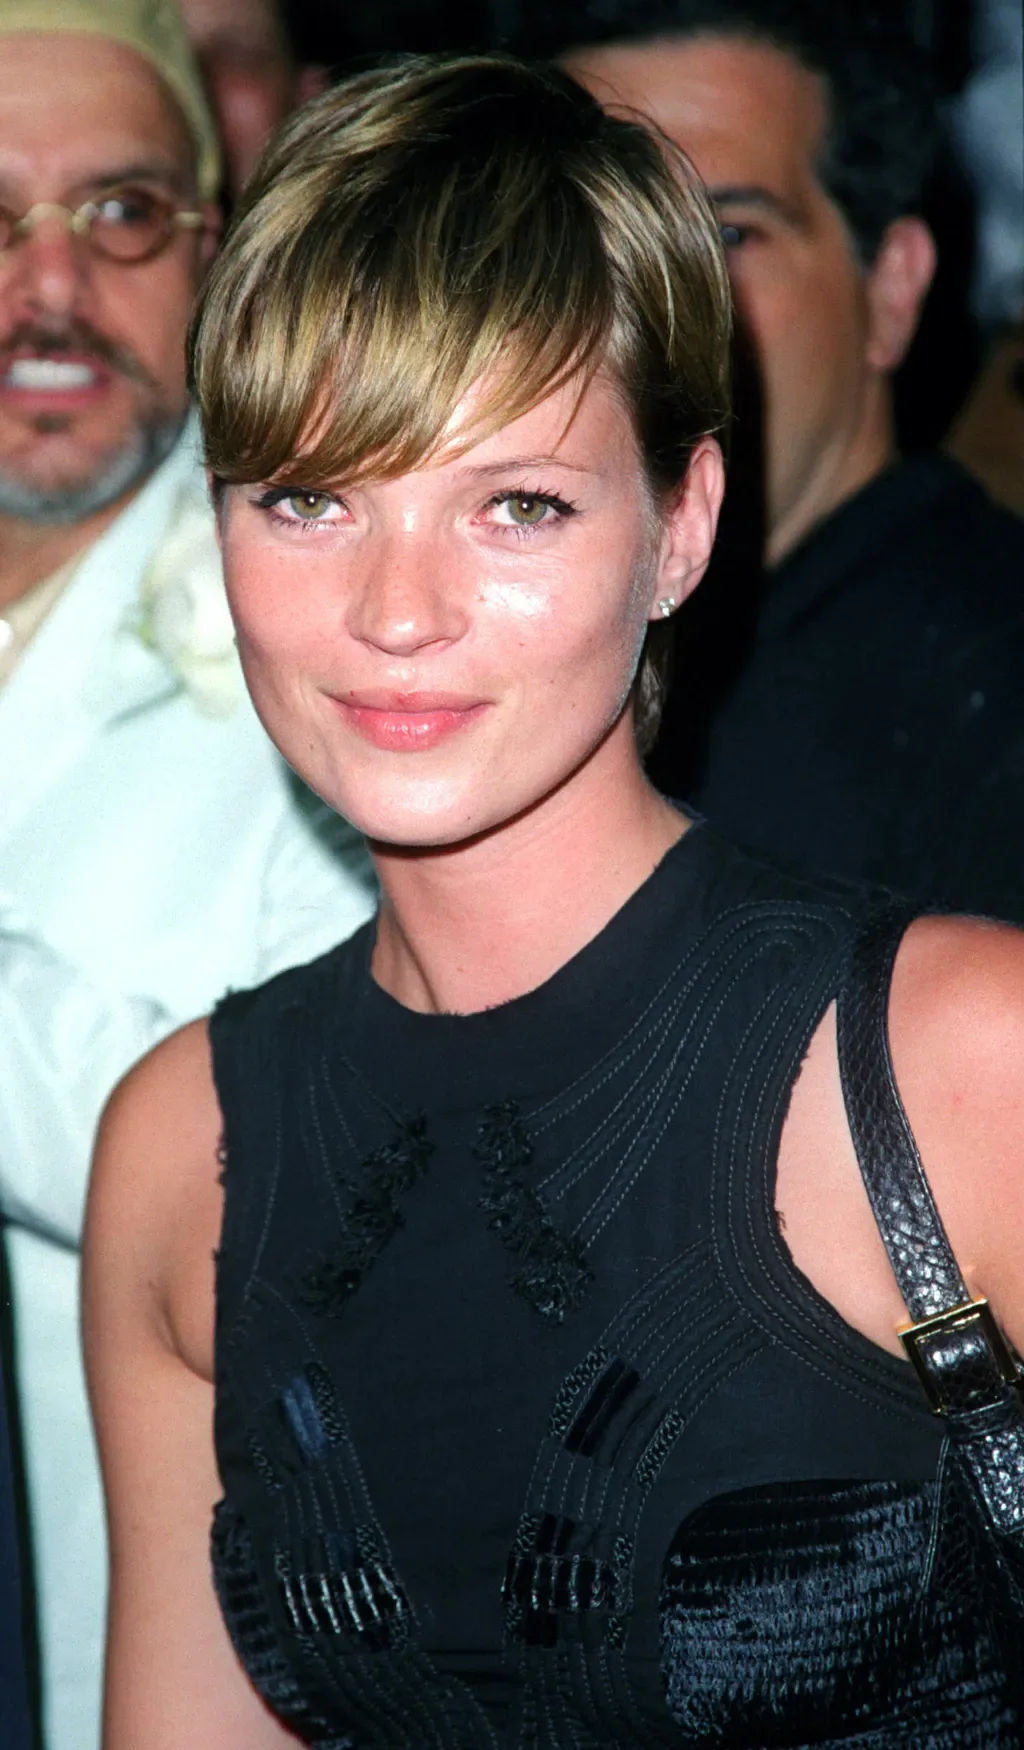
1. Side-Swept Chocolate Pixie
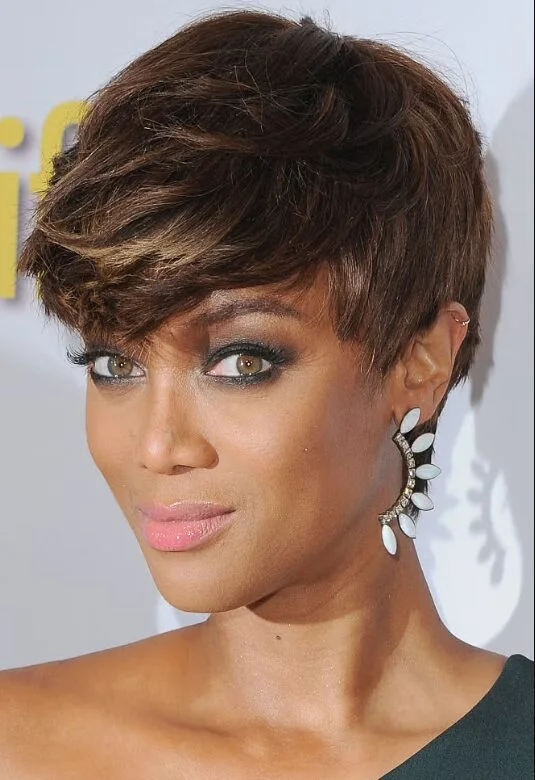
Description
A side-swept chocolate pixie with feathered bangs, lifted crown texture, and close sides that keep the haircut light.
Why it works
The long front gives the pixie movement, while the short sides keep the face open and stop the style from feeling heavy.
Best for
Straight to lightly wavy hair, soft glam styling, and anyone who wants a pixie with a little forehead coverage.
Maintenance
Keep the side sweep trimmed before it falls into the eyes and use paste only through the ends.
Try it yourself for Side-Swept Chocolate Pixie
How to DIY
- Dry the front of the side-swept chocolate pixie first so the shortest pieces settle in the right direction.
- Warm texture paste between your fingertips and pinch only the top pieces of the side-swept chocolate pixie.
- Lift the top of the side-swept chocolate pixie in small sections so the shape has height without turning stiff.
- Mist flexible spray over the side-swept chocolate pixie from a distance if the front needs hold, then touch only the ends.
- Book trims for the side-swept chocolate pixie before the sides lose their close shape, especially around the ears.
2. Jet Black Piecey Pixie
Description
This jet black pixie has sharp piecey layers through the front and a cropped side shape that makes the eyes stand out.
Why it works
The dark color makes every separated piece visible, so the pixie looks styled even when the finish is soft.
Best for
Thicker straight hair, bold makeup, and a pixie that needs strong front direction.
Maintenance
Refresh the top with a tiny amount of texture paste and avoid coating the full fringe.
Try it yourself for Jet Black Piecey Pixie
How to DIY
- Shape the crown of the jet black piecey pixie while the hair is still slightly damp, then let the sides stay close.
- Warm texture paste between your fingertips and pinch only the top pieces of the jet black piecey pixie.
- Tuck one side of the jet black piecey pixie close to the head if the front starts covering too much of the face.
- Use shine mist only on the surface of the jet black piecey pixie when the finish needs polish.
- Ask your stylist to clean the neckline of the jet black piecey pixie before the cut begins to look round at the back.
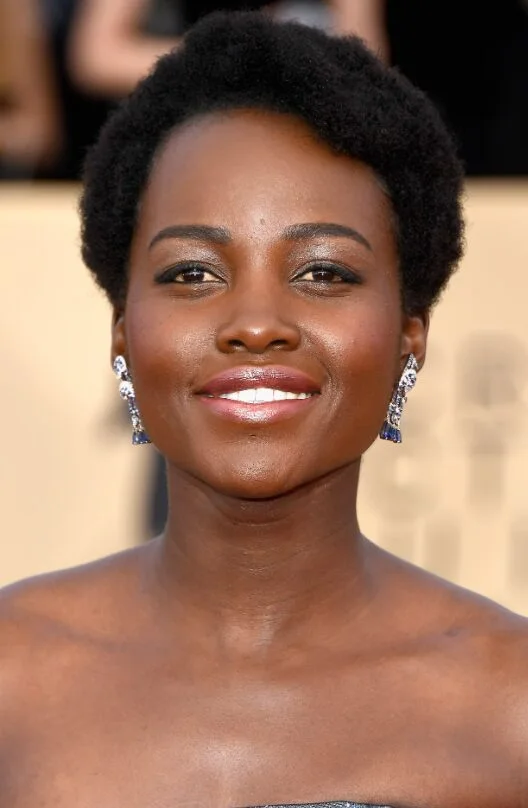
3. Soft Rounded Black Pixie
Description
A rounded black pixie with gentle side volume, neat layers, and a polished shape around the cheekbones.
Why it works
The rounded top softens the cut, and the cropped nape keeps the overall silhouette clearly short.
Best for
Fine to medium hair, polished short cuts, and readers who want a pixie that feels elegant.
Maintenance
Brush the front into place while drying and keep the neckline tidy.
Try it yourself for Soft Rounded Black Pixie
How to DIY
- Set the outline of the soft rounded black pixie before adding product so the cut does not become heavy.
- Use a small round brush around the front of the soft rounded black pixie to give the short layers a gentle bend.
- Keep the shortest side pieces on the soft rounded black pixie clean because they make the crop read intentional.
- Refresh the part line of the soft rounded black pixie with your fingers rather than adding more product later in the day.
- Keep bang or fringe trims on the soft rounded black pixie small so the pixie does not lose its original shape.
4. Silver Blonde Textured Pixie

Description
This silver blonde pixie has short lifted layers, soft texture, and enough volume through the top to keep the cut lively.
Why it works
The cool color shows the texture clearly, while the short side shape keeps the style easy to wear.
Best for
Gray blending, fine to medium hair, and anyone who wants a soft but shaped pixie.
Maintenance
Use purple shampoo as needed and keep the crown light with a small amount of texture cream.
Try it yourself for Silver Blonde Textured Pixie
How to DIY
- Guide the side pieces of the silver blonde textured pixie with your fingers first, then use a small brush only where needed.
- Keep the tones in the silver blonde textured pixie bright with purple shampoo, then soften the ends with texture cream.
- Check the profile of the silver blonde textured pixie in a mirror so the crown and nape balance each other.
- Let the front piece of the silver blonde textured pixie stay soft so the pixie still moves when you turn your head.
- Avoid heavy oils near the crown of the silver blonde textured pixie because short hair can flatten quickly.
5. Lifted Blonde Pixie With Glasses

Description
A lifted blonde pixie with close sides, glasses, and a strong crown shape that gives the haircut a confident profile.
Why it works
The height sits above the frames, so the glasses do not compete with the haircut.
Best for
Glasses wearers, straight hair, and a bolder pixie with height at the top.
Maintenance
Keep the sides clean and use styling wax only where the top needs lift.
Try it yourself for Lifted Blonde Pixie With Glasses
How to DIY
- Start with the nape and sides of the lifted blonde pixie with glasses, then finish the top once the base is controlled.
- Use styling wax or texture powder on the lifted area of the lifted blonde pixie with glasses, not across the whole haircut.
- Separate only the visible ends of the lifted blonde pixie with glasses instead of roughing up the whole haircut.
- Blot extra product from your fingers before touching the fringe or hairline of the lifted blonde pixie with glasses.
- Sleep on a smooth pillowcase or wrap the lifted blonde pixie with glasses lightly if the top loses shape overnight.
6. Layered Black Pixie Crop
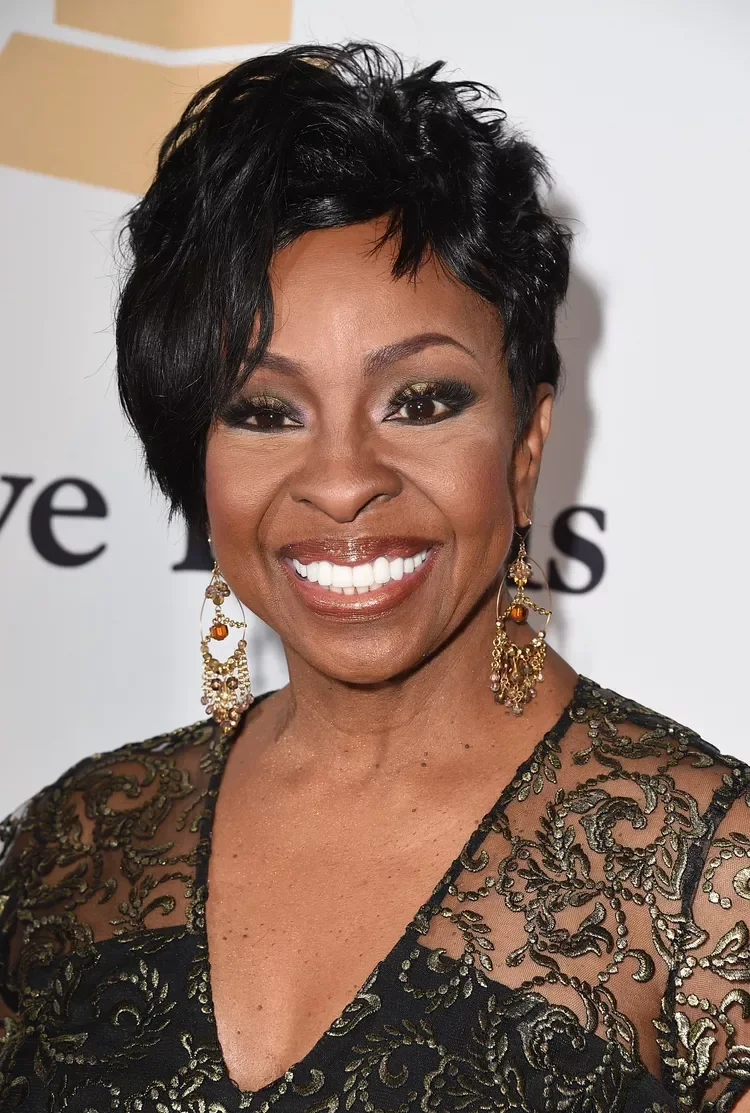
Description
This layered black pixie crop keeps volume at the top and short texture around the sides for a clean, wearable shape.
Why it works
The lifted top balances the cropped length and gives the pixie a fuller outline.
Best for
Medium-density hair, oval or heart face shapes, and a pixie that can dress up easily.
Maintenance
Dry the top forward first, then guide the side pieces into a neat finish.
Try it yourself for Layered Black Pixie Crop
How to DIY
- Dry the front of the layered black pixie crop first so the shortest pieces settle in the right direction.
- Use a small round brush around the front of the layered black pixie crop to give the short layers a gentle bend.
- Lift the top of the layered black pixie crop in small sections so the shape has height without turning stiff.
- Mist flexible spray over the layered black pixie crop from a distance if the front needs hold, then touch only the ends.
- Book trims for the layered black pixie crop before the sides lose their close shape, especially around the ears.
7. Low Taper Black Pixie
Description
A low taper black pixie with close sides and a smooth cropped top that keeps the face and neckline open.
Why it works
The taper makes the style crisp without needing long layers or heavy product.
Best for
Low-bulk short hair, clean edges, and readers who like a minimal pixie shape.
Maintenance
Use an edge brush around the hairline and book trims before the taper loses definition.
Try it yourself for Low Taper Black Pixie
How to DIY
- Shape the crown of the low taper black pixie while the hair is still slightly damp, then let the sides stay close.
- Use styling wax or texture powder on the lifted area of the low taper black pixie, not across the whole haircut.
- Tuck one side of the low taper black pixie close to the head if the front starts covering too much of the face.
- Use shine mist only on the surface of the low taper black pixie when the finish needs polish.
- Ask your stylist to clean the neckline of the low taper black pixie before the cut begins to look round at the back.
8. Soft Wavy Black Pixie
Description
This soft wavy pixie has side-swept movement and a rounded outline that makes the short cut feel feminine.
Why it works
The wave gives the front direction, and the cropped sides stop the shape from turning into a bob.
Best for
Wavy hair, side-swept styling, and a pixie that still has softness around the face.
Maintenance
Use a small round brush on the front and keep spray light so the waves can move.
Try it yourself for Soft Wavy Black Pixie
How to DIY
- Set the outline of the soft wavy black pixie before adding product so the cut does not become heavy.
- Use a small round brush around the front of the soft wavy black pixie to give the short layers a gentle bend.
- Keep the shortest side pieces on the soft wavy black pixie clean because they make the crop read intentional.
- Refresh the part line of the soft wavy black pixie with your fingers rather than adding more product later in the day.
- Keep bang or fringe trims on the soft wavy black pixie small so the pixie does not lose its original shape.
9. Short Curly Pixie
Description
A short curly pixie with defined curls through the top and neat sides that keep the shape compact.
Why it works
The curls add natural volume while the short sides make the haircut read as a pixie, not a rounded bob.
Best for
Curly hair, low-bulk short cuts, and anyone who wants texture without straightening.
Maintenance
Refresh the curl pattern with leave-in conditioner and avoid brushing once the curls are dry.
Try it yourself for Short Curly Pixie
How to DIY
- Guide the side pieces of the short curly pixie with your fingers first, then use a small brush only where needed.
- Scrunch curl cream into the curls of the short curly pixie and let the curl pattern dry without brushing.
- Check the profile of the short curly pixie in a mirror so the crown and nape balance each other.
- Let the front piece of the short curly pixie stay soft so the pixie still moves when you turn your head.
- Avoid heavy oils near the crown of the short curly pixie because short hair can flatten quickly.
10. Silver Curly Pixie
Description
This silver curly pixie has airy curls, a cropped shape, and bright color that makes the texture easy to see.
Why it works
The silver tone highlights the curl pattern, and the short perimeter keeps the cut fresh.
Best for
Gray curls, natural volume, and a pixie that feels playful rather than severe.
Maintenance
Scrunch curl cream into the top and dry gently so the sides do not puff out.
Try it yourself for Silver Curly Pixie
How to DIY
- Start with the nape and sides of the silver curly pixie, then finish the top once the base is controlled.
- Scrunch curl cream into the curls of the silver curly pixie and let the curl pattern dry without brushing.
- Separate only the visible ends of the silver curly pixie instead of roughing up the whole haircut.
- Blot extra product from your fingers before touching the fringe or hairline of the silver curly pixie.
- Sleep on a smooth pillowcase or wrap the silver curly pixie lightly if the top loses shape overnight.
11. Minimal Coily Pixie
Description
A minimal coily pixie with close natural texture and a clean outline around the face.
Why it works
The close length lets the curl texture become the main detail while keeping styling simple.
Best for
Natural hair, low-maintenance short cuts, and a clean pixie shape with strong features.
Maintenance
Use curl defining cream sparingly and protect the texture with a satin scarf at night.
Try it yourself for Minimal Coily Pixie
How to DIY
- Dry the front of the minimal coily pixie first so the shortest pieces settle in the right direction.
- Press curl defining cream into the top texture of the minimal coily pixie and soften the hairline with fingertips.
- Lift the top of the minimal coily pixie in small sections so the shape has height without turning stiff.
- Mist flexible spray over the minimal coily pixie from a distance if the front needs hold, then touch only the ends.
- Book trims for the minimal coily pixie before the sides lose their close shape, especially around the ears.
12. Soft Natural Pixie Crop
Description
This soft natural pixie crop has short coily texture and a rounded shape that stays open around the forehead.
Why it works
The shape keeps the texture visible without adding bulk near the sides.
Best for
Coily hair, natural short styles, and a pixie that needs very little daily shaping.
Maintenance
Apply leave-in lightly with fingertips and avoid stretching the curls too much.
Try it yourself for Soft Natural Pixie Crop
How to DIY
- Shape the crown of the soft natural pixie crop while the hair is still slightly damp, then let the sides stay close.
- Press curl defining cream into the top texture of the soft natural pixie crop and soften the hairline with fingertips.
- Tuck one side of the soft natural pixie crop close to the head if the front starts covering too much of the face.
- Use shine mist only on the surface of the soft natural pixie crop when the finish needs polish.
- Ask your stylist to clean the neckline of the soft natural pixie crop before the cut begins to look round at the back.
13. Side-View Coily Pixie
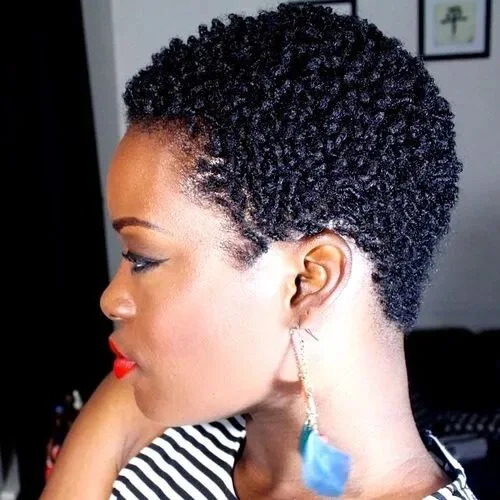
Description
A side-view coily pixie with a tapered nape, compact curls, and a profile that shows the haircut shape clearly.
Why it works
The side angle shows how the taper supports the top texture instead of letting it widen.
Best for
Natural curls, tapered pixies, and anyone who wants a neat neckline with texture on top.
Maintenance
Smooth the nape with a little edge control and keep curl cream focused on the top.
Try it yourself for Side-View Coily Pixie
How to DIY
- Set the outline of the side-view coily pixie before adding product so the cut does not become heavy.
- Press curl defining cream into the top texture of the side-view coily pixie and soften the hairline with fingertips.
- Keep the shortest side pieces on the side-view coily pixie clean because they make the crop read intentional.
- Refresh the part line of the side-view coily pixie with your fingers rather than adding more product later in the day.
- Keep bang or fringe trims on the side-view coily pixie small so the pixie does not lose its original shape.
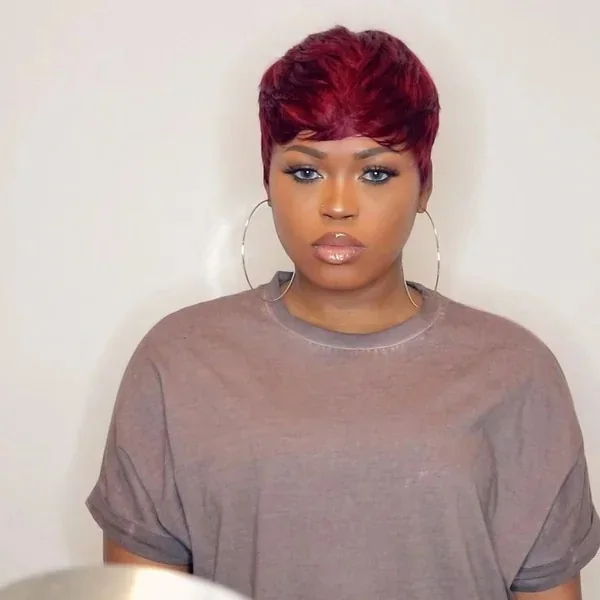
14. Red Textured Pixie
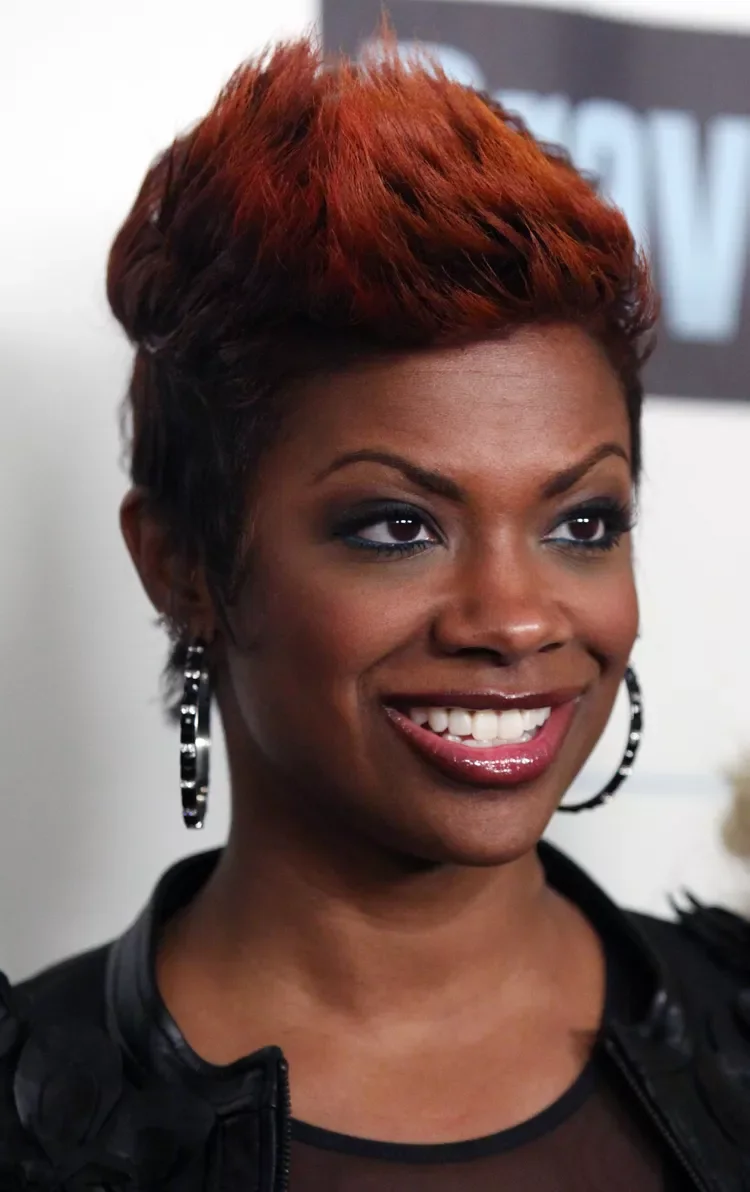
Description
This red textured pixie uses warm color, lifted layers, and a soft side shape to make the short cut feel bright.
Why it works
The color adds dimension, and the top texture gives the pixie a fuller finish.
Best for
Color lovers, thick short hair, and a pixie that should feel bold but wearable.
Maintenance
Use color-safe shampoo and pinch paste into the lifted pieces only.
Try it yourself for Red Textured Pixie
How to DIY
- Guide the side pieces of the red textured pixie with your fingers first, then use a small brush only where needed.
- Use color-safe shampoo on the red textured pixie, then add light texture only where the color needs definition.
- Check the profile of the red textured pixie in a mirror so the crown and nape balance each other.
- Let the front piece of the red textured pixie stay soft so the pixie still moves when you turn your head.
- Avoid heavy oils near the crown of the red textured pixie because short hair can flatten quickly.
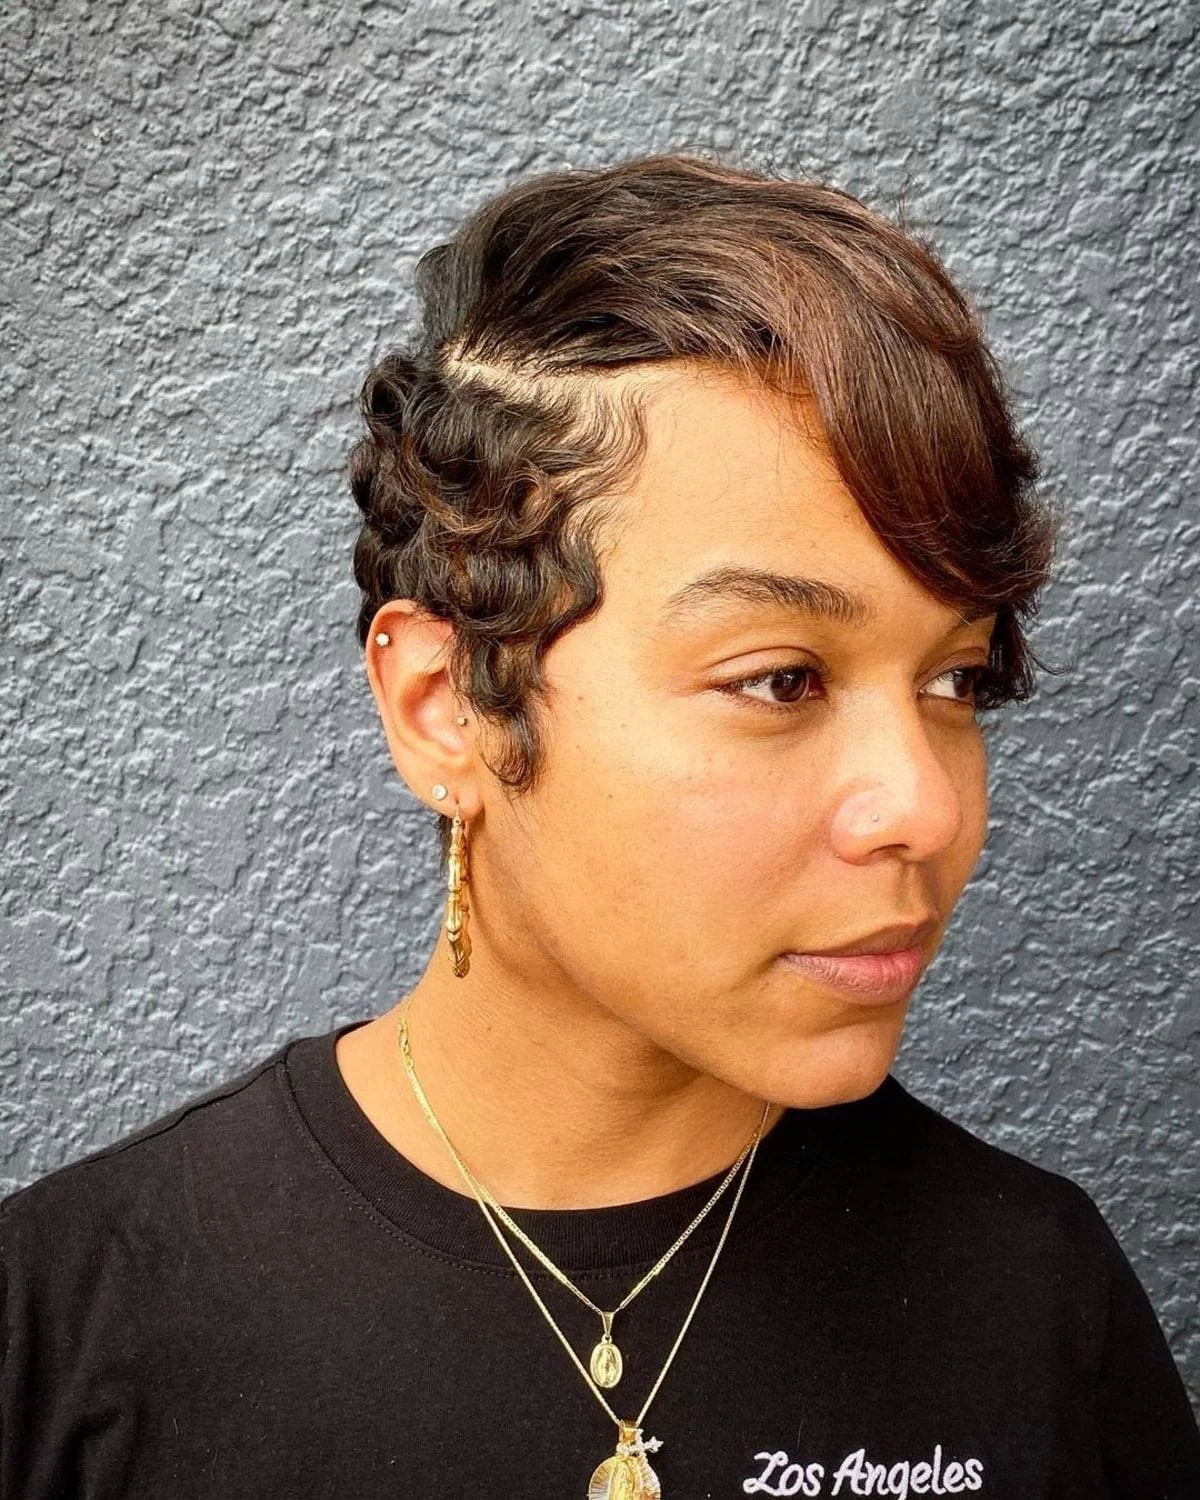
15. Finger Wave Pixie
Description
A glossy finger wave pixie with sculpted side waves and a smooth short shape.
Why it works
The wave pattern creates detail without needing length, so the style feels polished and intentional.
Best for
Special events, short relaxed hair, and a pixie with a sleek vintage mood.
Maintenance
Use smoothing cream on the wave ridge and keep shine spray light.
Try it yourself for Finger Wave Pixie
How to DIY
- Start with the nape and sides of the finger wave pixie, then finish the top once the base is controlled.
- Smooth a pea-size amount of cream over the visible surface of the finger wave pixie, keeping it away from the roots.
- Separate only the visible ends of the finger wave pixie instead of roughing up the whole haircut.
- Blot extra product from your fingers before touching the fringe or hairline of the finger wave pixie.
- Sleep on a smooth pillowcase or wrap the finger wave pixie lightly if the top loses shape overnight.
16. Wispy Gray Pixie

Description
This wispy gray pixie has soft short bangs, light texture, and a neat shape that works well with glasses.
Why it works
The fringe stays airy, so it frames the face without hiding the glasses.
Best for
Gray hair, glasses, and a soft pixie that does not need heavy styling.
Maintenance
Keep the fringe trimmed and use soft hold spray only on the top pieces.
Try it yourself for Wispy Gray Pixie
How to DIY
- Dry the front of the wispy gray pixie first so the shortest pieces settle in the right direction.
- Keep the tones in the wispy gray pixie bright with purple shampoo, then soften the ends with texture cream.
- Lift the top of the wispy gray pixie in small sections so the shape has height without turning stiff.
- Mist flexible spray over the wispy gray pixie from a distance if the front needs hold, then touch only the ends.
- Book trims for the wispy gray pixie before the sides lose their close shape, especially around the ears.
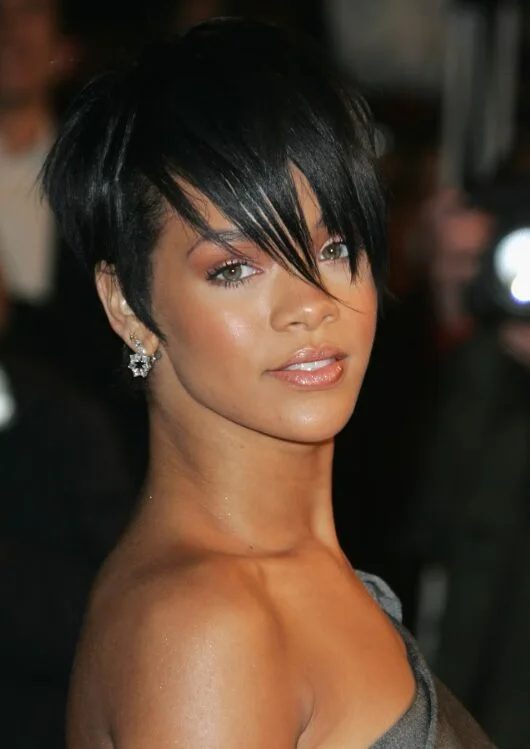
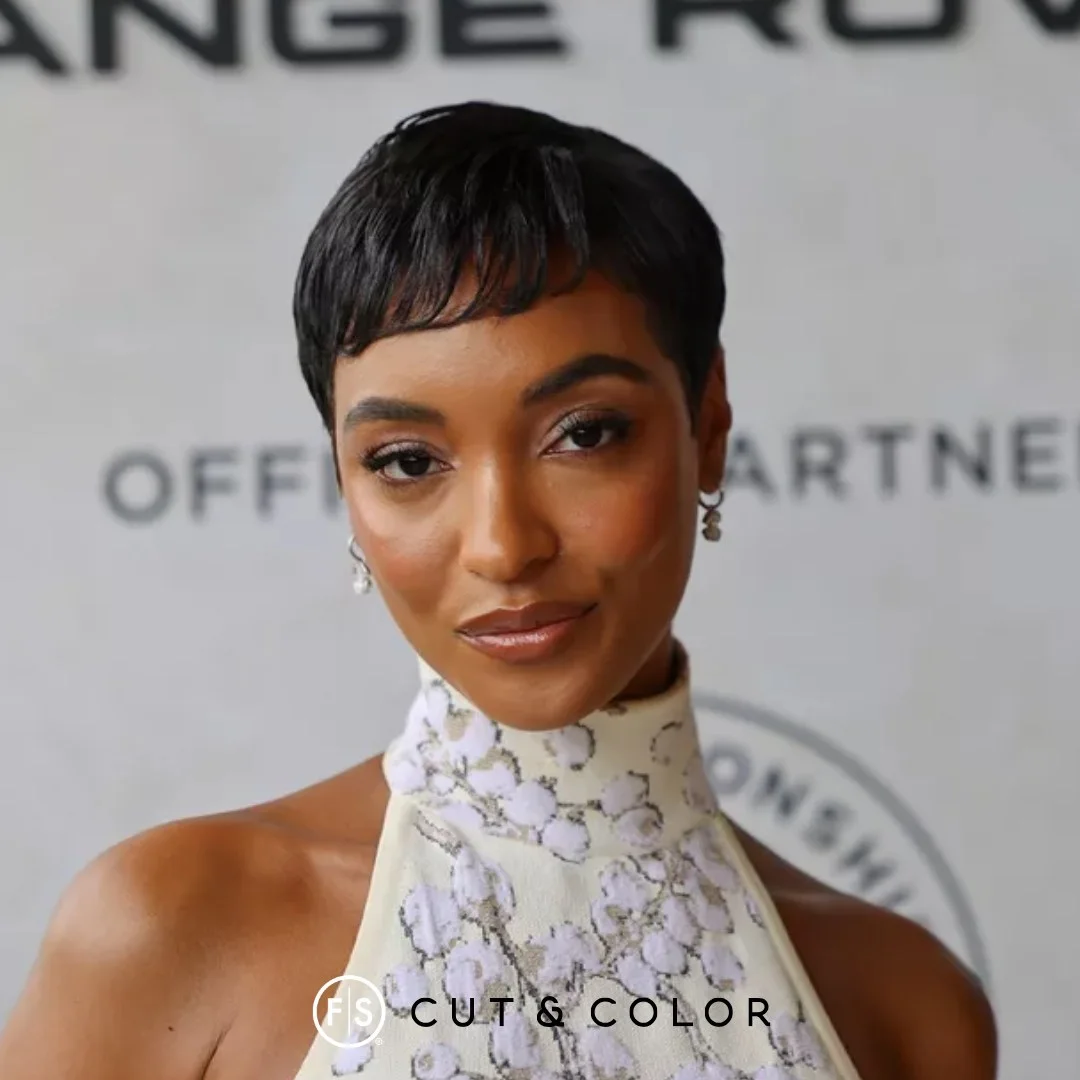
17. Black Pixie With Full Fringe
Description
A black pixie with full fringe, polished sides, and a sleek shape that keeps the focus on the eyes.
Why it works
The full front gives the pixie drama while the sides stay controlled and short.
Best for
Straight hair, statement fringe, and a more dressed-up pixie finish.
Maintenance
Smooth the fringe with a mini flat iron and finish only the surface with shine spray.
Try it yourself for Black Pixie With Full Fringe
How to DIY
- Shape the crown of the black pixie with full fringe while the hair is still slightly damp, then let the sides stay close.
- Smooth a pea-size amount of cream over the visible surface of the black pixie with full fringe, keeping it away from the roots.
- Tuck one side of the black pixie with full fringe close to the head if the front starts covering too much of the face.
- Use shine mist only on the surface of the black pixie with full fringe when the finish needs polish.
- Ask your stylist to clean the neckline of the black pixie with full fringe before the cut begins to look round at the back.
18. Cropped Coily Pixie

Description
This cropped coily pixie keeps the texture close to the head with a soft rounded top.
Why it works
The shorter length makes the curl pattern easy to manage while still giving the cut texture.
Best for
Natural hair, simple short cuts, and anyone who wants a neat everyday pixie.
Maintenance
Use curl defining cream in small sections and keep the hairline soft.
Try it yourself for Cropped Coily Pixie
How to DIY
- Set the outline of the cropped coily pixie before adding product so the cut does not become heavy.
- Press curl defining cream into the top texture of the cropped coily pixie and soften the hairline with fingertips.
- Keep the shortest side pieces on the cropped coily pixie clean because they make the crop read intentional.
- Refresh the part line of the cropped coily pixie with your fingers rather than adding more product later in the day.
- Keep bang or fringe trims on the cropped coily pixie small so the pixie does not lose its original shape.
19. Caramel-Tipped Pixie
Description
A caramel-tipped pixie with close sides, warm color through the top, and soft height near the crown.
Why it works
The lighter top pieces add dimension without needing extra length.
Best for
Short tapered cuts, warm highlights, and pixies that need visible shape from the front.
Maintenance
Protect the color with gentle shampoo and define the top with a small amount of paste.
Try it yourself for Caramel-Tipped Pixie
How to DIY
- Guide the side pieces of the caramel-tipped pixie with your fingers first, then use a small brush only where needed.
- Use color-safe shampoo on the caramel-tipped pixie, then add light texture only where the color needs definition.
- Check the profile of the caramel-tipped pixie in a mirror so the crown and nape balance each other.
- Let the front piece of the caramel-tipped pixie stay soft so the pixie still moves when you turn your head.
- Avoid heavy oils near the crown of the caramel-tipped pixie because short hair can flatten quickly.
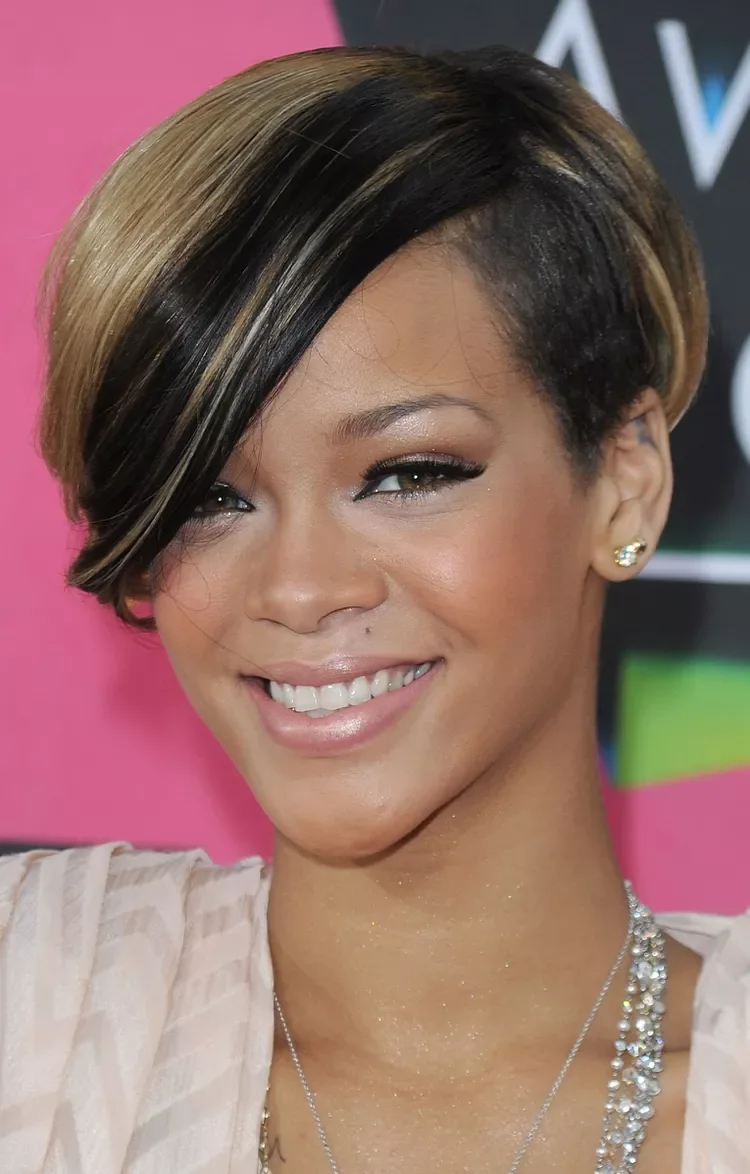
20. Sculpted Side Pixie
Description
This sculpted side pixie has a deep part, smooth waves, and a close cropped side for a sleek finish.
Why it works
The side waves make the short length feel styled, and the part gives the shape a clean direction.
Best for
Event styling, short relaxed hair, and pixies that need a smooth side profile.
Maintenance
Smooth cream over the wave pattern and avoid heavy spray near the part line.
Try it yourself for Sculpted Side Pixie
How to DIY
- Start with the nape and sides of the sculpted side pixie, then finish the top once the base is controlled.
- Smooth a pea-size amount of cream over the visible surface of the sculpted side pixie, keeping it away from the roots.
- Separate only the visible ends of the sculpted side pixie instead of roughing up the whole haircut.
- Blot extra product from your fingers before touching the fringe or hairline of the sculpted side pixie.
- Sleep on a smooth pillowcase or wrap the sculpted side pixie lightly if the top loses shape overnight.
21. Berry Coily Pixie
Description
A berry coily pixie with short bangs, tapered sides, and rich color that makes the texture stand out.
Why it works
The color gives the cropped shape personality while the short sides keep it practical.
Best for
Fashion color, natural texture, and a bold short cut that still feels wearable.
Maintenance
Use color-safe shampoo and define the front curls with a tiny amount of cream.
Try it yourself for Berry Coily Pixie
How to DIY
- Dry the front of the berry coily pixie first so the shortest pieces settle in the right direction.
- Use color-safe shampoo on the berry coily pixie, then add light texture only where the color needs definition.
- Lift the top of the berry coily pixie in small sections so the shape has height without turning stiff.
- Mist flexible spray over the berry coily pixie from a distance if the front needs hold, then touch only the ends.
- Book trims for the berry coily pixie before the sides lose their close shape, especially around the ears.
22. Glossy Side-Swept Pixie
Description
This glossy side-swept pixie has a smooth angled fringe and a clean short shape around the sides.
Why it works
The diagonal front adds softness, while the controlled sides keep the pixie sharp.
Best for
Sleek finishes, straight hair, and pixies that need a polished front.
Maintenance
Use smoothing cream only on the side sweep and keep the crown from getting flat.
Try it yourself for Glossy Side-Swept Pixie
How to DIY
- Shape the crown of the glossy side-swept pixie while the hair is still slightly damp, then let the sides stay close.
- Smooth a pea-size amount of cream over the visible surface of the glossy side-swept pixie, keeping it away from the roots.
- Tuck one side of the glossy side-swept pixie close to the head if the front starts covering too much of the face.
- Use shine mist only on the surface of the glossy side-swept pixie when the finish needs polish.
- Ask your stylist to clean the neckline of the glossy side-swept pixie before the cut begins to look round at the back.
23. Ruby Red Pixie Crop
Description
A ruby red pixie crop with short bangs, soft side layers, and a compact shape.
Why it works
The color makes the small shape feel intentional, and the cropped length keeps the look fresh.
Best for
Fashion color, straight hair, and a pixie that has a playful finish.
Maintenance
Use color-safe shampoo and refresh the bang ends with a little texture paste.
Try it yourself for Ruby Red Pixie Crop
How to DIY
- Set the outline of the ruby red pixie crop before adding product so the cut does not become heavy.
- Use color-safe shampoo on the ruby red pixie crop, then add light texture only where the color needs definition.
- Keep the shortest side pieces on the ruby red pixie crop clean because they make the crop read intentional.
- Refresh the part line of the ruby red pixie crop with your fingers rather than adding more product later in the day.
- Keep bang or fringe trims on the ruby red pixie crop small so the pixie does not lose its original shape.
24. Tiny Fringe Pixie
Description
This tiny fringe pixie has a short front line, cropped sides, and a sleek finish that feels modern.
Why it works
The tiny fringe makes the pixie look deliberate, while the sides keep the shape light.
Best for
Very short cuts, sharp features, and anyone who wants a minimal pixie with edge.
Maintenance
Keep the front line trimmed and use wax only on the smallest pieces.
Try it yourself for Tiny Fringe Pixie
How to DIY
- Guide the side pieces of the tiny fringe pixie with your fingers first, then use a small brush only where needed.
- Use styling wax or texture powder on the lifted area of the tiny fringe pixie, not across the whole haircut.
- Check the profile of the tiny fringe pixie in a mirror so the crown and nape balance each other.
- Let the front piece of the tiny fringe pixie stay soft so the pixie still moves when you turn your head.
- Avoid heavy oils near the crown of the tiny fringe pixie because short hair can flatten quickly.
25. Polished Blonde Pixie

Description
A polished blonde pixie with short side-swept layers and a clean red-carpet finish.
Why it works
The side direction gives the cut softness, and the shorter back keeps the shape neat.
Best for
Straight hair, formal outfits, and a classic blonde pixie.
Maintenance
Dry the front with a small round brush and mist the finished shape lightly.
Try it yourself for Polished Blonde Pixie
How to DIY
- Start with the nape and sides of the polished blonde pixie, then finish the top once the base is controlled.
- Use a small round brush around the front of the polished blonde pixie to give the short layers a gentle bend.
- Separate only the visible ends of the polished blonde pixie instead of roughing up the whole haircut.
- Blot extra product from your fingers before touching the fringe or hairline of the polished blonde pixie.
- Sleep on a smooth pillowcase or wrap the polished blonde pixie lightly if the top loses shape overnight.
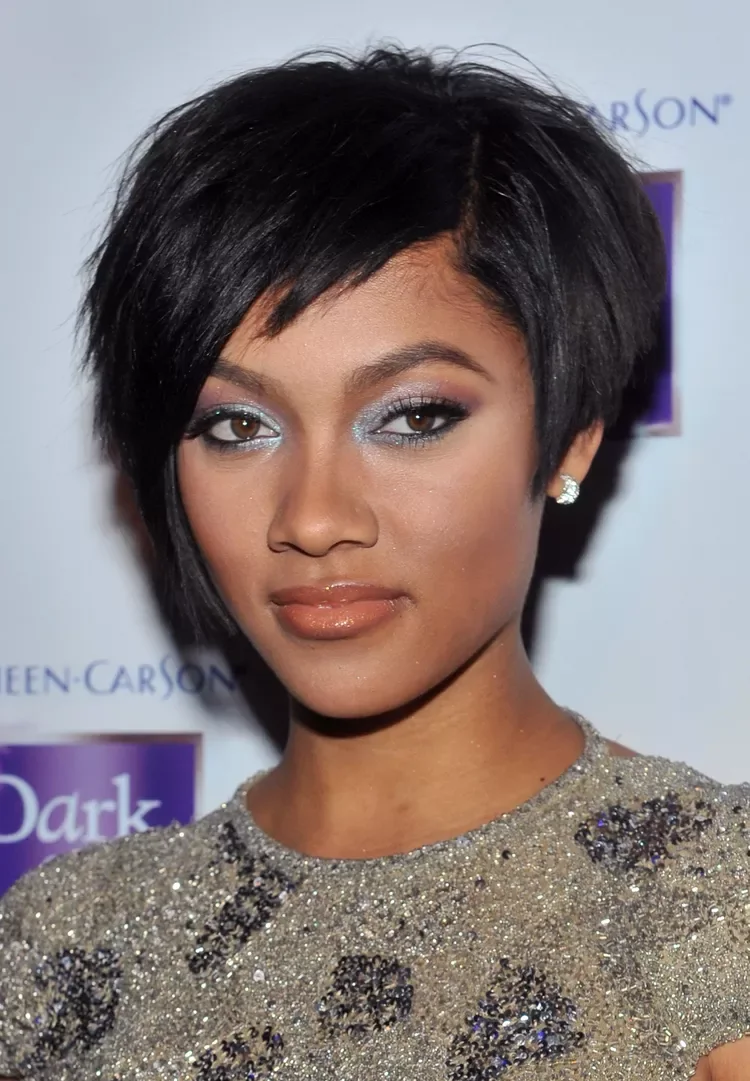
26. Soft Brunette Pixie Crop
Description
This soft brunette pixie crop has short side bangs, neat sides, and a clean shape that still feels gentle around the face.
Why it works
The compact length keeps the haircut clearly pixie, while the soft fringe prevents the front from looking too severe.
Best for
Straight hair, classic short cuts, and readers who want a simple pixie with a softer front.
Maintenance
Use light styling cream on the fringe and keep the side pieces trimmed close.
Try it yourself for Soft Brunette Pixie Crop
How to DIY
- Dry the front of the soft brunette pixie crop first so the shortest pieces settle in the right direction.
- Use a small round brush around the front of the soft brunette pixie crop to give the short layers a gentle bend.
- Lift the top of the soft brunette pixie crop in small sections so the shape has height without turning stiff.
- Mist flexible spray over the soft brunette pixie crop from a distance if the front needs hold, then touch only the ends.
- Book trims for the soft brunette pixie crop before the sides lose their close shape, especially around the ears.
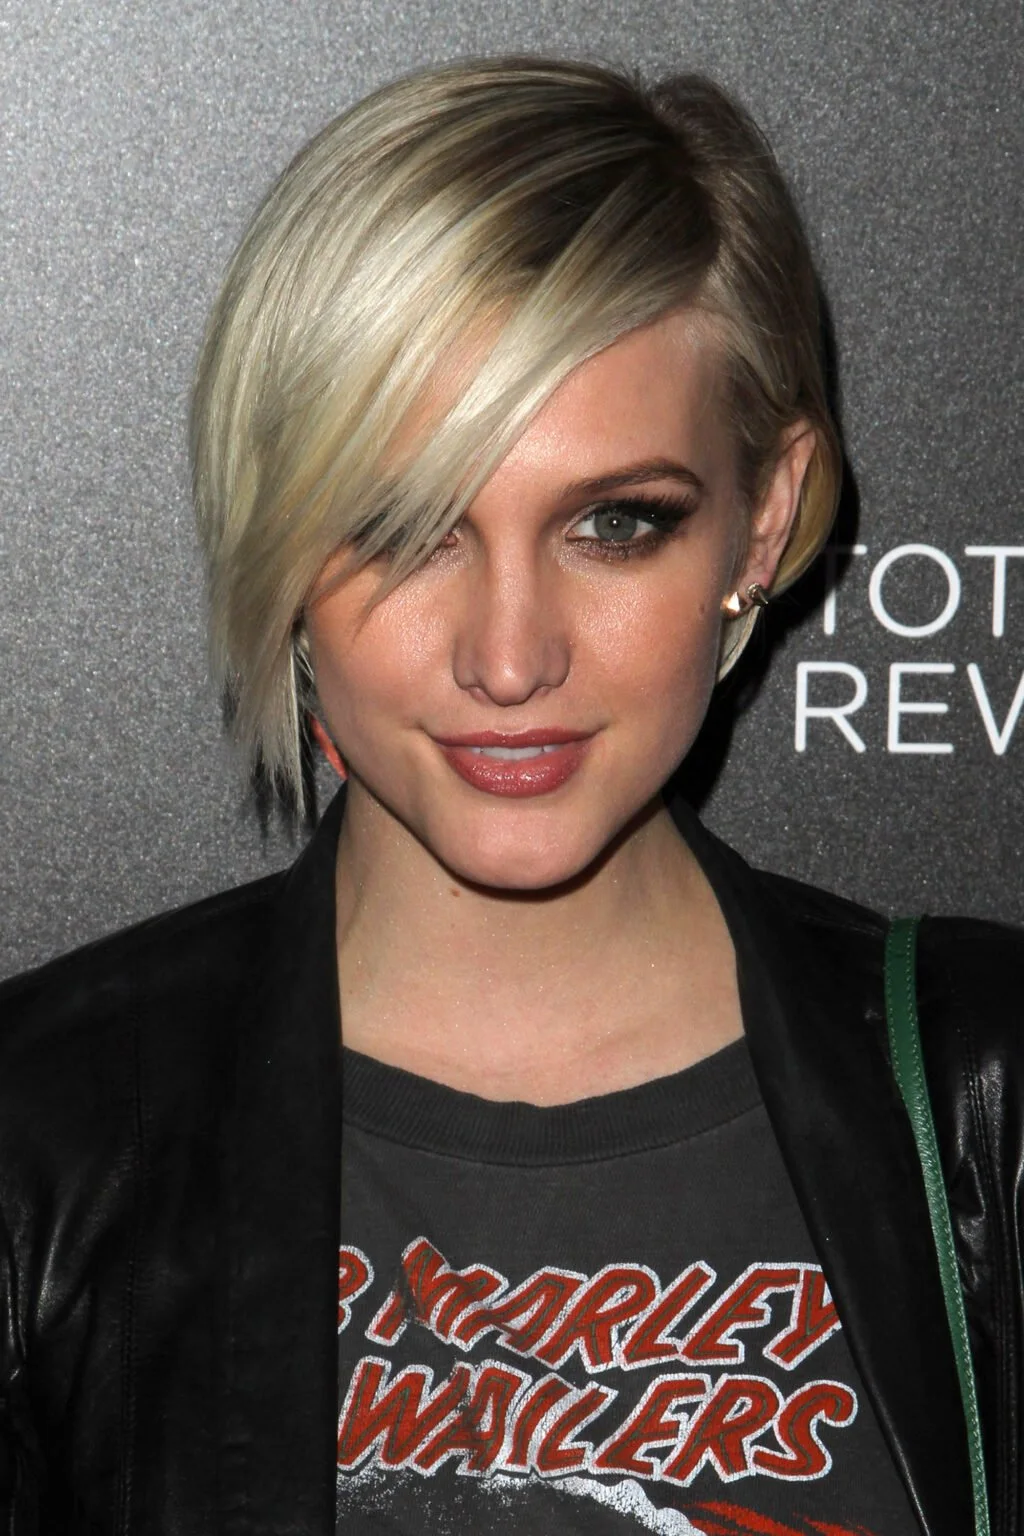
27. Long-Fringe Blonde Pixie
Description
A long-fringe blonde pixie with a smooth side-swept front and a tucked short side.
Why it works
The long fringe gives movement, while the tucked side keeps the overall haircut cropped.
Best for
Straight hair, side parts, and pixies that need a glamorous front piece.
Maintenance
Use heat protectant before smoothing the fringe and leave the crown slightly lifted.
Try it yourself for Long-Fringe Blonde Pixie
How to DIY
- Shape the crown of the long-fringe blonde pixie while the hair is still slightly damp, then let the sides stay close.
- Smooth a pea-size amount of cream over the visible surface of the long-fringe blonde pixie, keeping it away from the roots.
- Tuck one side of the long-fringe blonde pixie close to the head if the front starts covering too much of the face.
- Use shine mist only on the surface of the long-fringe blonde pixie when the finish needs polish.
- Ask your stylist to clean the neckline of the long-fringe blonde pixie before the cut begins to look round at the back.
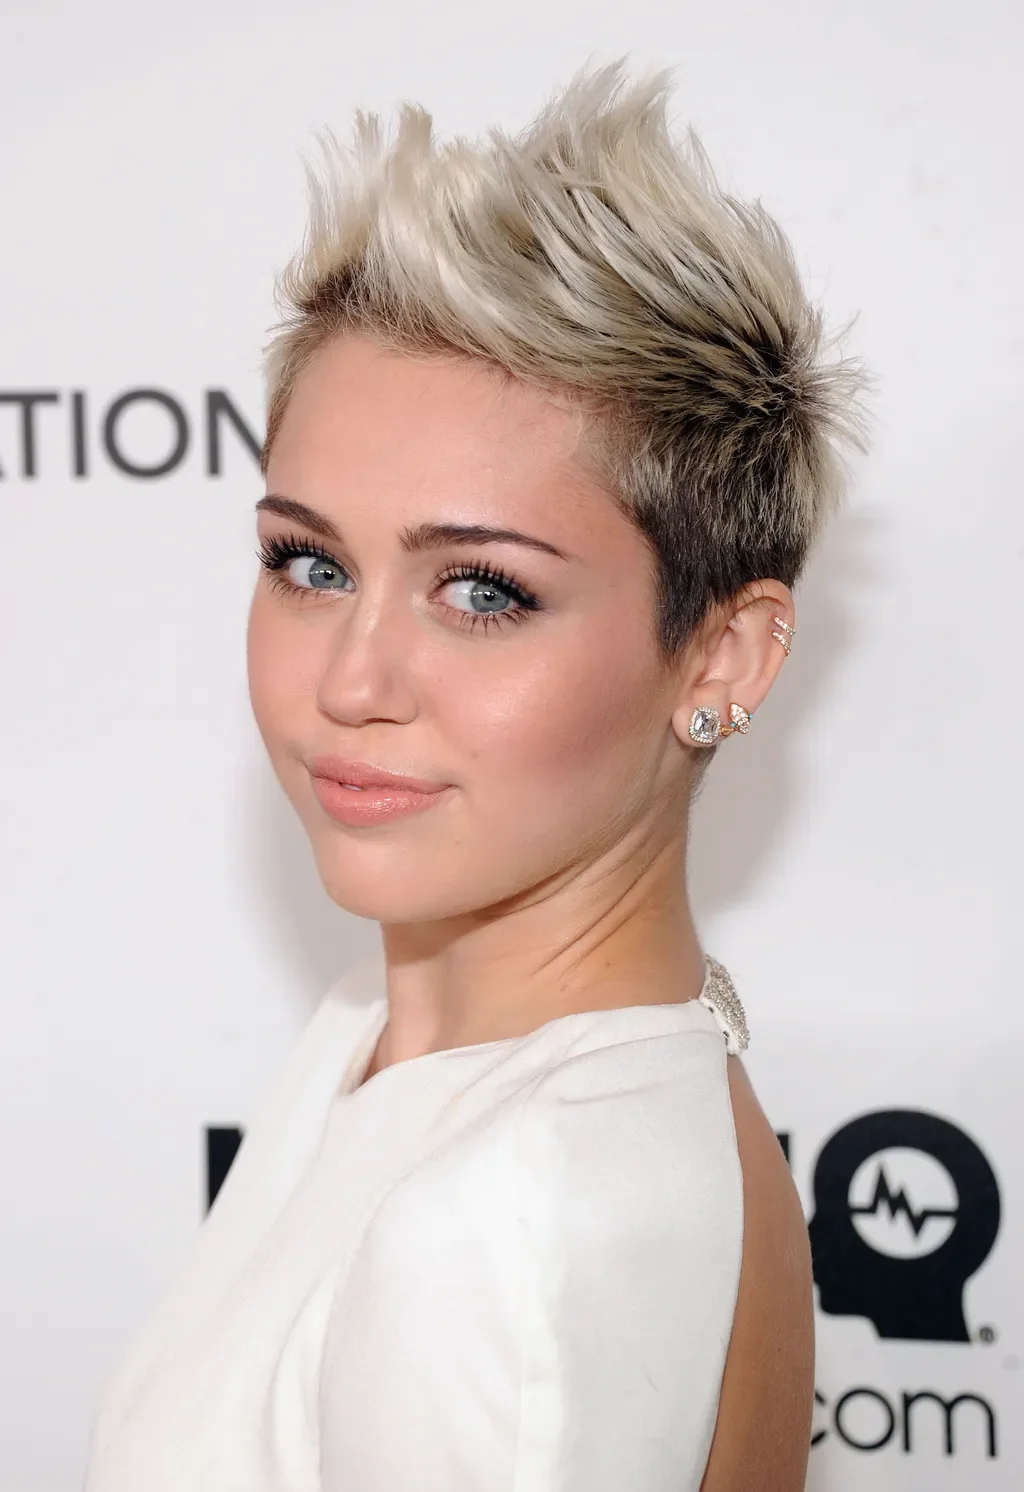
28. Spiky Blonde Pixie
Description
This spiky blonde pixie has a lifted top, short sides, and piecey texture that gives the cut energy.
Why it works
The top height makes the pixie feel fuller, and the sides keep the style from widening.
Best for
Fine to medium hair, short sporty cuts, and readers who like a little lift.
Maintenance
Work texture paste into the top pieces and keep the sides flat with a vent brush.
Try it yourself for Spiky Blonde Pixie
How to DIY
- Set the outline of the spiky blonde pixie before adding product so the cut does not become heavy.
- Warm texture paste between your fingertips and pinch only the top pieces of the spiky blonde pixie.
- Keep the shortest side pieces on the spiky blonde pixie clean because they make the crop read intentional.
- Refresh the part line of the spiky blonde pixie with your fingers rather than adding more product later in the day.
- Keep bang or fringe trims on the spiky blonde pixie small so the pixie does not lose its original shape.
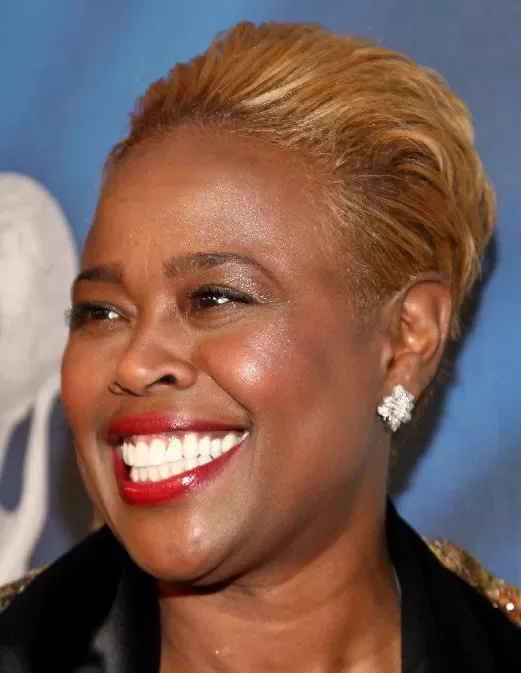
29. Golden Blonde Tapered Pixie
Description
A golden blonde tapered pixie with a neat short outline and warm color that brightens the face.
Why it works
The taper gives the haircut structure while the warm blonde shade keeps it soft.
Best for
Short tapered cuts, warm hair color, and a practical pixie with polish.
Maintenance
Use styling wax on the top only and keep the nape trimmed.
Try it yourself for Golden Blonde Tapered Pixie
How to DIY
- Guide the side pieces of the golden blonde tapered pixie with your fingers first, then use a small brush only where needed.
- Use styling wax or texture powder on the lifted area of the golden blonde tapered pixie, not across the whole haircut.
- Check the profile of the golden blonde tapered pixie in a mirror so the crown and nape balance each other.
- Let the front piece of the golden blonde tapered pixie stay soft so the pixie still moves when you turn your head.
- Avoid heavy oils near the crown of the golden blonde tapered pixie because short hair can flatten quickly.
30. Pastel Blue Pixie

Description
This pastel blue pixie has wispy bangs, soft gray-blonde sides, and a light fashion-color finish.
Why it works
The pastel front adds personality while the short shape keeps the color wearable.
Best for
Creative color, fine hair, and a pixie that feels playful without needing long length.
Maintenance
Use color-safe shampoo and refresh the front pieces with a small amount of texture cream.
Try it yourself for Pastel Blue Pixie
How to DIY
- Start with the nape and sides of the pastel blue pixie, then finish the top once the base is controlled.
- Use color-safe shampoo on the pastel blue pixie, then add light texture only where the color needs definition.
- Separate only the visible ends of the pastel blue pixie instead of roughing up the whole haircut.
- Blot extra product from your fingers before touching the fringe or hairline of the pastel blue pixie.
- Sleep on a smooth pillowcase or wrap the pastel blue pixie lightly if the top loses shape overnight.
How to choose a short pixie cut
Start with the part of the haircut you want people to notice first. A side-swept pixie draws attention to the eyes, a tapered pixie keeps the neckline clean, and a curly or coily pixie lets natural texture lead the shape.
If you are nervous about going very short, choose a pixie with a longer front or soft side fringe. If you already like cropped hair, a tiny fringe, close taper, or lifted top can make the cut feel more intentional.
What makes a pixie cut easy to style
A pixie is easier to style when the cut already has direction. The crown should know where it lifts, the sides should know where they sit, and the front should not need a lot of heat to fall into place.
Use products in small zones: paste on the top pieces, cream on a smooth side sweep, curl cream on the curls, and edge control only at the hairline. Short hair usually needs placement more than quantity.
Best pixie details to ask your stylist for
Ask your stylist where the volume should live, how close the sides should be, and how often the neckline needs cleaning up. These details matter more than simply asking for a short pixie.
Bring photos that show the front and side shape. A pixie with a long fringe, a curly top, a sleek taper, or an undercut can all be short, but they behave very differently once you style them at home.

About the author
Bella Ross
Bella Ross is the hairstyle editor behind Latest Easy Hairstyles. She curates practical haircut, braid, color, and styling ideas with a focus on looks that are easy to browse, realistic to recreate, and useful for everyday hair decisions.