Before you choose
Haircuts that help thin fine hair look fuller
Haircuts for thin fine hair should make the hair look shaped before you add products. A pixie can lift the crown, a bob can make the ends look stronger, and a short shag can add movement without leaving the bottom too sparse. If your main goal is easier upkeep, compare these ideas with low maintenance haircuts for fine hair.
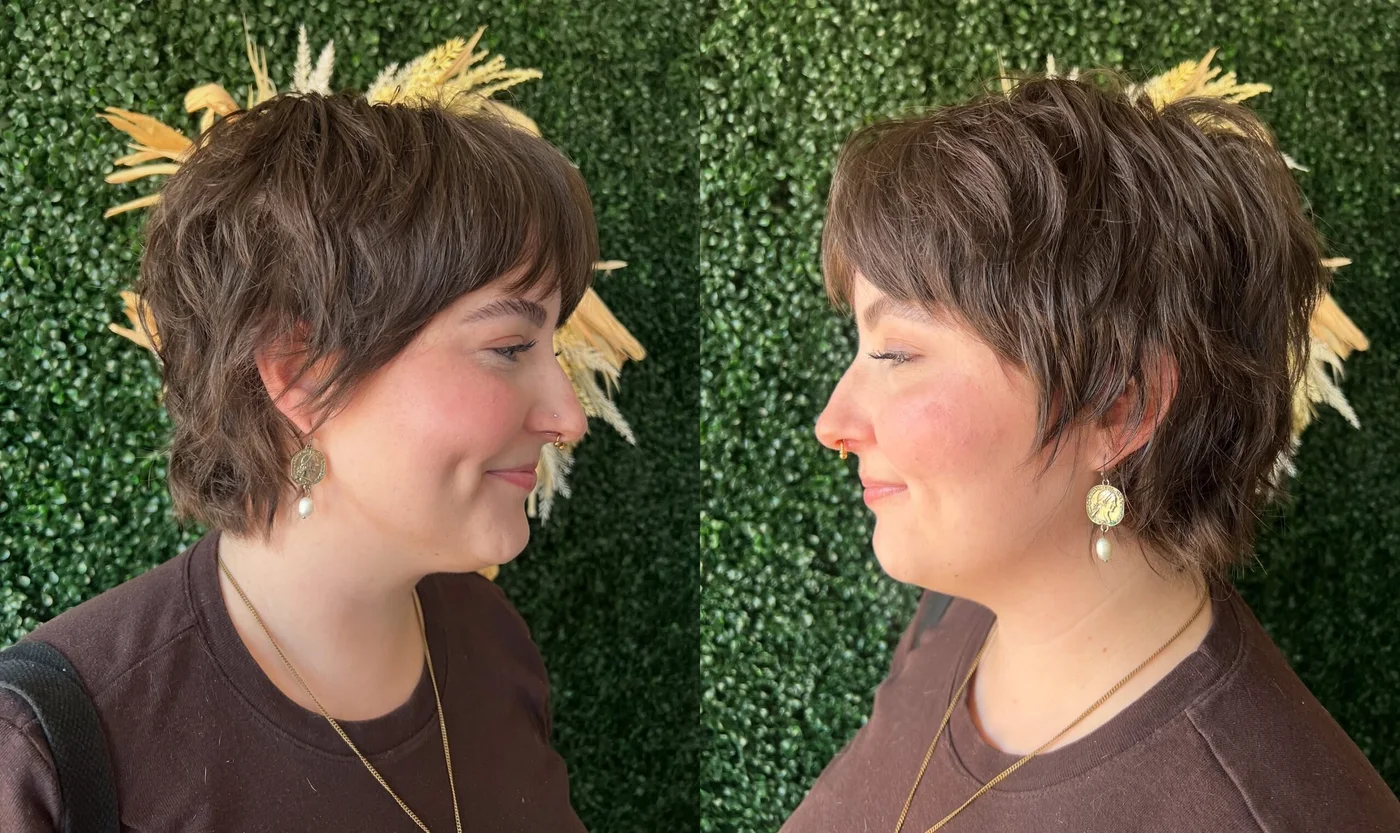
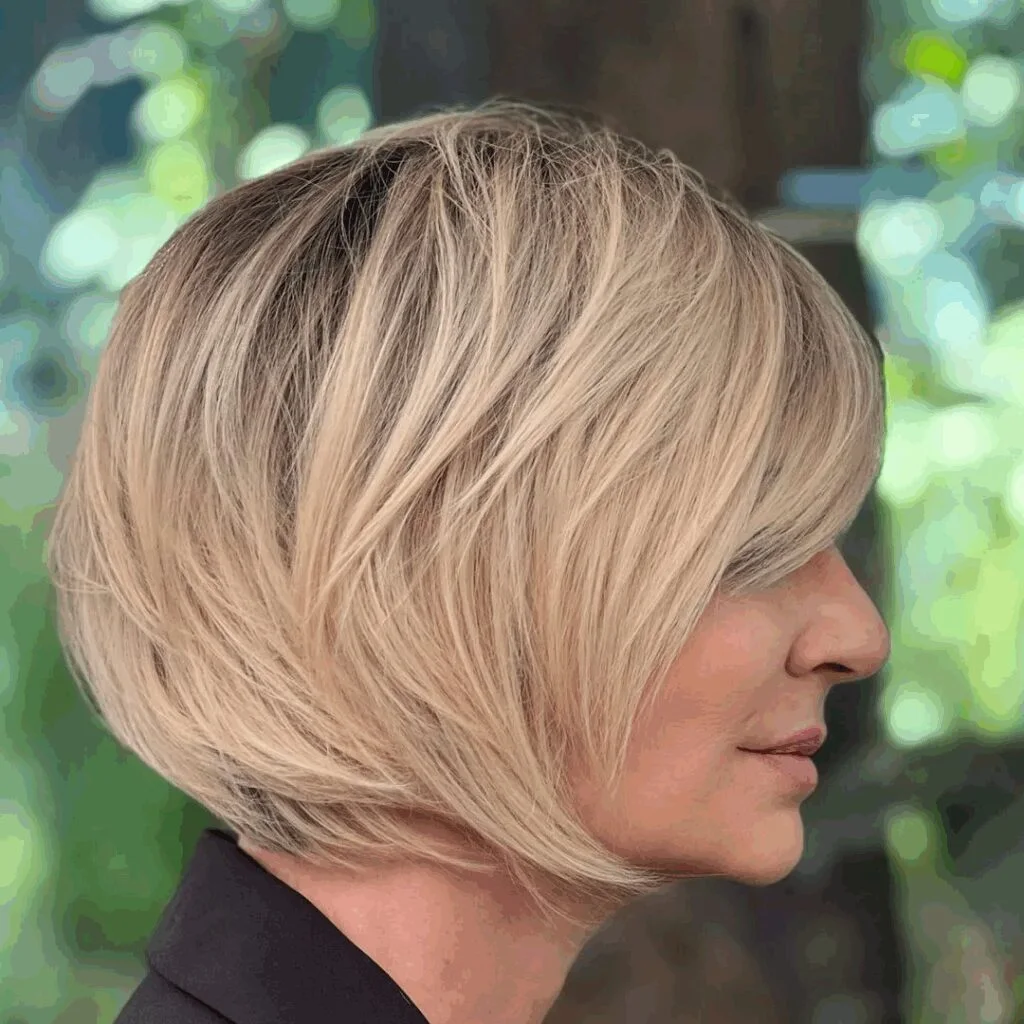
The visual reference
29+ Haircuts for Thin Fine Hair That Add Shape and Fullness
Thin fine hair usually needs shape from the haircut first, then lightweight styling support.
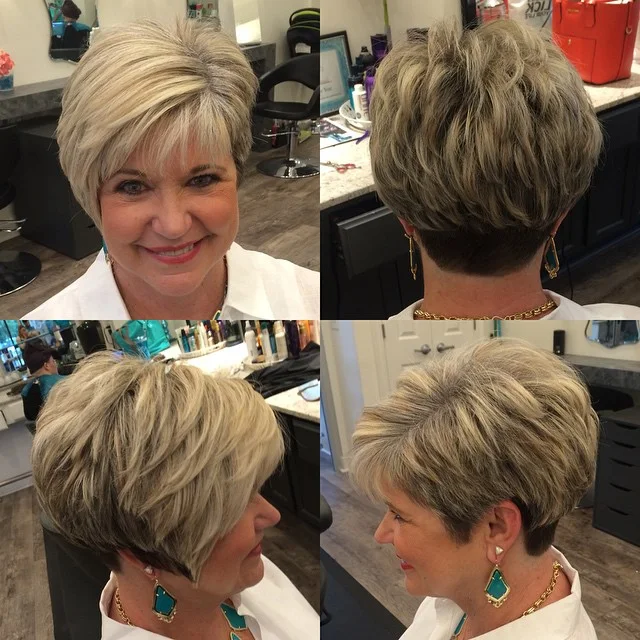
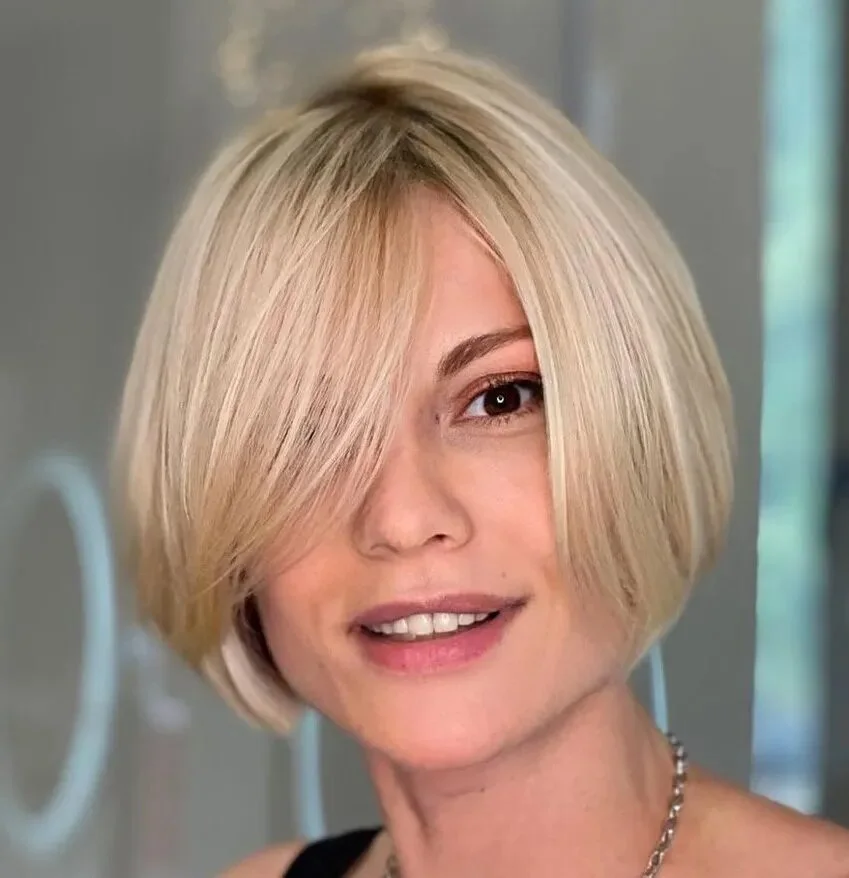
Idea 01
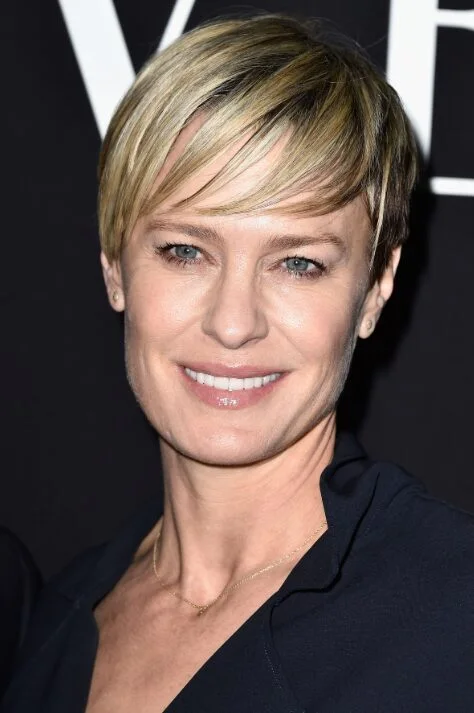
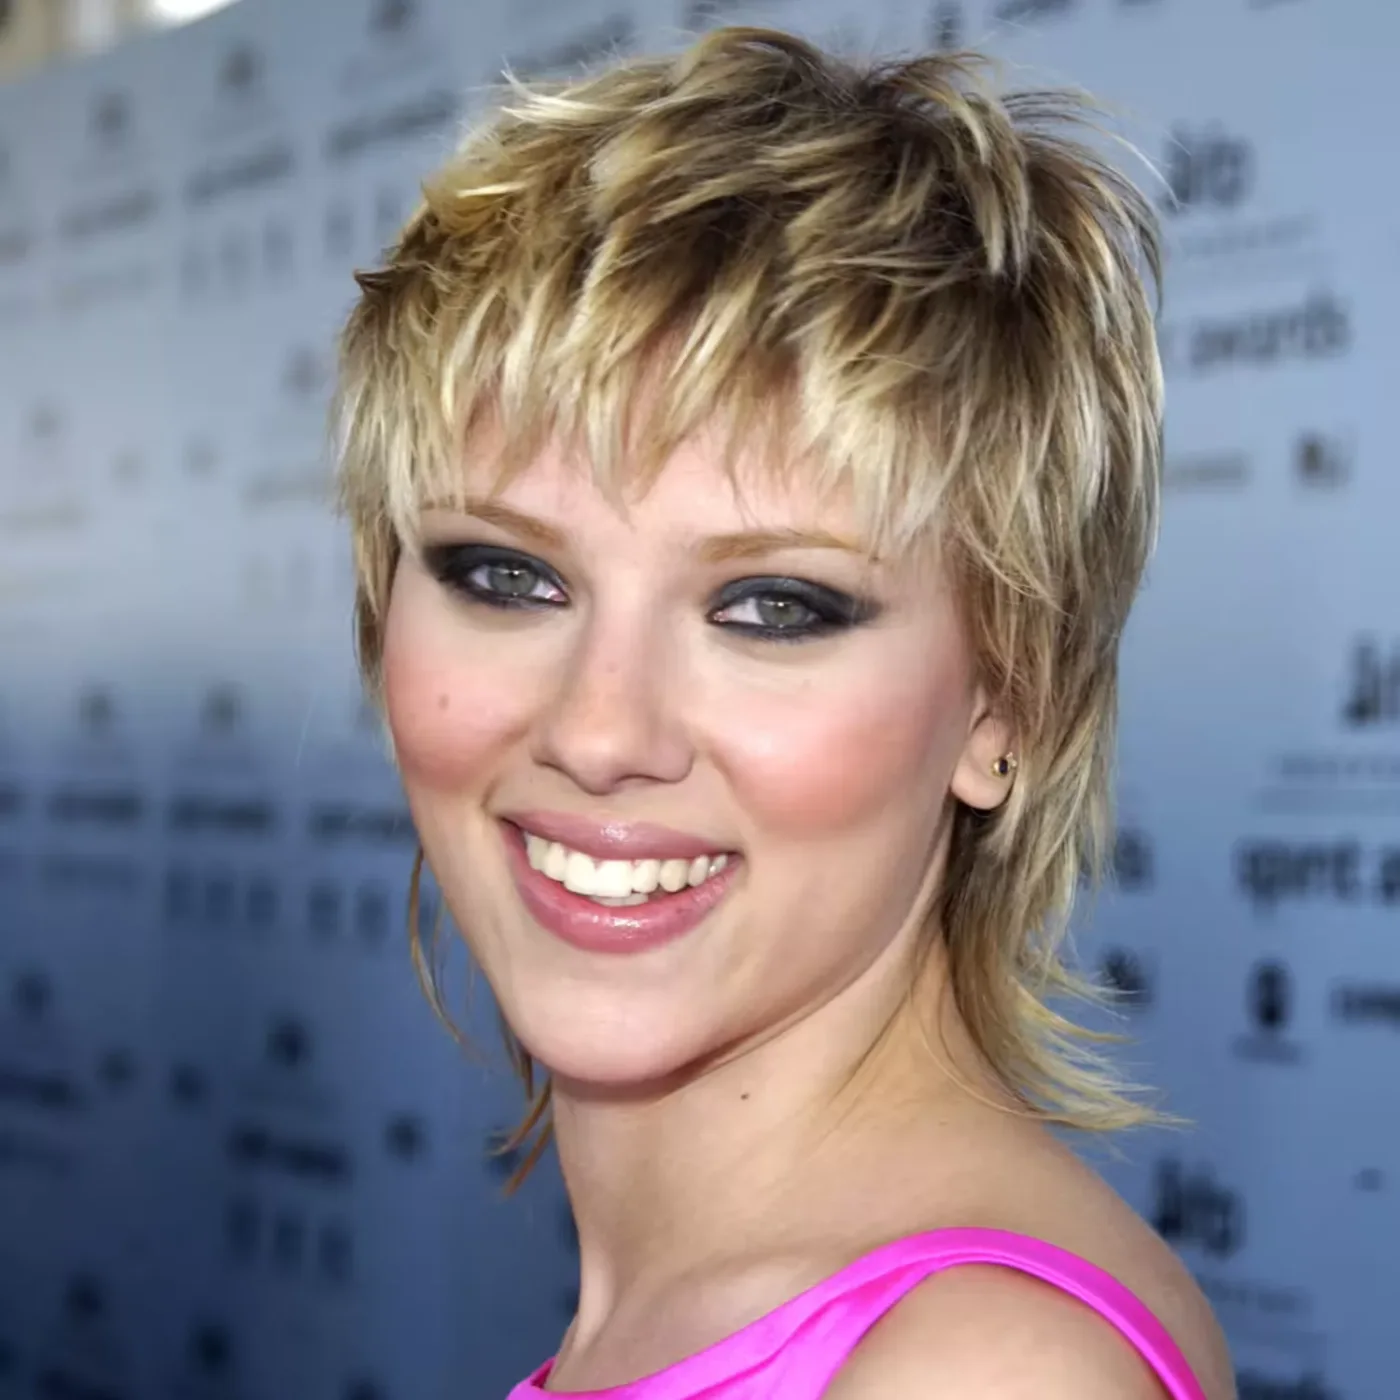
Side-Swept Blonde Pixie For Fine Hair
A side-swept blonde pixie with a soft fringe and close sides.
- Length
- Pixie
- Texture
- Straight
- Parting
- Side
The longer front gives fine hair a fuller direction, while the short sides keep the outline clean. Fine hair that needs lift at the crown, a short shape, and a soft face-opening fringe. In the photograph, Side-Swept Blonde Pixie For Fine Hair keeps its side swept fringe readable beside the side part, which is the useful relationship to compare within haircuts for thin fine hair. Side-Swept Blonde Pixie For Fine Hair provides the specific example here: the medium layering is also visible enough to discuss without assuming that the same finish will behave identically on every density.
Wearability note: Keep the fringe light and trim the neckline before it starts to collapse.
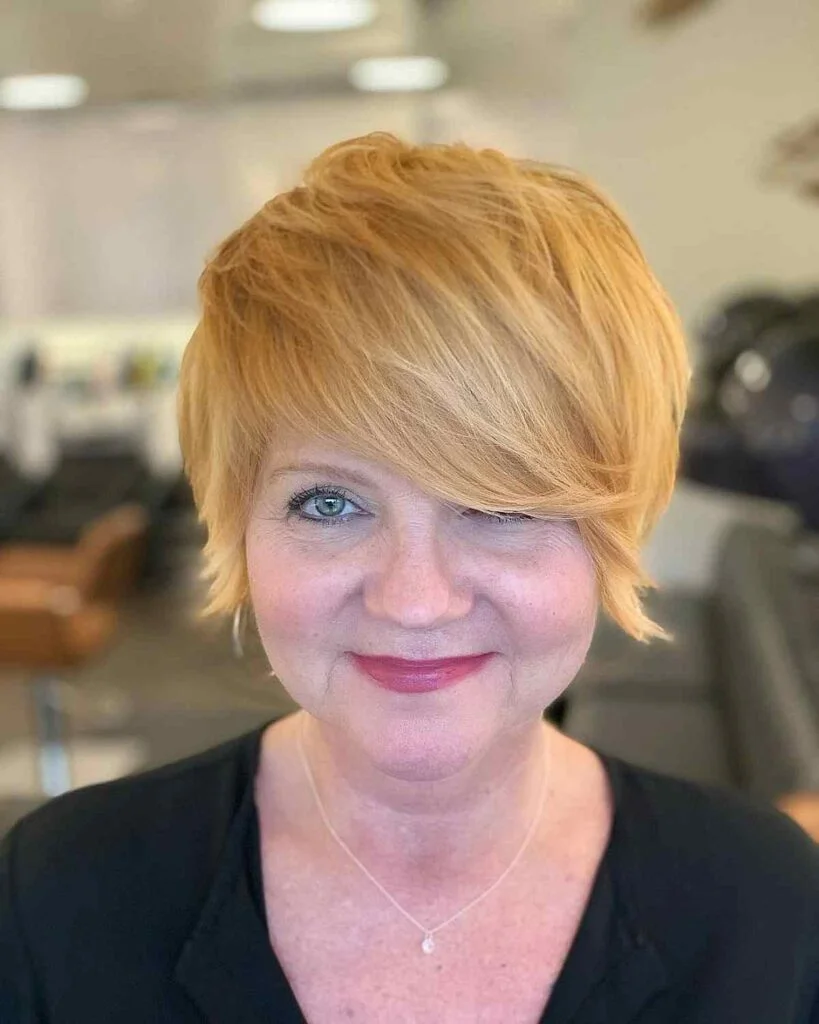
Idea 02
Soft Blonde Bixie With Bangs
A soft blonde bixie with feathered bangs and gentle side fullness.
- Length
- Pixie
- Texture
- Straight
- Parting
- Side
The bixie shape gives more coverage than a pixie but still removes enough weight for fine hair to lift. Fine hair, soft short cuts, and anyone who wants a pixie-bob balance. In soft blonde bixie with bangs, the fringe line, face frame, and transition into the sides are the clearest details to compare before choosing a direction.
Wearability note: Use root lift at the crown and keep cream away from the bang roots.

Idea 03
Copper Pixie With Glasses For Fine Hair
A copper pixie with short layers, glasses, and a neat rounded top.
- Length
- Pixie
- Texture
- Straight
- Parting
- Side
The short layers make the haircut look intentional without asking thin hair to hold a heavy shape. Fine hair with glasses and a compact cut that still feels warm and personal. What separates Copper Pixie With Glasses For Fine Hair from nearby haircuts for thin fine hair options is the balance between the wispy fringe, side part, and straight texture. Copper Pixie With Glasses For Fine Hair provides the specific example here: those visible proportions can be carried into a consultation even when the final texture or color will be different.
Wearability note: Direct the front away from the frames and refresh the top with fingertips.
Choose your direction
Best for flat crown
A pixie, bixie, or short crop with light crown layers.
Best for thin ends
A blunt bob, angled bob, or softly rounded bob.
Best for movement
A short shag, pixie shag, or feathered crop.
Best with glasses
A pixie or bob with side pieces that stay clear of the frames.
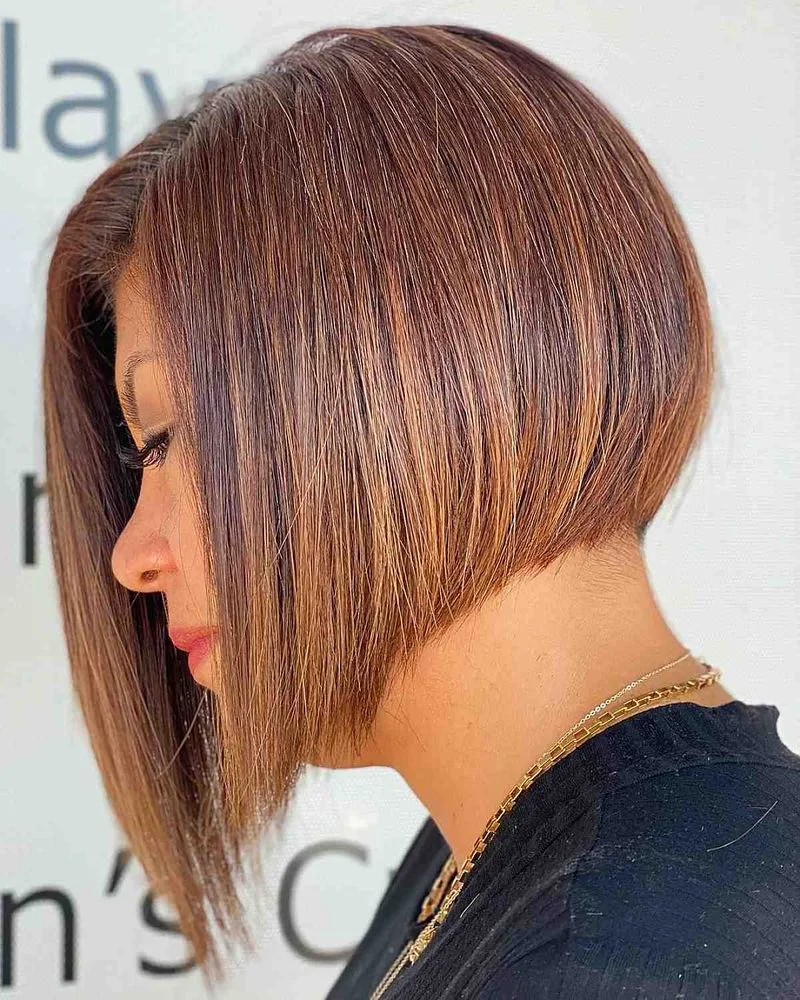
Idea 04
Angled Auburn Bob
An angled auburn bob with a stronger front line and stacked movement at the back.
- Length
- Bob
- Texture
- Straight
- Parting
- Side
The angled edge makes thin fine hair look denser because the shape has a clear lower line. Bob lovers, straight fine hair, and anyone who wants fullness without curls. Use angled auburn bob to decide how much emphasis you want on the perimeter, side volume, and front line. When considering angled auburn bob, use the photograph to agree on the visible proportions first, then adapt the amount of lift, separation, and polish to your natural density and the time you normally spend styling.
Wearability note: Blow-dry the nape under first, then smooth the front panels last.

Idea 05
Silver Feathered Pixie
A silver feathered pixie with side-swept volume and soft texture.
- Length
- Pixie
- Texture
- Straight
- Parting
- Side
The feathering lifts the top while keeping the sides tidy, which helps fine hair avoid a flat finish. Silver hair, short layers, and a polished but lightweight pixie. The photograph of silver feathered pixie keeps the crown shape, side length, and neckline visible enough for a useful salon conversation. What distinguishes silver feathered pixie is the balance between the crown shape, side length, and neckline.
Wearability note: Set the side fringe first and avoid heavy shine products near the crown.

Idea 06
White Shag With Choppy Layers
A white short shag with choppy layers, airy bangs, and a light undone shape.
- Length
- Short
- Texture
- Straight
- Cut
- Shag
The choppy texture gives fine hair visible separation without making the ends look sparse. Fine hair with natural texture, short shags, and soft edgy cuts. Viewed as a haircuts for thin fine hair reference, White Shag With Choppy Layers is most informative around the micro fringe. White Shag With Choppy Layers provides the specific example here: the center part and heavy layering explain why the finished silhouette reads this way and which details would need deliberate styling at home.
Wearability note: Use texture spray through the middle layers and leave the bang area touchable.
Idea 07
Blonde Short Shag With Bangs
A blonde short shag with bangs, piecey ends, and loose movement around the cheeks.
- Length
- Short
- Texture
- Straight
- Cut
- Shag
The cut adds shape through the crown and sides, so the hair does not rely on thickness alone. Fine hair that needs movement, light bangs, and a modern short shag shape. The visual evidence in Blonde Short Shag With Bangs is concentrated in the wispy fringe and center part. Together they control how the heavy layering reads, giving this haircuts for thin fine hair example a specific shape that can be compared with the rest of the gallery.
Wearability note: Scrunch light mousse into damp hair and separate the fringe with fingers.
Idea 08
Piecey Blonde Pixie Shag
A piecey blonde pixie shag with lifted short layers and a soft fringe.
- Length
- Short
- Texture
- Straight
- Cut
- Shag
The short layers create texture from the cut itself, which is helpful when fine hair falls flat quickly. Fine blonde hair, pixie shags, and readers who want visible texture. Piecey Blonde Pixie Shag presents micro fringe without obscuring the center part, while the heavy layering completes the visible outline. That combination is the practical reason to keep this photograph among the haircuts for thin fine hair references.
Wearability note: Pinch texture paste into the top pieces only, then leave the sides clean.

Idea 09
Messy Blonde Shag With Fringe
A messy blonde shag with a light fringe and medium short layers.
- Length
- Medium
- Texture
- Straight
- Cut
- Shag
The airy shape creates fullness around the face without a solid heavy perimeter. Fine hair that can hold a tousled shape, soft fringe, and lived-in texture. For Messy Blonde Shag With Fringe, the micro fringe remains the clearest fixed point in the photograph. Compare its scale with the center part and heavy layering; those relationships reveal how this haircuts for thin fine hair option is constructed and how much daily definition it may need.
Wearability note: Mist the crown lightly and keep the ends separated instead of over-brushed.

Idea 10
Airy Silver Pixie With Glasses
An airy silver pixie with glasses and a soft side-swept front.
- Length
- Short
- Texture
- Straight
- Cut
- Pixie
The side sweep adds height while the cropped sides keep fine hair from widening at the wrong place. Fine silver hair, glasses, and an easy face-framing pixie. When considering airy silver pixie with glasses, use the photograph to agree on the visible proportions first, then adapt the amount of lift, separation, and polish to your natural density and the time you normally spend styling.
Wearability note: Brush the side pieces away from the frames and use light hold only at the part.
Idea 11
Soft Blonde Pixie Mullet
A soft blonde pixie mullet with short textured layers and a longer nape.
- Length
- Short
- Texture
- Straight
- Cut
- Pixie
The shape gives fine hair movement at the back while keeping the crown light and lifted. Fine hair, playful short cuts, and readers who want a little edge without bulk. The micro fringe in Soft Blonde Pixie Mullet establishes the first line of the silhouette, and the center part carries it toward the light layering. This is the part of the haircuts for thin fine hair photograph worth discussing when placement and proportion are the main decision.
Wearability note: Work mousse through the crown and shape the nape with fingers.
Idea 12
White Piecey Pixie
A white piecey pixie with light bangs and short airy sides.
- Length
- Short
- Texture
- Straight
- Cut
- Pixie
The piecey top keeps the cut from looking flat, and the pale color shows the texture clearly. White or blonde fine hair, cropped cuts, and quick daily styling. Within this haircuts for thin fine hair gallery, White Piecey Pixie earns its place through the visible connection between wispy fringe and side part. The light layering adds context, but the structural relationship between the first two details is what defines the option.
Wearability note: Dry the top forward, then break it apart with a tiny amount of paste.

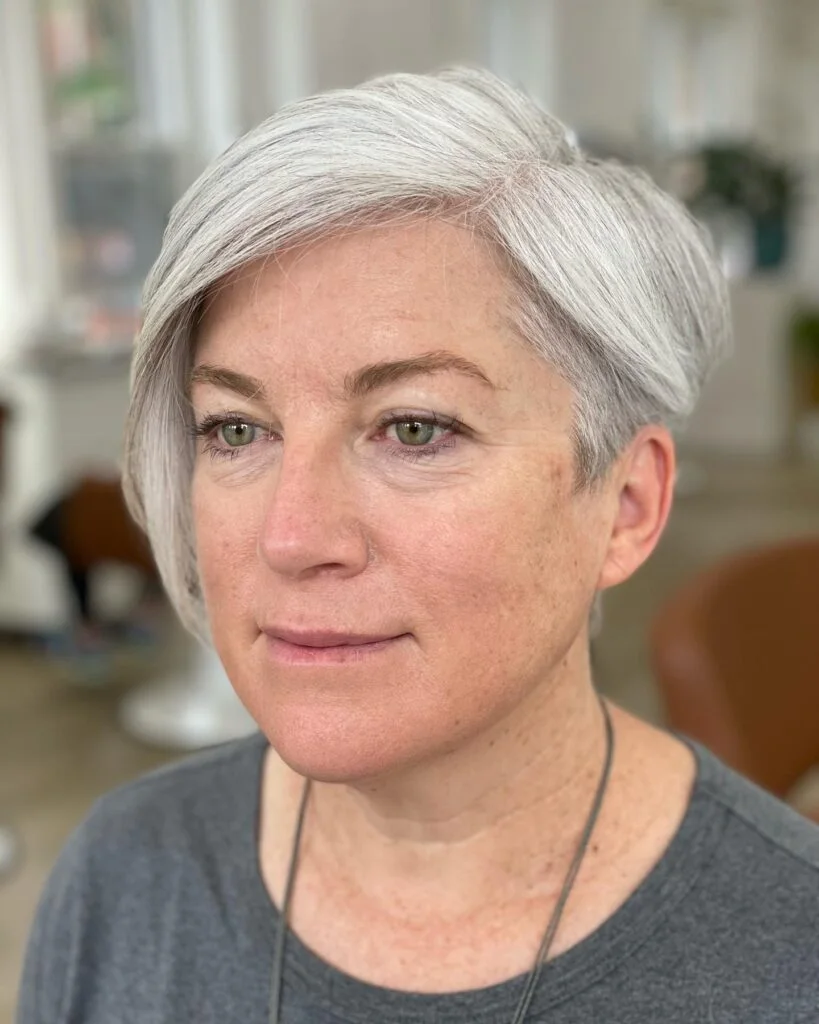
Idea 13
Soft Gray Pixie Shag
A soft gray pixie shag with wispy layers and relaxed side movement.
- Length
- Short
- Texture
- Wavy
- Cut
- Pixie
The shaggy pieces create fullness around the face without leaving thin ends hanging long. Fine gray hair, casual texture, and short cuts that should feel soft. The crown shape, side length, and neckline give soft gray pixie shag its own silhouette within haircuts for thin fine hair. In the photograph, Soft Gray Pixie Shag keeps its wispy fringe readable beside the side part, which is the useful relationship to compare within haircuts for thin fine hair. The light layering is also visible enough to discuss without assuming that the same finish will behave identically on every density.
Wearability note: Add texture at the crown and keep the side pieces light around the cheekbones.
Idea 14
Brunette Pixie With Glasses
A brunette pixie with glasses, short layers, and a slightly tousled crown.
- Length
- Short
- Texture
- Straight
- Cut
- Pixie
The cropped shape clears the frames while the top texture adds enough lift for fine hair. Fine brunette hair, glasses, and short everyday haircuts. Brunette Pixie With Glasses gives a clear view of the side part and the way it meets the light layering. For someone comparing haircuts for thin fine hair, that transition matters because it affects the outline more directly than the model's exact color or styling product.
Wearability note: Use a vent brush to lift the crown, then smooth the sides near the glasses.

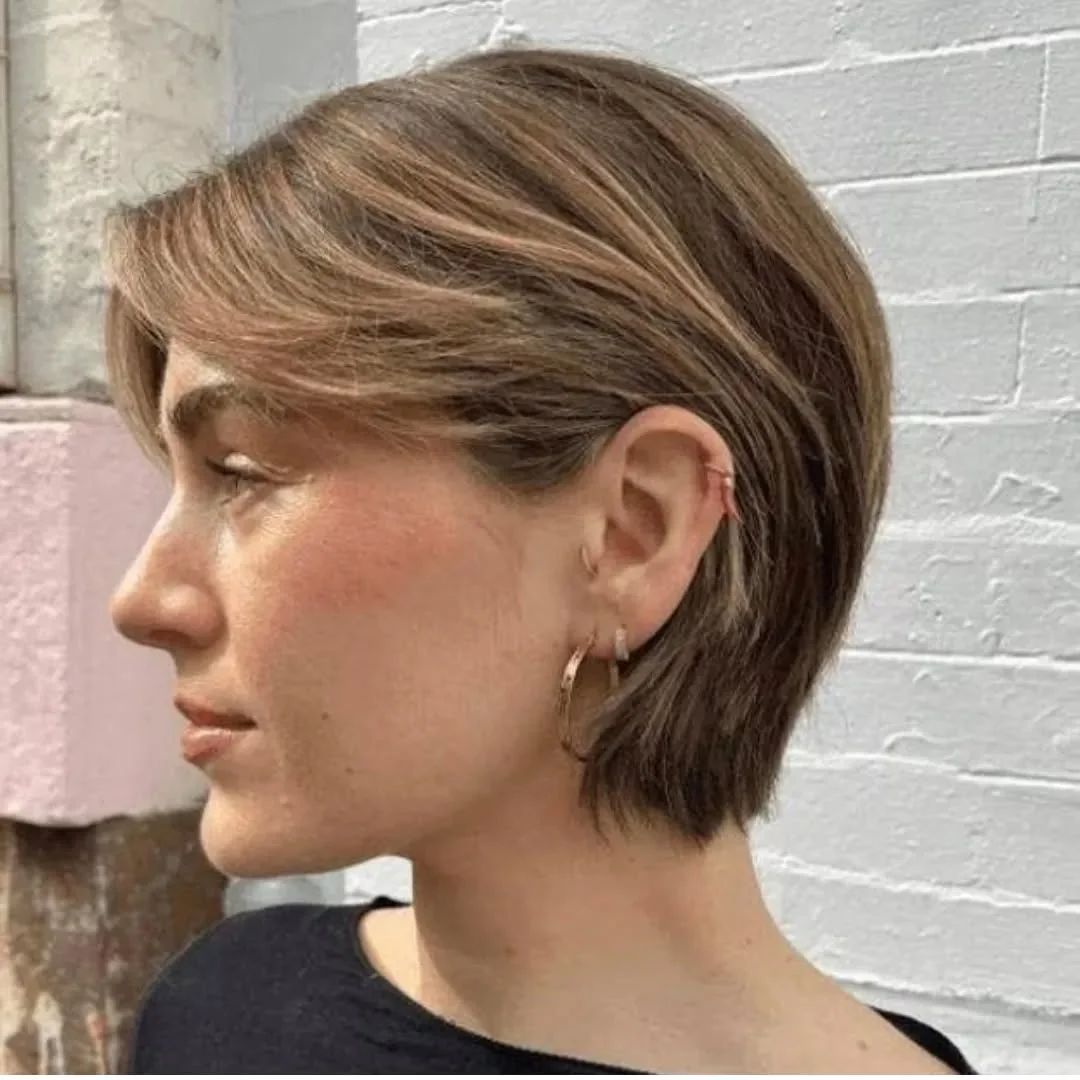
Idea 15
Silver Side-Part Bob For Fine Hair
A silver side-part bob with a smooth cheekbone shape and tucked ends.
- Length
- Bob
- Texture
- Straight
- Finish
- Sleek
The side part creates instant direction, and the bob line makes fine hair look more substantial. Fine hair that needs a polished bob, side volume, and a clean outline. What separates Silver Side-Part Bob For Fine Hair from nearby haircuts for thin fine hair options is the balance between the side swept fringe, side part, and light layering. Silver Side-Part Bob For Fine Hair provides the specific example here: those visible proportions can be carried into a consultation even when the final texture or color will be different.
Wearability note: Dry the part line upward before turning the ends under with a round brush.
Idea 16
Highlighted Pixie Cut Views
A highlighted pixie shown from multiple angles with short textured layers.
- Length
- Short
- Texture
- Straight
- Cut
- Pixie
The multi-angle shape shows how a fine-hair pixie can build fullness at the crown and back. Fine hair, salon reference photos, and short cuts that need shape from every side. In highlighted pixie cut views, the crown shape, side length, and neckline are the clearest details to compare before choosing a direction. When considering highlighted pixie cut views, use the photograph to agree on the visible proportions first, then adapt the amount of lift, separation, and polish to your natural density and the time you normally spend styling.
Wearability note: Lift the crown, smooth the sides, and check the back so the shape stays balanced.
Idea 17
Short Blonde Pixie With Crown Lift
A short blonde pixie with lifted crown layers and neat side shape.
- Length
- Short
- Texture
- Straight
- Cut
- Pixie
The lift at the top gives fine hair height without needing long layers or teasing. Fine blonde hair, simple pixies, and cuts that need crown support. Use short blonde pixie with crown lift to decide how much emphasis you want on the crown shape, side length, and neckline. Short Blonde Pixie With Crown Lift should be judged first by its side part, then by how the light layering supports the sleek finish. This photograph keeps all three areas visible, so it can guide a precise conversation about haircuts for thin fine hair rather than only naming a trend.
Wearability note: Aim root lift at the crown only and let the front sit softly to one side.
Idea 18
Asymmetrical Blonde Pixie
An asymmetrical blonde pixie with a long sweeping front and close side.
- Length
- Bob
- Texture
- Wavy
- Finish
- Textured
The diagonal front creates visual fullness, while the shorter side keeps the haircut light. Fine hair, asymmetrical pixies, and a stronger salon-style shape. The photograph of asymmetrical blonde pixie keeps the crown shape, side length, and neckline visible enough for a useful salon conversation. Viewed as a haircuts for thin fine hair reference, Asymmetrical Blonde Pixie is most informative around the light layering. The textured finish and wavy texture explain why the finished silhouette reads this way and which details would need deliberate styling at home.
Wearability note: Smooth the long front panel and keep product away from the cropped side.

Idea 19
Wispy Blonde Bob With Glasses
A wispy blonde bob with glasses, light bangs, and soft cheekbone movement.
- Length
- Medium
- Texture
- Straight
- Cut
- Shag
The bob keeps enough perimeter to look full, while the wispy front prevents the style from feeling heavy. Fine blonde hair, glasses, and short bobs with soft fringe. What distinguishes wispy blonde bob with glasses is the balance between the perimeter, side volume, and front line. The visual evidence in Wispy Blonde Bob With Glasses is concentrated in the wispy fringe and medium layering. Together they control how the sleek finish reads, giving this haircuts for thin fine hair example a specific shape that can be compared with the rest of the gallery.
Wearability note: Dry the bangs first and tuck the side pieces gently around the frames.

Idea 20
Sleek Silver Pixie Bob
A sleek silver pixie bob with a side fringe and compact rounded shape.
- Length
- Short
- Texture
- Straight
- Cut
- Pixie
The smooth finish makes fine hair look polished, and the short length keeps the ends from thinning out. Fine silver hair, neat short cuts, and a polished everyday look. Sleek Silver Pixie Bob presents side swept fringe without obscuring the light layering, while the sleek finish completes the visible outline. Sleek Silver Pixie Bob provides the specific example here: that combination is the practical reason to keep this photograph among the haircuts for thin fine hair references.
Wearability note: Use smoothing cream only on the outer layer and leave the roots clean.
Idea 21
Copper Cropped Pixie For Fine Hair
A copper cropped pixie with tiny textured pieces and a close neckline.
- Length
- Pixie
- Texture
- Straight
- Finish
- Textured
The warm color and short texture make fine hair read as deliberate instead of sparse. Fine hair, copper color, and very short cuts with personality. For Copper Cropped Pixie For Fine Hair, the wispy fringe remains the clearest fixed point in the photograph. Compare its scale with the side part and medium layering; those relationships reveal how this haircuts for thin fine hair option is constructed and how much daily definition it may need.
Wearability note: Warm texture paste between fingertips and touch only the top pieces.
Idea 22
Silver Textured Crop For Fine Hair
A silver textured crop with choppy lift and soft tapered sides.
- Length
- Pixie
- Texture
- Straight
- Finish
- Textured
The choppy top builds height, while the tapered sides keep the haircut controlled. Fine silver hair, low-bulk crops, and easy crown volume. Silver Textured Crop For Fine Hair makes the wispy fringe, side part, and medium layering visible in the same frame. Their spacing gives a more reliable basis for choosing this haircuts for thin fine hair direction than copying the model's color or assuming the finish will transfer unchanged.
Wearability note: Dry the top upward and press the sides into place with a small brush.
Idea 23
Soft Brunette Short Pixie
A soft brunette short pixie with rounded bangs and clean side shape.
- Length
- Pixie
- Texture
- Straight
- Finish
- Textured
The rounded front gives thin hair a neat focal point without needing extra length. Fine brunette hair, short pixies, and a softer cropped look. The wispy fringe in Soft Brunette Short Pixie establishes the first line of the silhouette, and the side part carries it toward the medium layering. Soft Brunette Short Pixie provides the specific example here: this is the part of the haircuts for thin fine hair photograph worth discussing when placement and proportion are the main decision.
Wearability note: Comb the fringe while damp and use a small amount of spray only at the roots.
Idea 24
Platinum Side-Swept Pixie For Fine Hair
A platinum side-swept pixie with a longer front and sleek close sides.
- Length
- Pixie
- Texture
- Straight
- Finish
- Textured
The long sweep adds drama, while the short sides stop fine hair from looking limp. Fine hair, platinum color, and side-swept pixie cuts. Within this haircuts for thin fine hair gallery, Platinum Side-Swept Pixie For Fine Hair earns its place through the visible connection between wispy fringe and side part. Platinum Side-Swept Pixie For Fine Hair provides the specific example here: the medium layering adds context, but the structural relationship between the first two details is what defines the option.
Wearability note: Smooth the front in one direction and finish the ends with shine spray.

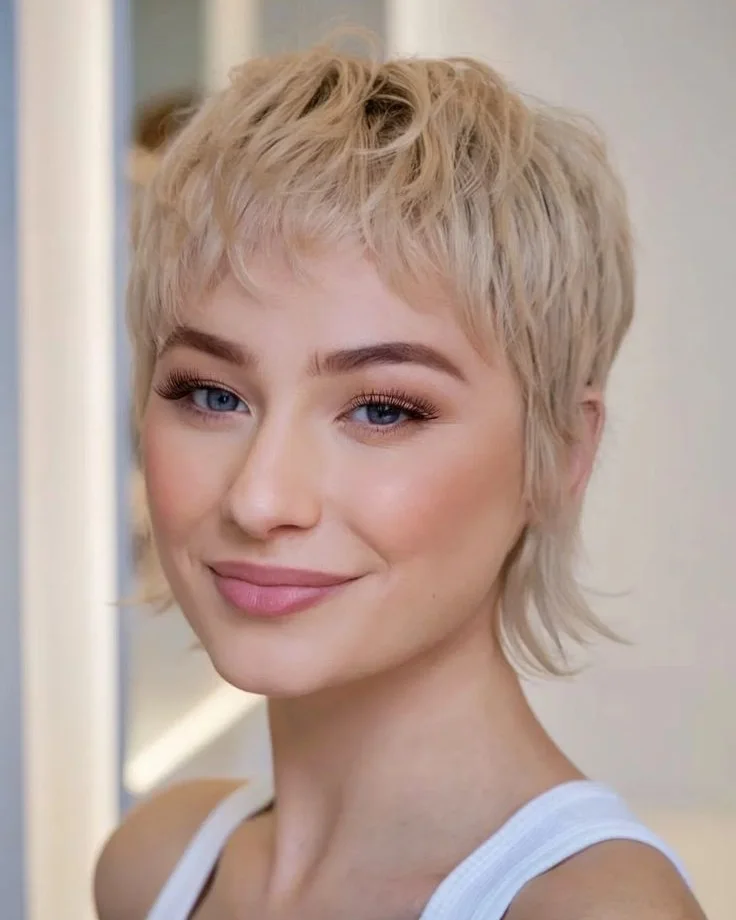
Idea 25
Side-Swept Blonde Pixie Cut
A side-swept blonde pixie cut with glossy shape and a longer front piece.
- Length
- Pixie
- Texture
- Straight
- Finish
- Sleek
The long front gives the haircut movement, and the close side keeps fine hair structured. Fine hair, polished short cuts, and dramatic side-swept fronts. In the photograph, Side-Swept Blonde Pixie Cut keeps its side swept fringe readable beside the side part, which is the useful relationship to compare within haircuts for thin fine hair. Side-Swept Blonde Pixie Cut provides the specific example here: the medium layering is also visible enough to discuss without assuming that the same finish will behave identically on every density.
Wearability note: Use heat protectant on the front section and avoid flattening the crown.

Idea 26
Asymmetrical Blonde Pixie Bob
An asymmetrical blonde pixie bob with a deep side fringe and smooth finish.
- Length
- Pixie
- Texture
- Straight
- Finish
- Textured
The longer diagonal front makes fine hair look fuller because the eye follows one clean shape. Fine straight hair, asymmetrical cuts, and short bobs with polish. The crown shape, side length, and neckline give asymmetrical blonde pixie bob its own silhouette within haircuts for thin fine hair. Asymmetrical Blonde Pixie Bob gives a clear view of the side swept fringe and the way it meets the side part. Asymmetrical Blonde Pixie Bob provides the specific example here: for someone comparing haircuts for thin fine hair, that transition matters because it affects the outline more directly than the model's exact color or styling product.
Wearability note: Blow-dry the front panel flat but lift the roots before smoothing.
Idea 27
Long Blonde Pixie Bob
A long blonde pixie bob with a sweeping fringe and soft rounded sides.
- Length
- Pixie
- Texture
- Straight
- Finish
- Textured
The longer top gives styling flexibility while the cropped back keeps the haircut light. Fine hair that wants more length than a pixie but less weight than a bob. When considering long blonde pixie bob, use the photograph to agree on the visible proportions first, then adapt the amount of lift, separation, and polish to your natural density and the time you normally spend styling.
Wearability note: Lift the crown first and smooth the side fringe only after the roots are dry.
Idea 28
Soft Brown Feathered Pixie
A soft brown feathered pixie with short airy pieces and natural texture.
- Length
- Short
- Texture
- Wavy
- Cut
- Shag
The feathered layers create fullness without leaving fine hair overloaded with product. Fine hair, natural texture, and soft short cuts with movement. The photographed short bixie makes the side swept fringe easy to locate before the eye moves to the center part. That order is helpful when deciding which part of this haircuts for thin fine hair idea should remain strongest after it is adapted.
Wearability note: Dry the layers with fingers and use paste only on the pieces that need definition.
Idea 29
White Cropped Pixie
A white cropped pixie with short bangs, clean sides, and a bright finish.
- Length
- Pixie
- Texture
- Straight
- Finish
- Textured
The close shape gives thin fine hair structure and keeps the silhouette crisp. White or platinum fine hair, very short pixies, and easy upkeep. In white cropped pixie, the crown shape, side length, and neckline are the clearest details to compare before choosing a direction. White Cropped Pixie should be judged first by its side swept fringe, then by how the side part supports the medium layering. White Cropped Pixie provides the specific example here: this photograph keeps all three areas visible, so it can guide a precise conversation about haircuts for thin fine hair rather than only naming a trend.
Wearability note: Keep the fringe brushed forward and refresh lift with a tiny amount of root spray.
Idea 30
Auburn Layered Pixie
An auburn layered pixie with soft side volume and neat tapered edges.
- Length
- Pixie
- Texture
- Straight
- Finish
- Textured
The warm color adds dimension while the layers give fine hair a fuller profile. Fine auburn hair, short layers, and a softer pixie shape. Use auburn layered pixie to decide how much emphasis you want on the crown shape, side length, and neckline. Viewed as a haircuts for thin fine hair reference, Auburn Layered Pixie is most informative around the side swept fringe. Auburn Layered Pixie provides the specific example here: the side part and medium layering explain why the finished silhouette reads this way and which details would need deliberate styling at home.
Wearability note: Direct the top layers forward first, then sweep the side pieces into place.
Idea 31
Tucked Short Bob With Fine Layers
A tucked short bob with fine layers, a clean side profile, and soft nape shape.
- Length
- Pixie
- Texture
- Straight
- Finish
- Textured
The tuck shows how a short bob can keep density near the bottom while still feeling light. Fine hair, short bobs, and clean side profiles. The photograph of tucked short bob with fine layers keeps the perimeter, side volume, and front line visible enough for a useful salon conversation. The visual evidence in Tucked Short Bob With Fine Layers is concentrated in the side swept fringe and side part. Together they control how the medium layering reads, giving this haircuts for thin fine hair example a specific shape that can be compared with the rest of the gallery.
Wearability note: Round-brush the lower edge under and keep the top layer airy.
Idea 32
Blonde Side-Fringe Bob
A blonde side-fringe bob with a longer front piece and smooth jaw shape.
- Length
- Bob
- Texture
- Straight
- Finish
- Sleek
The side fringe gives movement at the front, while the bob edge helps the ends look fuller. Fine blonde hair, side fringe, and a bob that needs a stronger outline. What distinguishes blonde side-fringe bob is the balance between the fringe line, face frame, and transition into the sides. Blonde Side-Fringe Bob presents side part without obscuring the light layering, while the sleek finish completes the visible outline. Blonde Side-Fringe Bob provides the specific example here: that combination is the practical reason to keep this photograph among the haircuts for thin fine hair references.
Wearability note: Dry the fringe diagonally and use flexible spray under the front piece.
Idea 33
Stacked Blonde Bob For Fine Hair
A stacked blonde bob with a rounded back and smooth side angle.
- Length
- Bob
- Texture
- Straight
- Finish
- Sleek
Stacking builds shape where fine hair often needs it most, especially through the back. Fine hair, stacked bobs, and a fuller back shape. For Stacked Blonde Bob For Fine Hair, the side part remains the clearest fixed point in the photograph. Compare its scale with the light layering and sleek finish; those relationships reveal how this haircuts for thin fine hair option is constructed and how much daily definition it may need.
Wearability note: Lift the back with a round brush and smooth the side panels last.
Idea 34
Soft Silver Cropped Cut
A soft silver cropped cut with light side texture and a neat front.
- Length
- Pixie
- Texture
- Straight
- Finish
- Glossy
The crop creates a clean outline while the soft top keeps fine hair from looking flat. Fine silver hair, mature short cuts, and simple daily styling. Soft Silver Cropped Cut makes the side swept fringe, center part, and medium layering visible in the same frame. Soft Silver Cropped Cut provides the specific example here: their spacing gives a more reliable basis for choosing this haircuts for thin fine hair direction than copying the model's color or assuming the finish will transfer unchanged.
Wearability note: Brush the front into place and use root lift only where the crown drops.
What haircut makes thin fine hair look thicker
A haircut makes thin fine hair look thicker when it keeps enough density at the ends and adds lift where the hair collapses. Blunt bobs, stacked bobs, pixies with crown lift, and soft bixies can all create a stronger outline.
The goal is not always to add more layers. Sometimes fine hair needs fewer, cleaner layers so the bottom edge does not look see-through.
Best short cuts for fine hair
Pixies work well when the crown needs height and the sides need control. Bixies are useful when you want the lift of a pixie but still like a little softness near the ears and jaw.
Short shags work when the hair has enough texture to separate. Keep the layers airy, not overly thinned, so the haircut reads as movement instead of missing density.
Best bob shapes for thin fine hair
Bobs are helpful because a clean lower edge can make fine hair look fuller. Angled bobs, stacked bobs, and softly rounded bobs create shape without needing heavy daily styling.
If the front is the thinnest area, a side part or side-swept fringe can give the haircut direction. If the back falls flat, a stacked nape can make the shape look fuller from the side.

About the author
Bella Ross
Bella Ross is the hairstyle editor behind Latest Easy Hairstyles. She curates practical haircut, braid, color, and styling ideas with a focus on looks that are easy to browse, realistic to recreate, and useful for everyday hair decisions.