Haircut guide
30 Pixie Cuts With Bangs for Fresh Short Hair
Updated June 13, 2026
A photo-first guide to pixie cuts with bangs, from soft side fringe and wispy bangs to curly pixies, micro fringe, tapered crops, and glossy short cuts.
Pixie cuts where the bangs shape the whole look
Pixie with bangs is a short haircut where the fringe does most of the face-framing work. The bangs can sweep sideways, sit wispy across the forehead, curl forward, or stay tiny and blunt for a sharper look.
If you want a deliberately undone finish, compare these with messy pixie cuts with bangs. If the fringe itself is the boldest part of the cut, the baby bangs guide is the closer next step.
30 Pixie Cuts With Bangs for Fresh Short Hair photo ideas
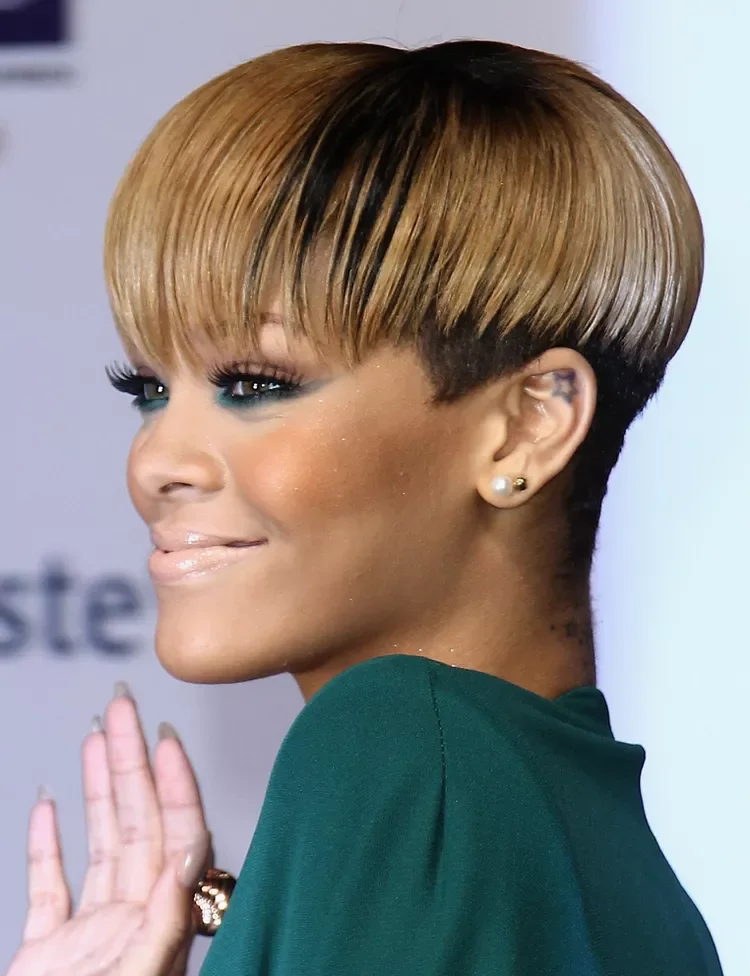
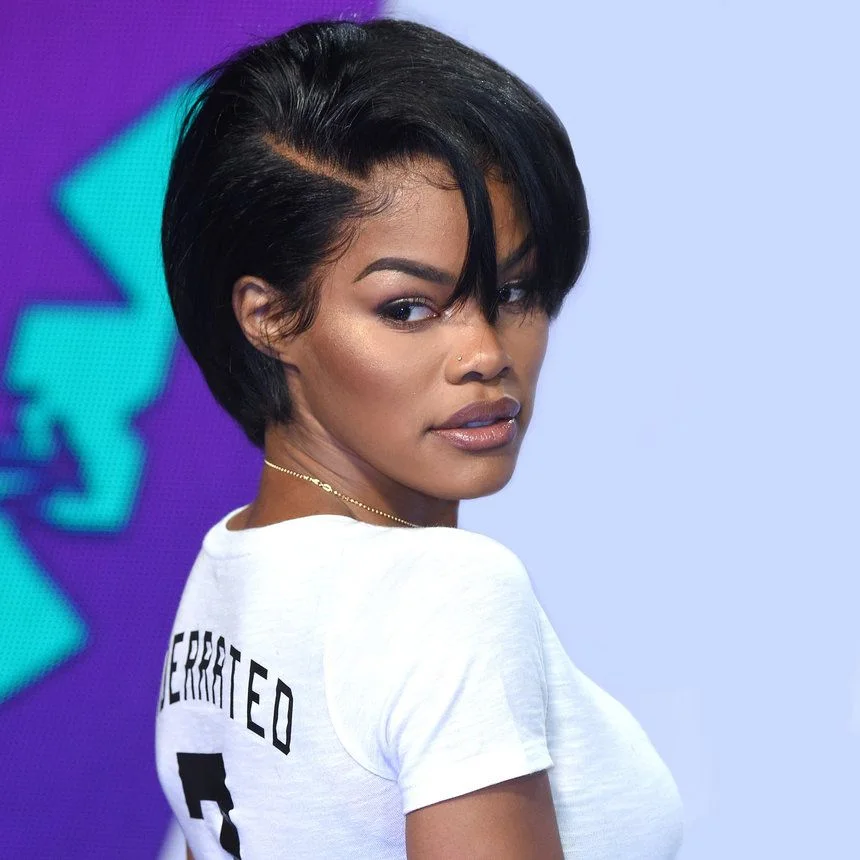
1. Blunt Bowl Pixie With Bangs
Description
This blunt bowl pixie makes the bangs the main shape. The rounded fringe sits smooth across the forehead while the shorter side keeps the cut sharp.
Why it works
The heavy bang line gives the pixie a clear silhouette, and the cropped side stops the rounded top from feeling bulky.
Best for
Straight hair, bold fringe, and anyone who wants a clean pixie with a graphic front.
Maintenance
Trim the bang line often and keep the side detail neat so the cut stays intentional.
Try it yourself for Blunt Bowl Pixie With Bangs
How to DIY
- Dry the fringe line of the blunt bowl pixie with bangs first, directing the bangs into their final fall before the crown cools.
- Mist heat protectant over the front pieces of the blunt bowl pixie with bangs, keeping it off the roots so the fringe does not flatten.
- Pass a mini flat iron over only the bang ends of the blunt bowl pixie with bangs, then curve the last inch in the direction it is meant to sweep.
- Use your fingertips to connect the side pieces of the blunt bowl pixie with bangs around the ear with the smooth fringe line.
- Add light shine spray to the outer layer of the blunt bowl pixie with bangs so the bangs stay visible without turning stiff.
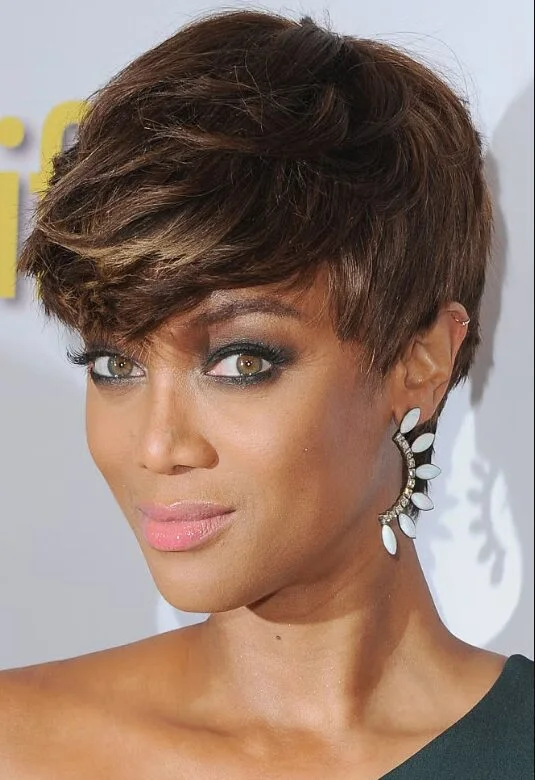
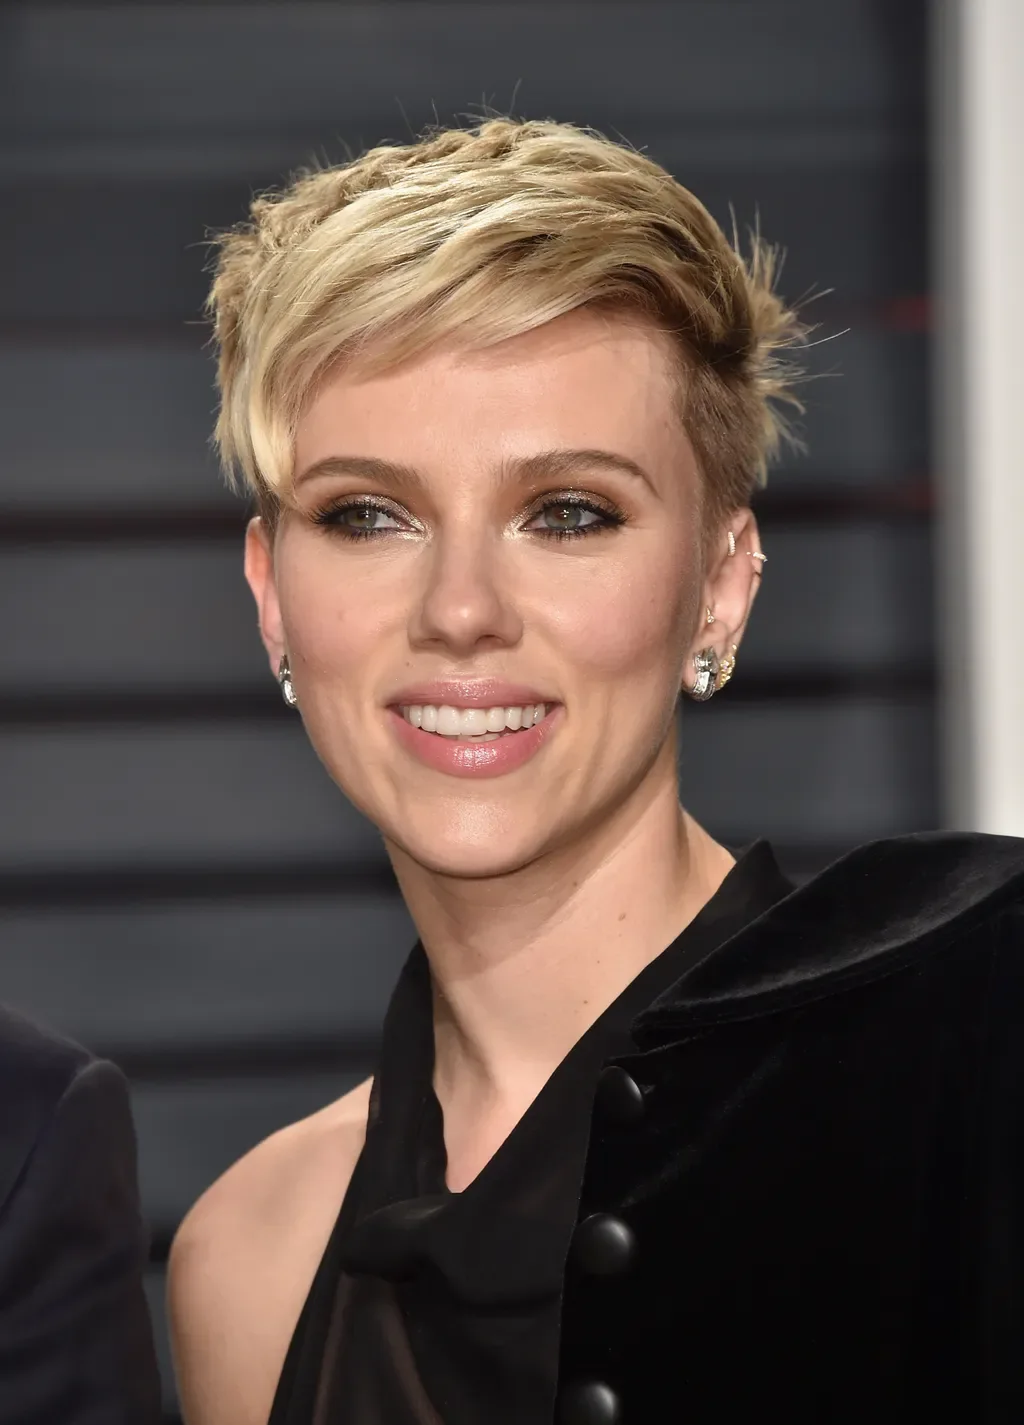
2. Tousled Side Bang Pixie
Description
Long side bangs soften this tousled pixie and give the front more movement. The crown has enough lift to keep the short cut from lying flat.
Why it works
The side fringe frames one eye while the textured top gives the haircut a fuller, more relaxed shape.
Best for
Fine to medium hair, side-swept bangs, and pixies that need volume without stiffness.
Maintenance
Use very little paste so the bangs stay separated but not greasy.
Try it yourself for Tousled Side Bang Pixie
How to DIY
- Lift the crown of the tousled side bang pixie while drying, then let the bangs fall forward before adding product.
- Mist root lift spray at the top of the tousled side bang pixie only, using your fingers to keep the short layers raised near the front sweep.
- Warm texture paste between your fingertips and pinch two or three bang pieces on the tousled side bang pixie instead of coating the whole fringe.
- Use a fine tooth comb to place the shortest front pieces of the tousled side bang pixie, then break them apart slightly for movement.
- Tap any leftover paste onto the sideburn area of the tousled side bang pixie so the short shape keeps a touchable finish.
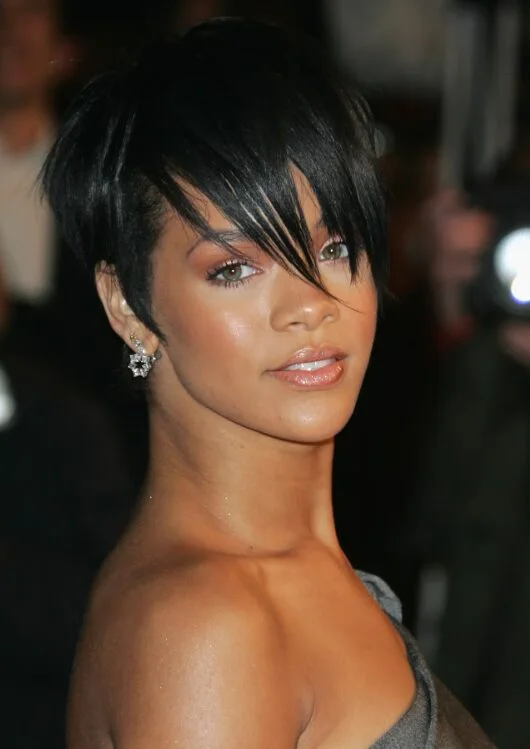
3. Jet Black Piecey Pixie Bangs
Description
This jet black pixie uses piecey bangs to add drama around the eyes. The top is textured, but the sides stay close and controlled.
Why it works
Piecey fringe breaks up the dark color and makes the cut look styled from the front.
Best for
Straight hair, thick fringe, and a sharper pixie that still feels wearable.
Maintenance
Shape the bangs first, then pinch the top pieces only where you want separation.
Try it yourself for Jet Black Piecey Pixie Bangs
How to DIY
- Lift the crown of the jet black piecey pixie bangs while drying, then let the bangs fall forward before adding product.
- Mist root lift spray at the top of the jet black piecey pixie bangs only, using your fingers to keep the short layers raised near the crown lift.
- Warm texture paste between your fingertips and pinch two or three bang pieces on the jet black piecey pixie bangs instead of coating the whole fringe.
- Use a fine tooth comb to place the shortest front pieces of the jet black piecey pixie bangs, then break them apart slightly for movement.
- Tap any leftover paste onto the sideburn area of the jet black piecey pixie bangs so the fringe keeps its bend through the day.
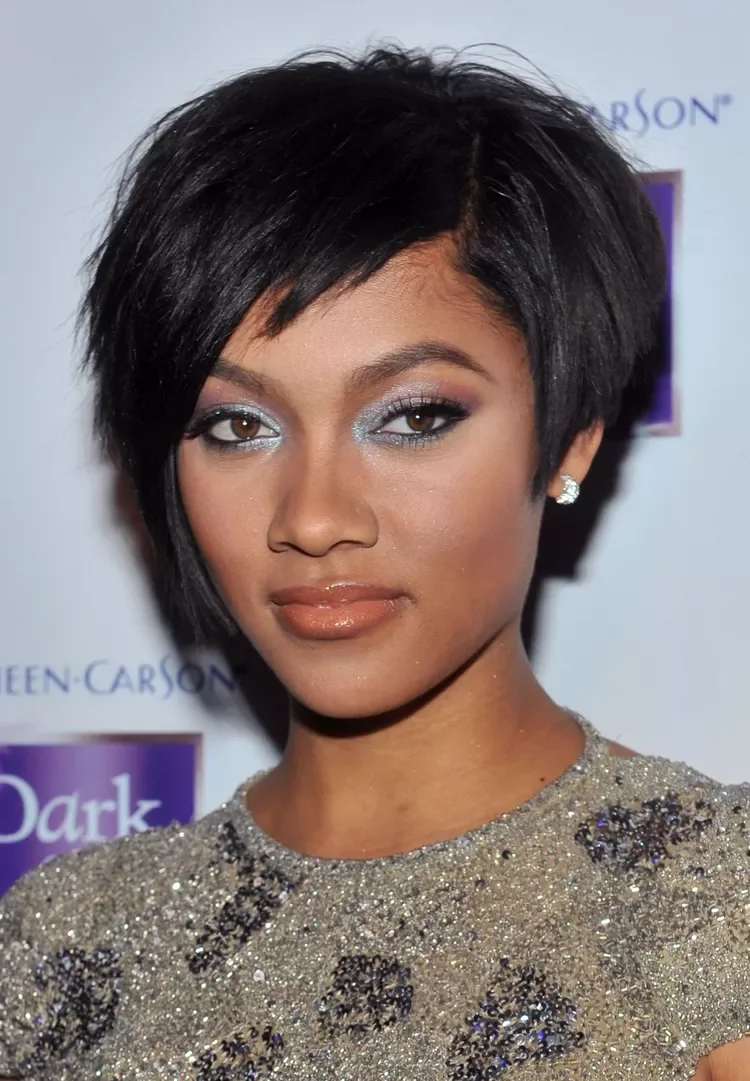
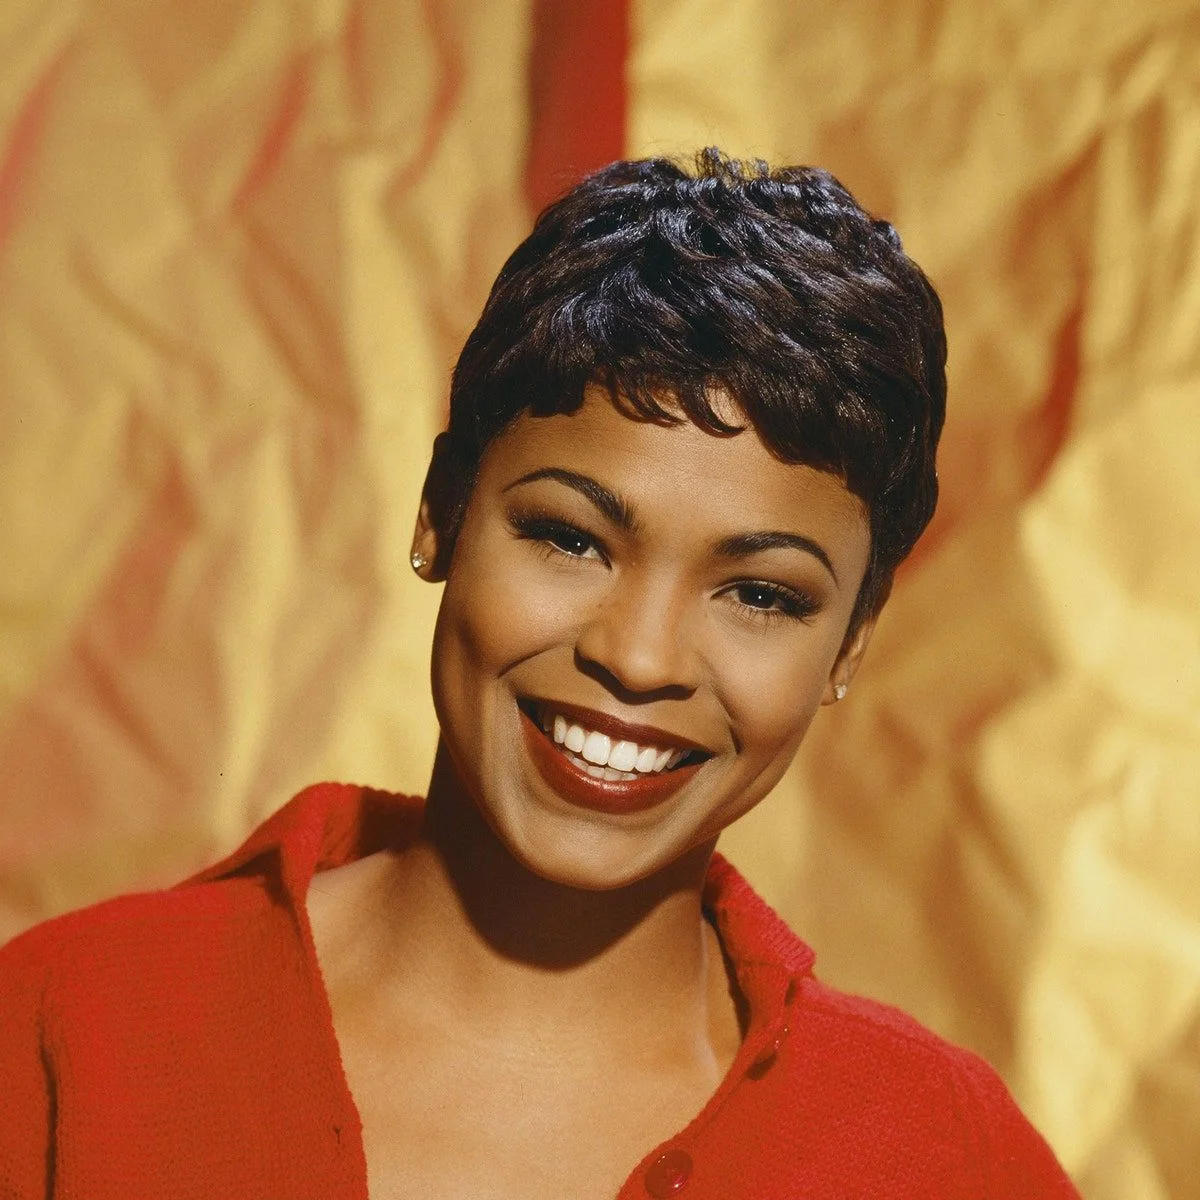
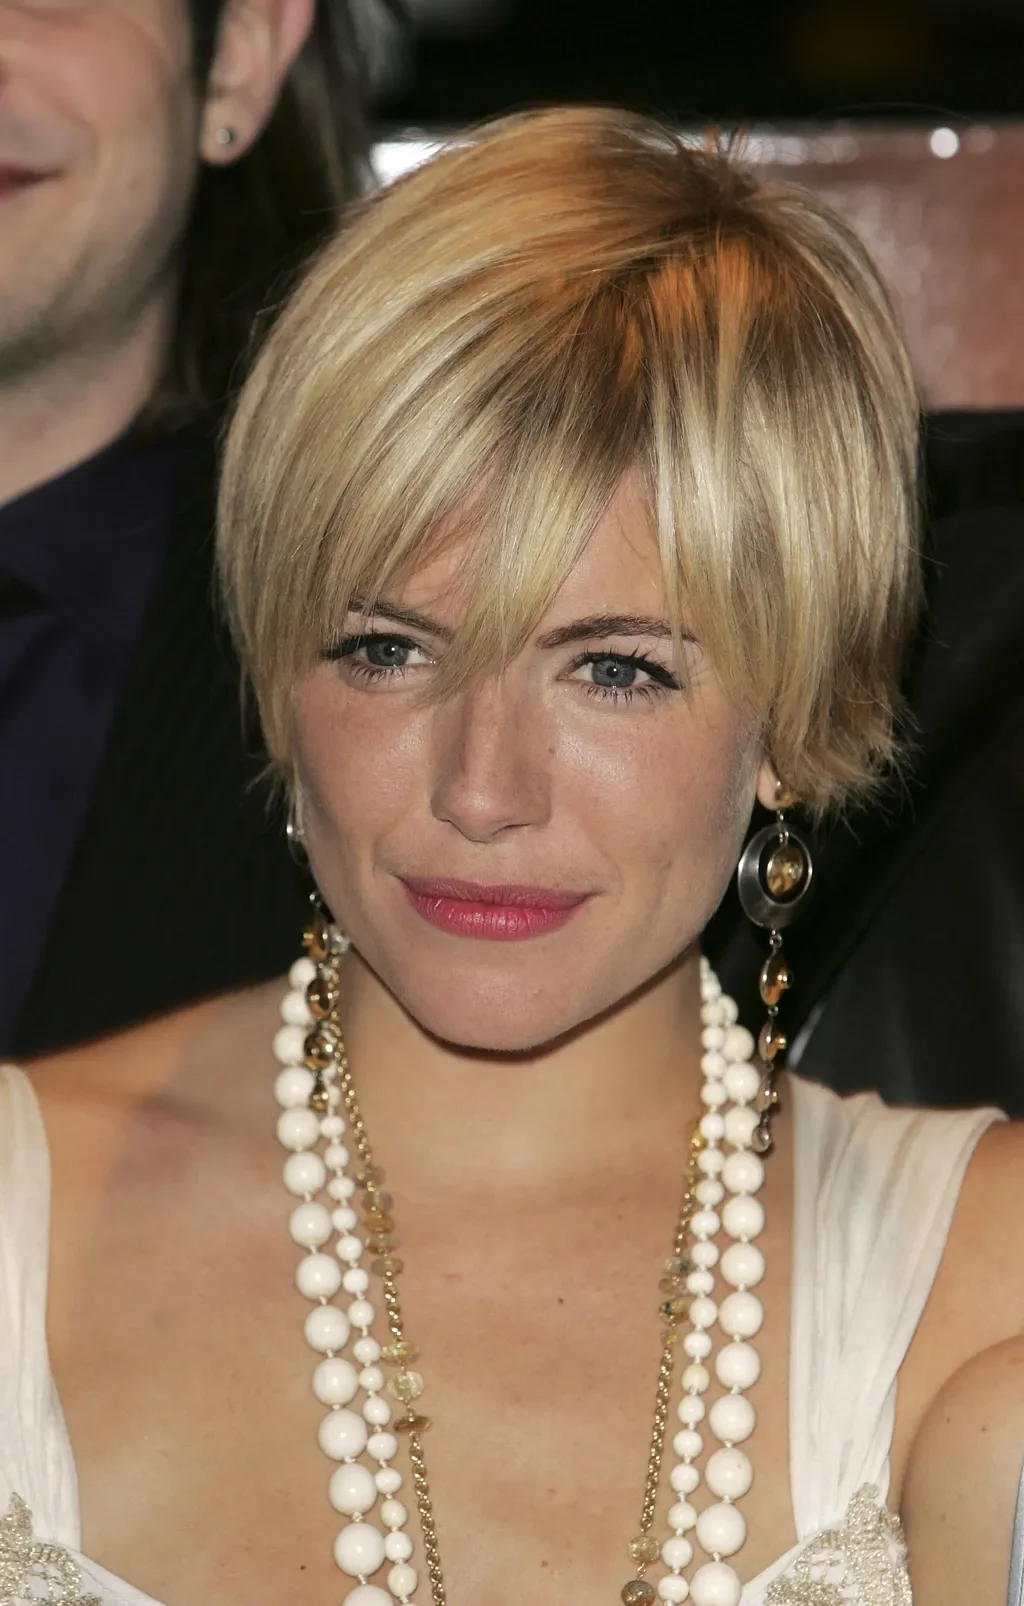
4. Soft Side Fringe Pixie
Description
A soft side fringe gives this pixie a smooth, face-framing finish. The layers are short enough to stay neat but long enough to move.
Why it works
The fringe angles across the forehead, which makes the pixie feel softer than a fully exposed crop.
Best for
Straight to slightly wavy hair and readers who want polished short hair with bangs.
Maintenance
Brush the fringe into place while drying and mist the top with light hairspray.
Try it yourself for Soft Side Fringe Pixie
How to DIY
- Brush the bangs of the soft side fringe pixie into place while they are still slightly damp, then dry the crown afterward.
- Use a small round brush at the side taper, rolling the fringe just enough to create bend without a bubble shape.
- Mist dry texture spray under the top layer of the soft side fringe pixie, not directly on the forehead pieces.
- Arrange the side fringe of the soft side fringe pixie with your fingers so the short layers frame the eyes naturally.
- Lock the front of the soft side fringe pixie with light hairspray from a distance so the pixie outline still looks clean.
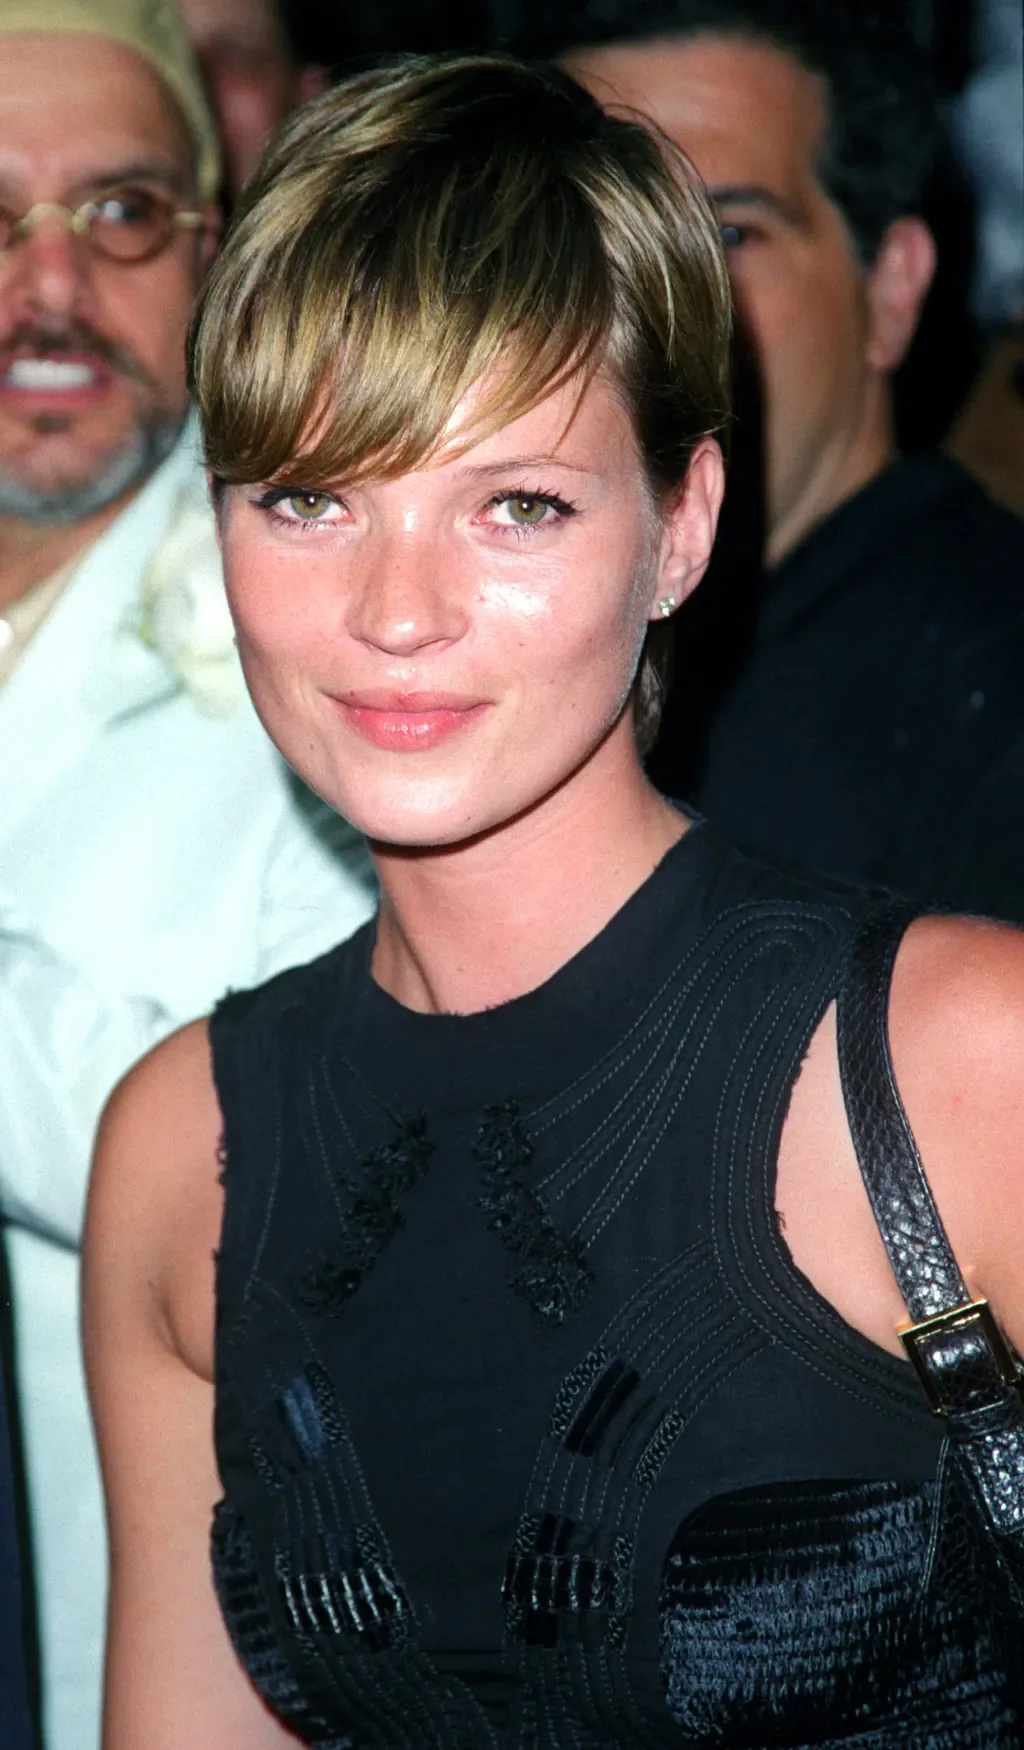
5. Long Side Bang Pixie
Description
This pixie keeps one side longer so the bangs sweep across the face. It is short in shape but still has a glamorous front.
Why it works
The longer bang panel adds movement and makes the pixie easier to wear for anyone nervous about going very cropped.
Best for
Thicker straight hair, sleek finishes, and side-bang lovers.
Maintenance
Smooth the front panel with heat protectant and avoid flattening the crown.
Try it yourself for Long Side Bang Pixie
How to DIY
- Dry the hairline detail of the long side bang pixie first, directing the bangs into their final fall before the crown cools.
- Mist heat protectant over the front pieces of the long side bang pixie, keeping it off the roots so the fringe does not flatten.
- Pass a mini flat iron over only the bang ends of the long side bang pixie, then curve the last inch in the direction it is meant to sweep.
- Use your fingertips to connect the side pieces of the long side bang pixie around the ear with the smooth fringe line.
- Add light shine spray to the outer layer of the long side bang pixie so the front reads polished but not heavy.
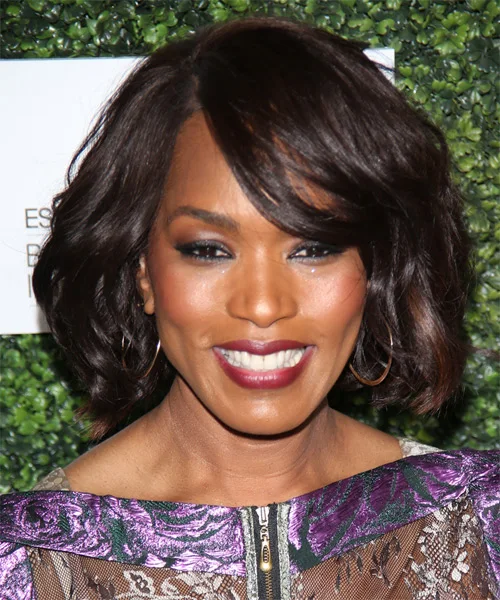
6. Wavy Side Bang Pixie
Description
Soft waves give this side bang pixie a fuller outline. The bangs curve across the forehead instead of sitting flat.
Why it works
The wave pattern adds width near the cheekbones while the cropped length keeps the haircut light.
Best for
Wavy hair, mature hair, and anyone who wants a softer pixie with bangs.
Maintenance
Set the fringe with a small round brush and keep dry texture spray away from the roots.
Try it yourself for Wavy Side Bang Pixie
How to DIY
- Brush the bangs of the wavy side bang pixie into place while they are still slightly damp, then dry the crown afterward.
- Use a small round brush at the top texture, rolling the fringe just enough to create bend without a bubble shape.
- Mist dry texture spray under the top layer of the wavy side bang pixie, not directly on the forehead pieces.
- Arrange the side fringe of the wavy side bang pixie with your fingers so the short layers frame the eyes naturally.
- Lock the front of the wavy side bang pixie with light hairspray from a distance so the bangs stay visible without turning stiff.
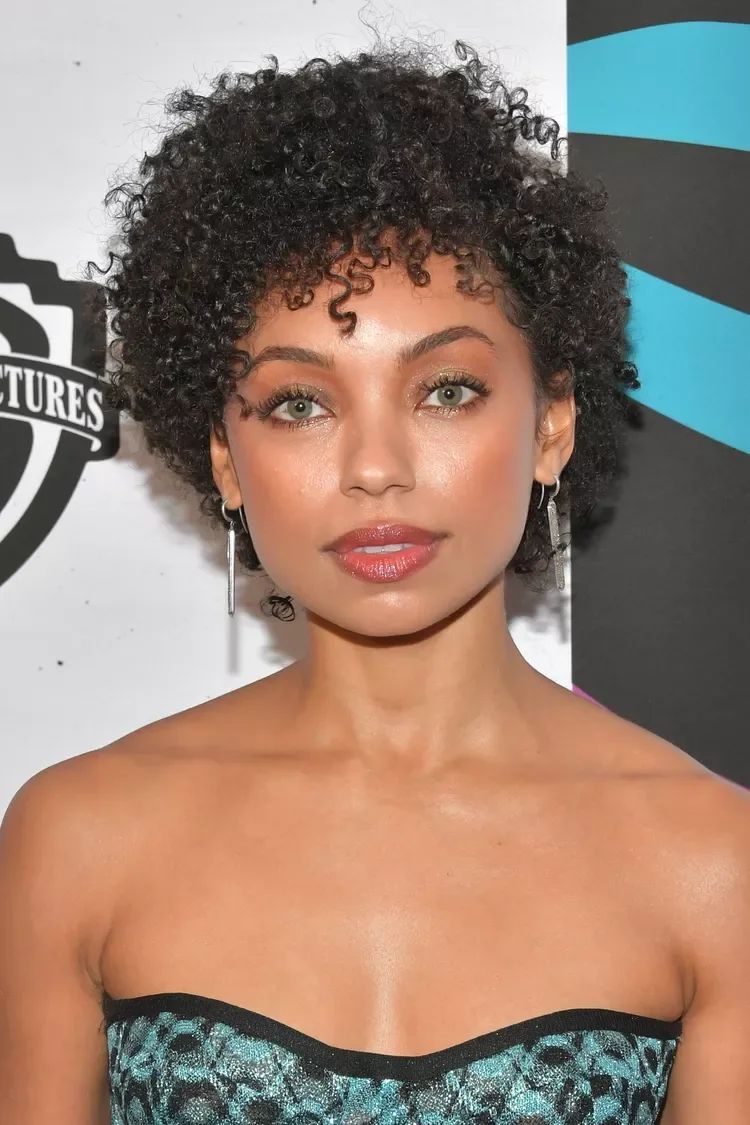
7. Curly Pixie Fringe
Description
This curly pixie lets the fringe bend naturally over the forehead. The sides stay short, which helps the curls read as pixie length.
Why it works
Defined curls create texture without needing heavy styling, and the short perimeter keeps the shape fresh.
Best for
Curly hair, soft fringe, and pixie cuts that need natural movement.
Maintenance
Scrunch curl cream through the fringe and dry gently so the curls do not puff out unevenly.
Try it yourself for Curly Pixie Fringe
How to DIY
- Blot the curly pixie fringe gently after washing so the curls in the bang area stay grouped together.
- Work leave-in conditioner through the front curls of the curly pixie fringe first, then smooth the remaining product over the crown.
- Press curl cream into the fringe of the curly pixie fringe curl by curl, avoiding the scalp so the pixie does not lose lift.
- Use a diffuser on low air around the bang ends, stopping before the curls become fuzzy.
- Separate only the bang curls that block the eyes so the curly pixie fringe keeps its natural shape.
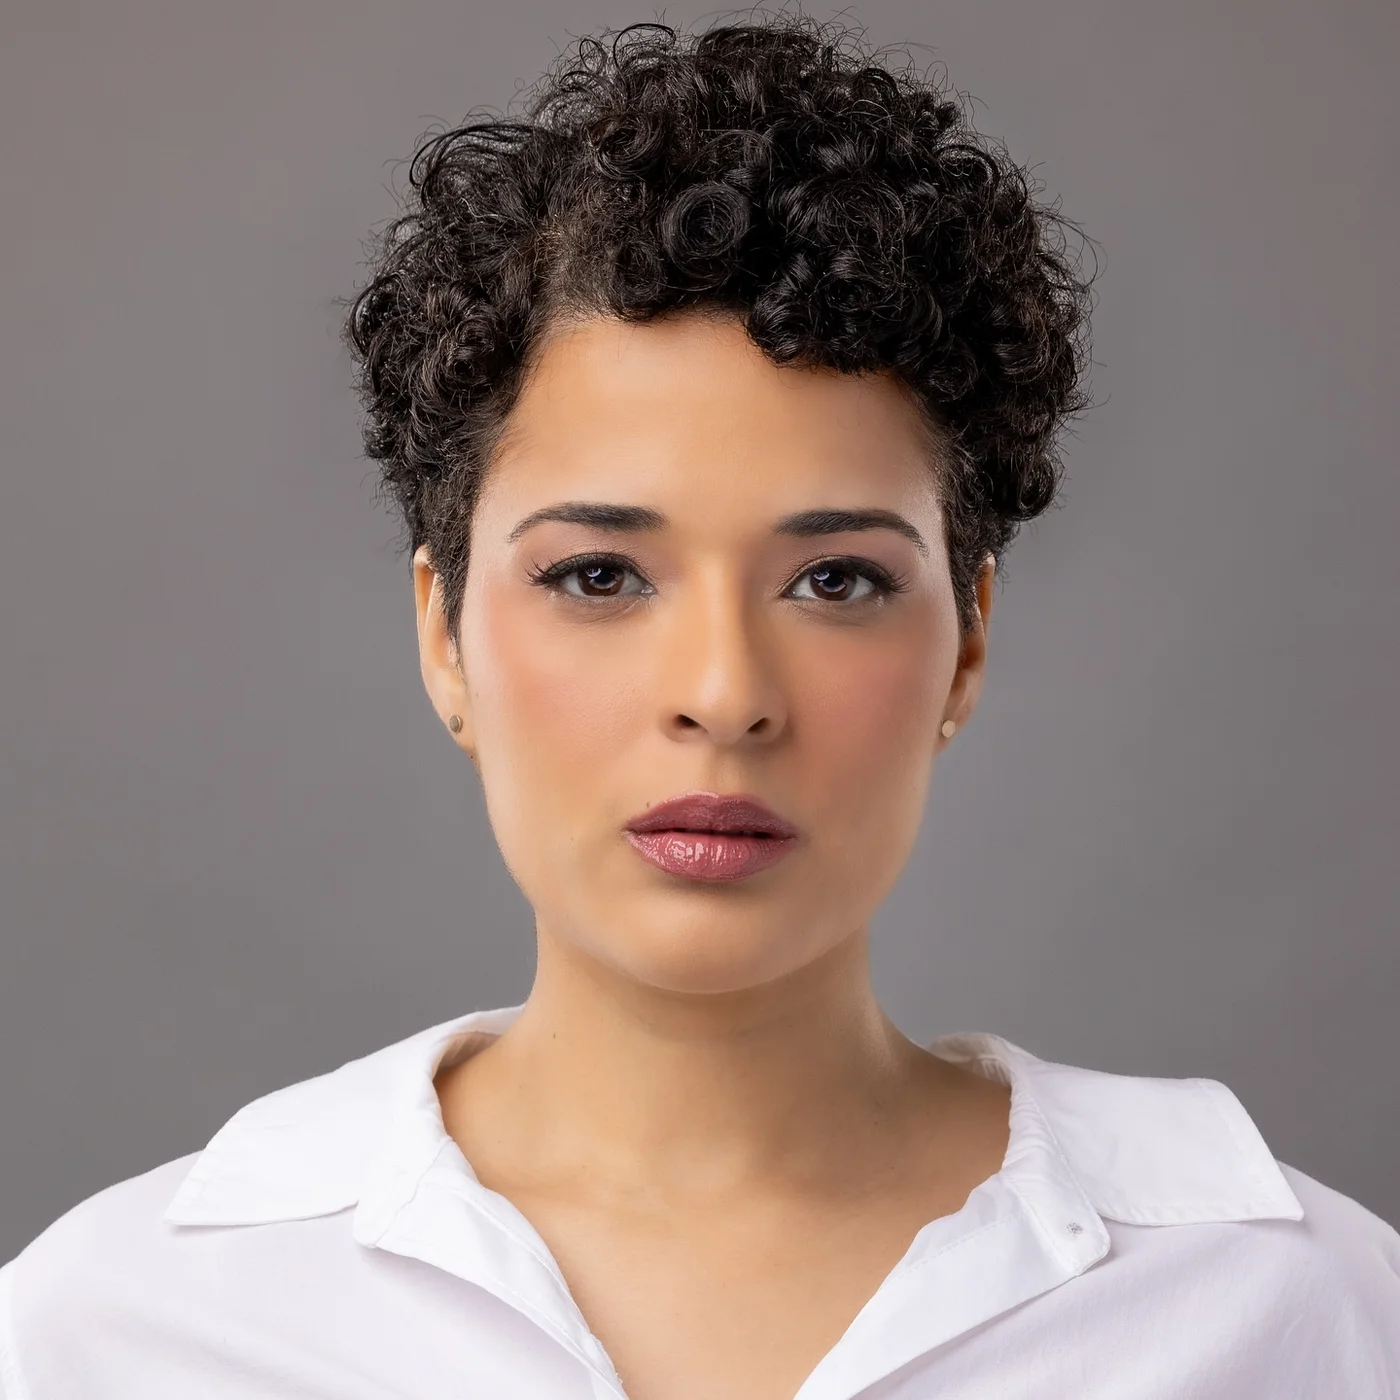
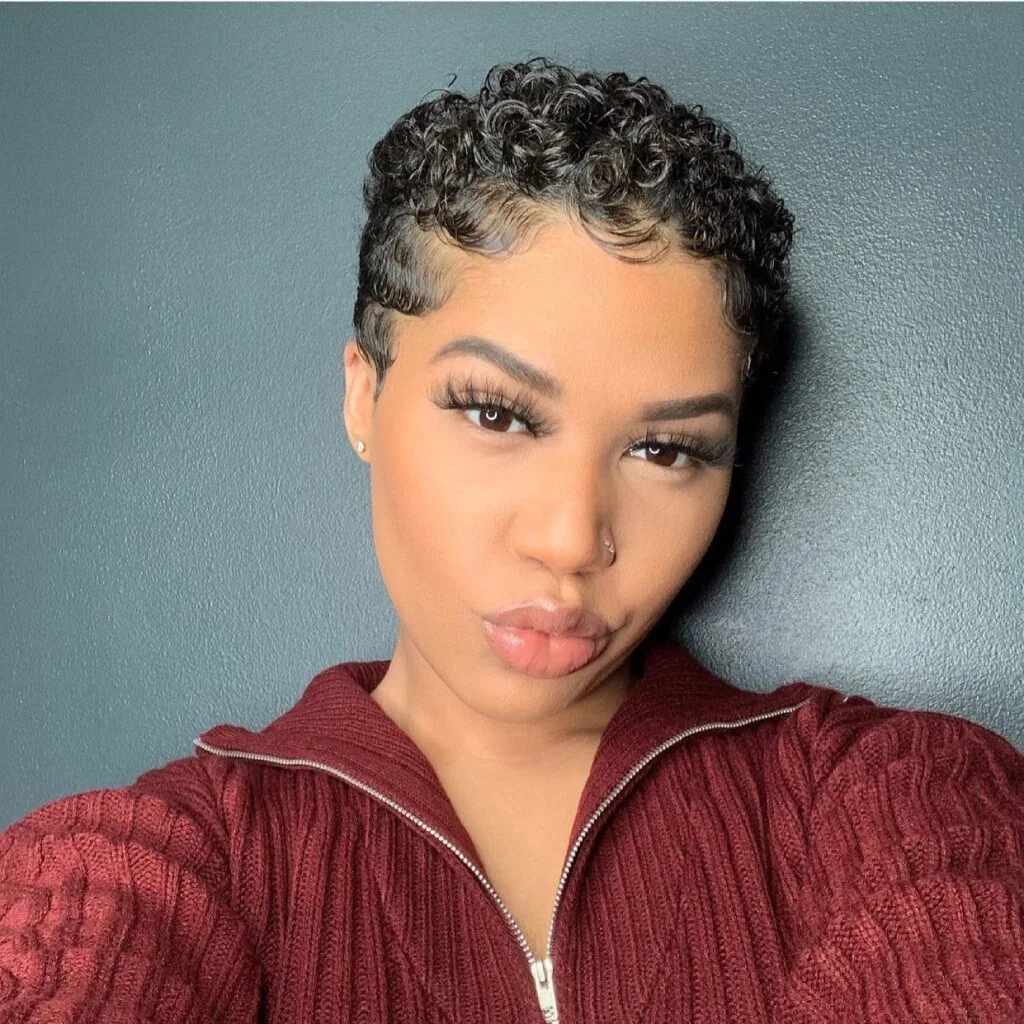
8. Short Curly Pixie Bangs
Description
Small curls sit forward in this cropped pixie, creating a soft bang effect. The sides are neat enough to keep the style clean.
Why it works
The curls make the fringe feel light and textured while the short sides define the haircut.
Best for
Curly short hair and low-bulk pixie shapes with visible bangs.
Maintenance
Refresh the front curls with leave-in conditioner before touching the crown.
Try it yourself for Short Curly Pixie Bangs
How to DIY
- Blot the short curly pixie bangs gently after washing so the curls in the bang area stay grouped together.
- Work leave-in conditioner through the front curls of the short curly pixie bangs first, then smooth the remaining product over the crown.
- Press curl cream into the fringe of the short curly pixie bangs curl by curl, avoiding the scalp so the pixie does not lose lift.
- Use a diffuser on low air around the nape outline, stopping before the curls become fuzzy.
- Separate only the bang curls that block the eyes so the short curly pixie bangs keeps its natural shape.
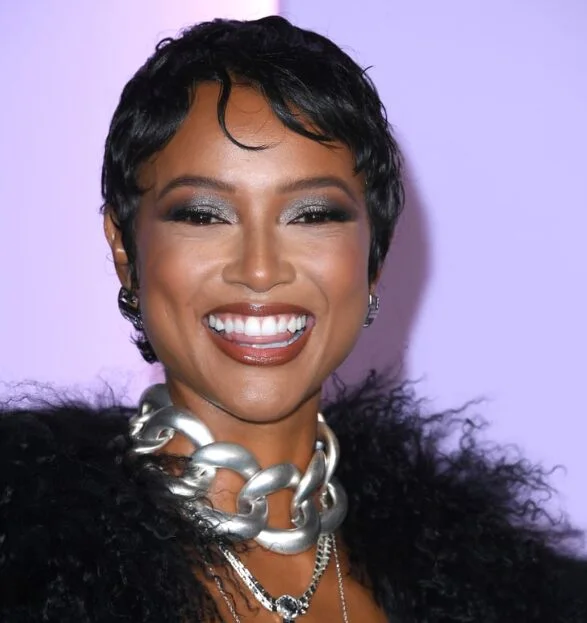
9. Silver Curly Pixie With Bangs
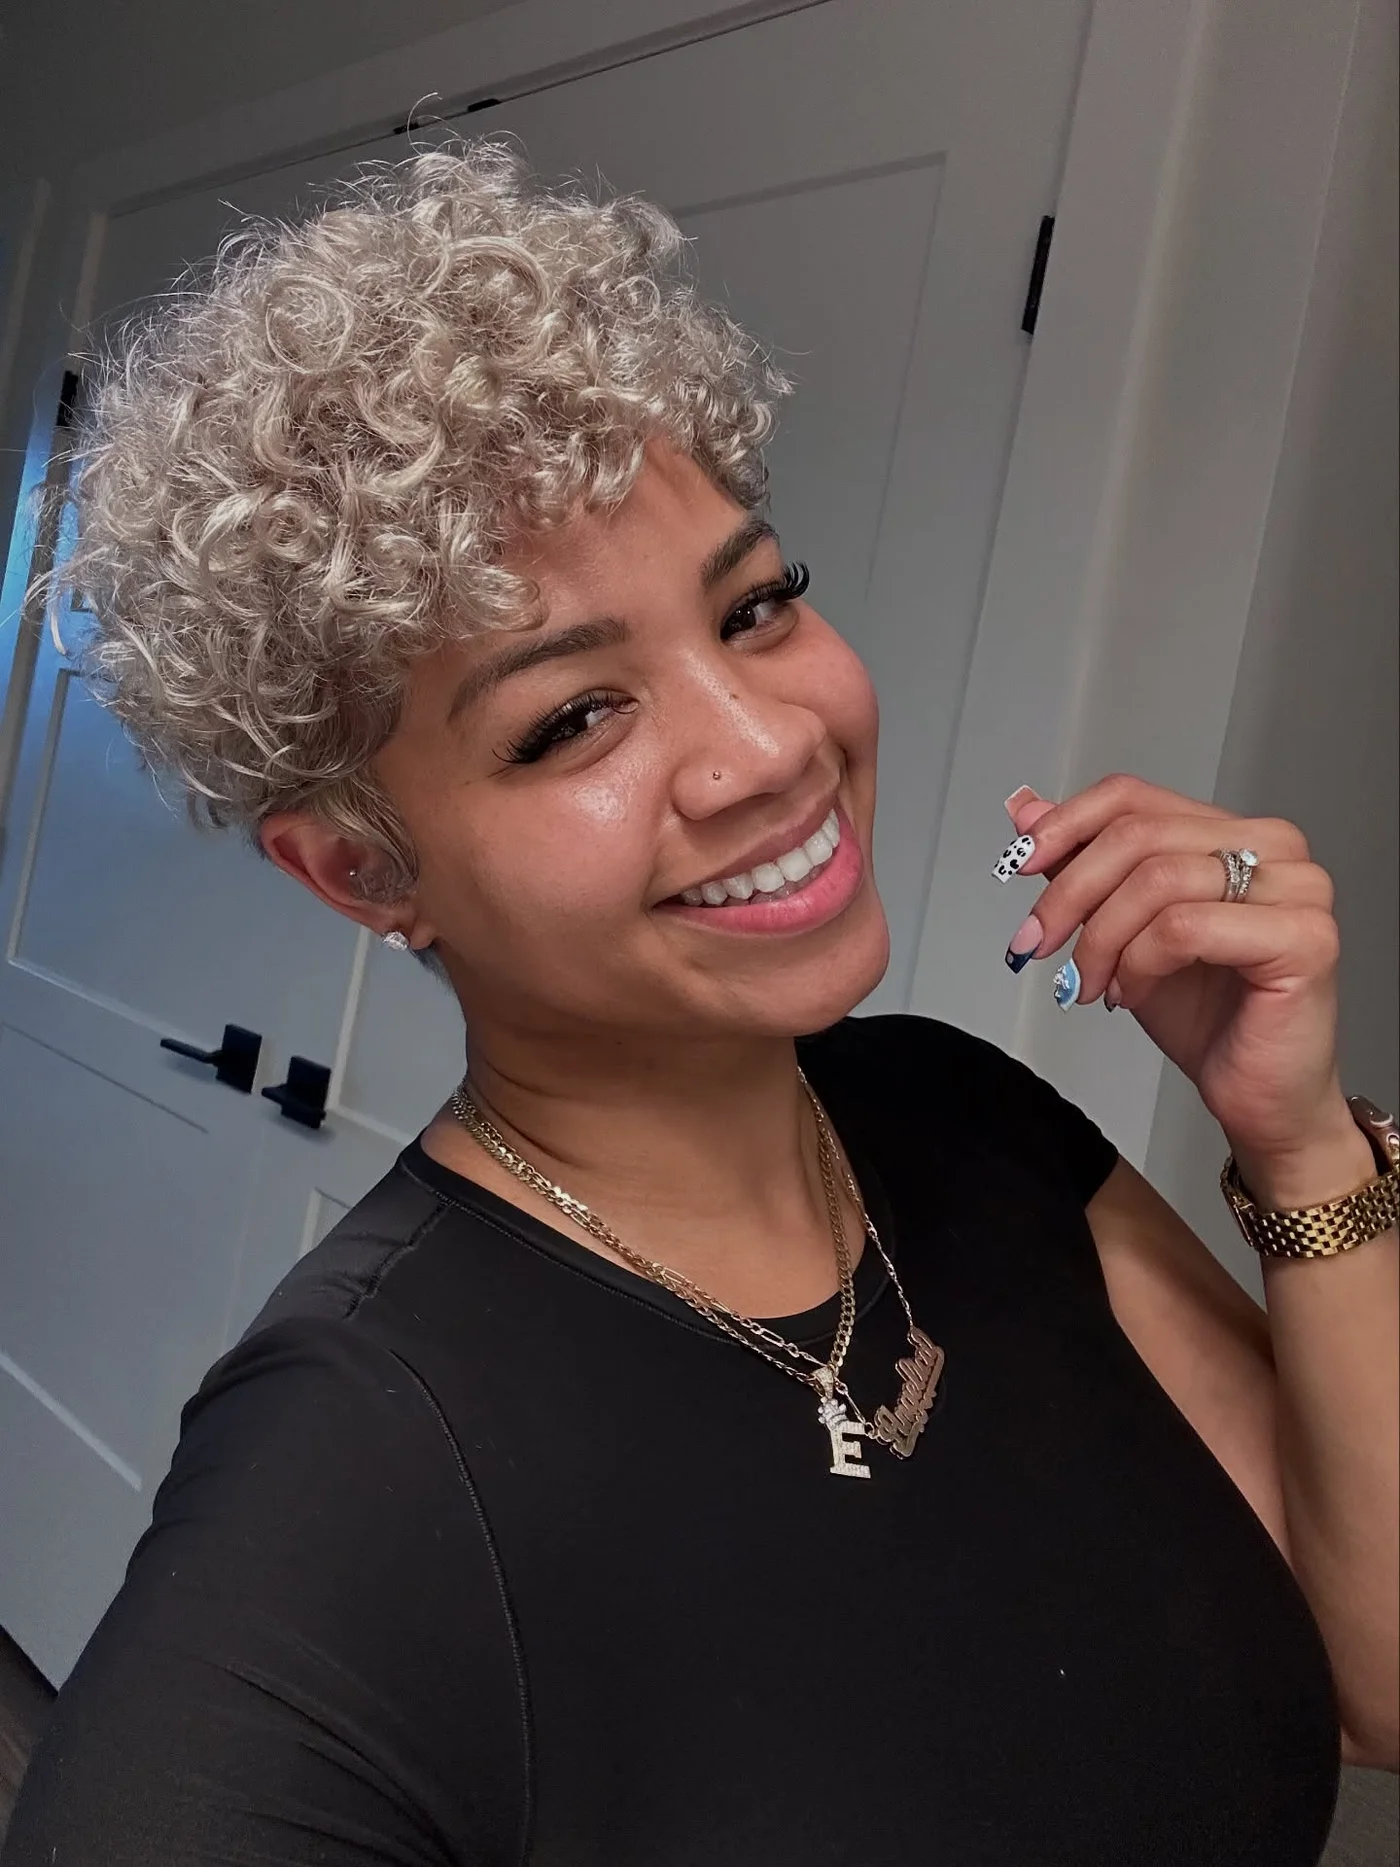
Description
Silver curls give this pixie a lively shape, with short bangs falling softly toward the forehead. The color makes the texture easy to see.
Why it works
The lifted curls add volume while the short fringe keeps the front youthful and open.
Best for
Gray or silver hair, natural curl, and short cuts that need bounce.
Maintenance
Diffuse the top lightly and use curl cream only through the visible curls.
Try it yourself for Silver Curly Pixie With Bangs
How to DIY
- Blot the silver curly pixie with bangs gently after washing so the curls in the bang area stay grouped together.
- Work leave-in conditioner through the front curls of the silver curly pixie with bangs first, then smooth the remaining product over the crown.
- Press curl cream into the fringe of the silver curly pixie with bangs curl by curl, avoiding the scalp so the pixie does not lose lift.
- Use a diffuser on low air around the short layers, stopping before the curls become fuzzy.
- Separate only the bang curls that block the eyes so the silver curly pixie with bangs keeps its natural shape.
10. Blonde Coily Pixie Fringe
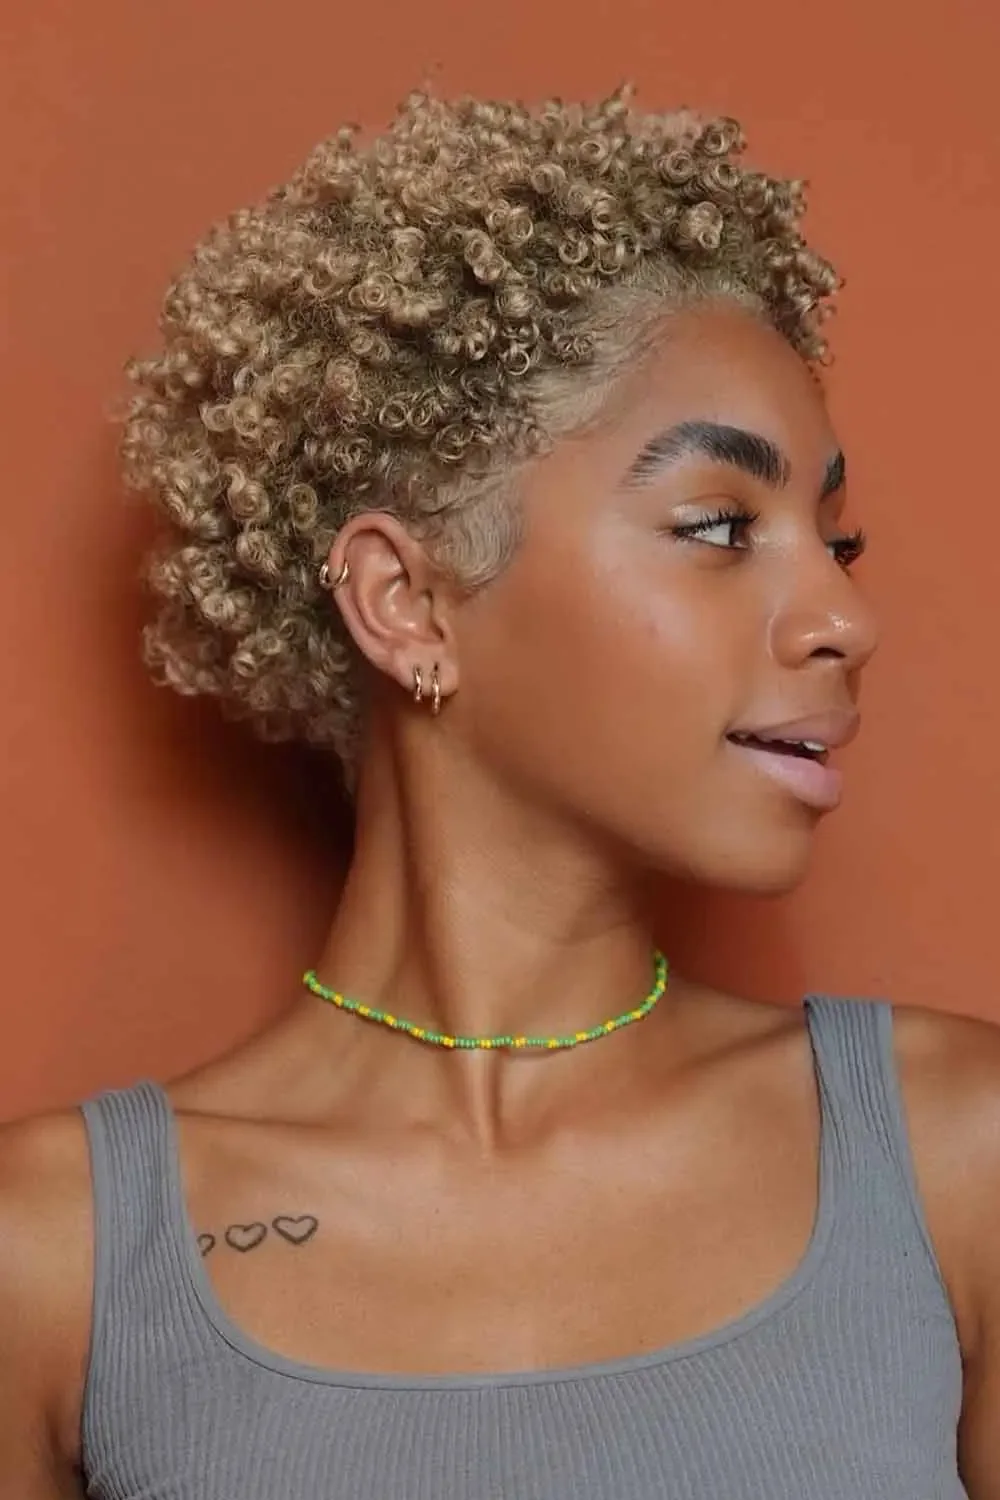
Description
This blonde coily pixie has a short fringe that curves forward at the hairline. The sides are tapered so the texture stays focused on top.
Why it works
The cropped shape highlights the curls while the fringe softens the face.
Best for
Coily texture, blonde color, and tapered pixie cuts with movement.
Maintenance
Use curl defining cream through the top and wrap the edges gently at night.
Try it yourself for Blonde Coily Pixie Fringe
How to DIY
- Dampen the front of the blonde coily pixie fringe lightly, then press the coils forward where the bang shape should sit.
- Use curl defining cream on the top coils of the blonde coily pixie fringe first, keeping the tapered side cleaner than the fringe.
- Smooth a small amount of edge control around the blonde coily pixie fringe hairline only where the pixie needs polish.
- Tie a satin scarf over the front for a few minutes if the face frame needs a more controlled finish.
- Lift the coils with your fingertips before leaving so the blonde coily pixie fringe keeps softness at the bangs.
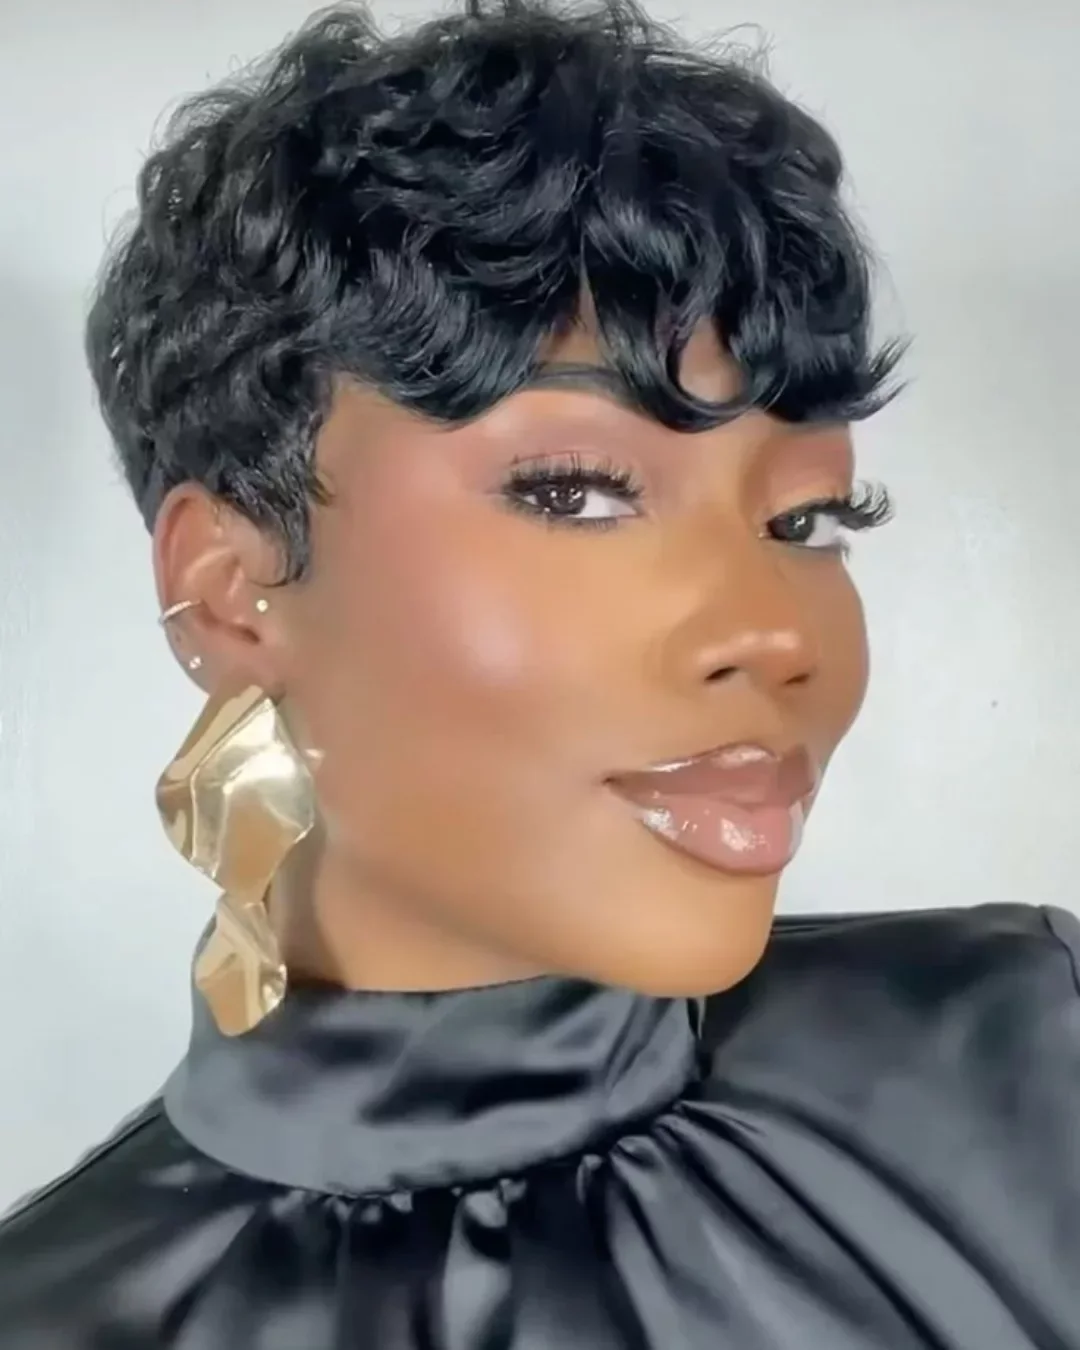
11. Deep Curly Pixie Bangs
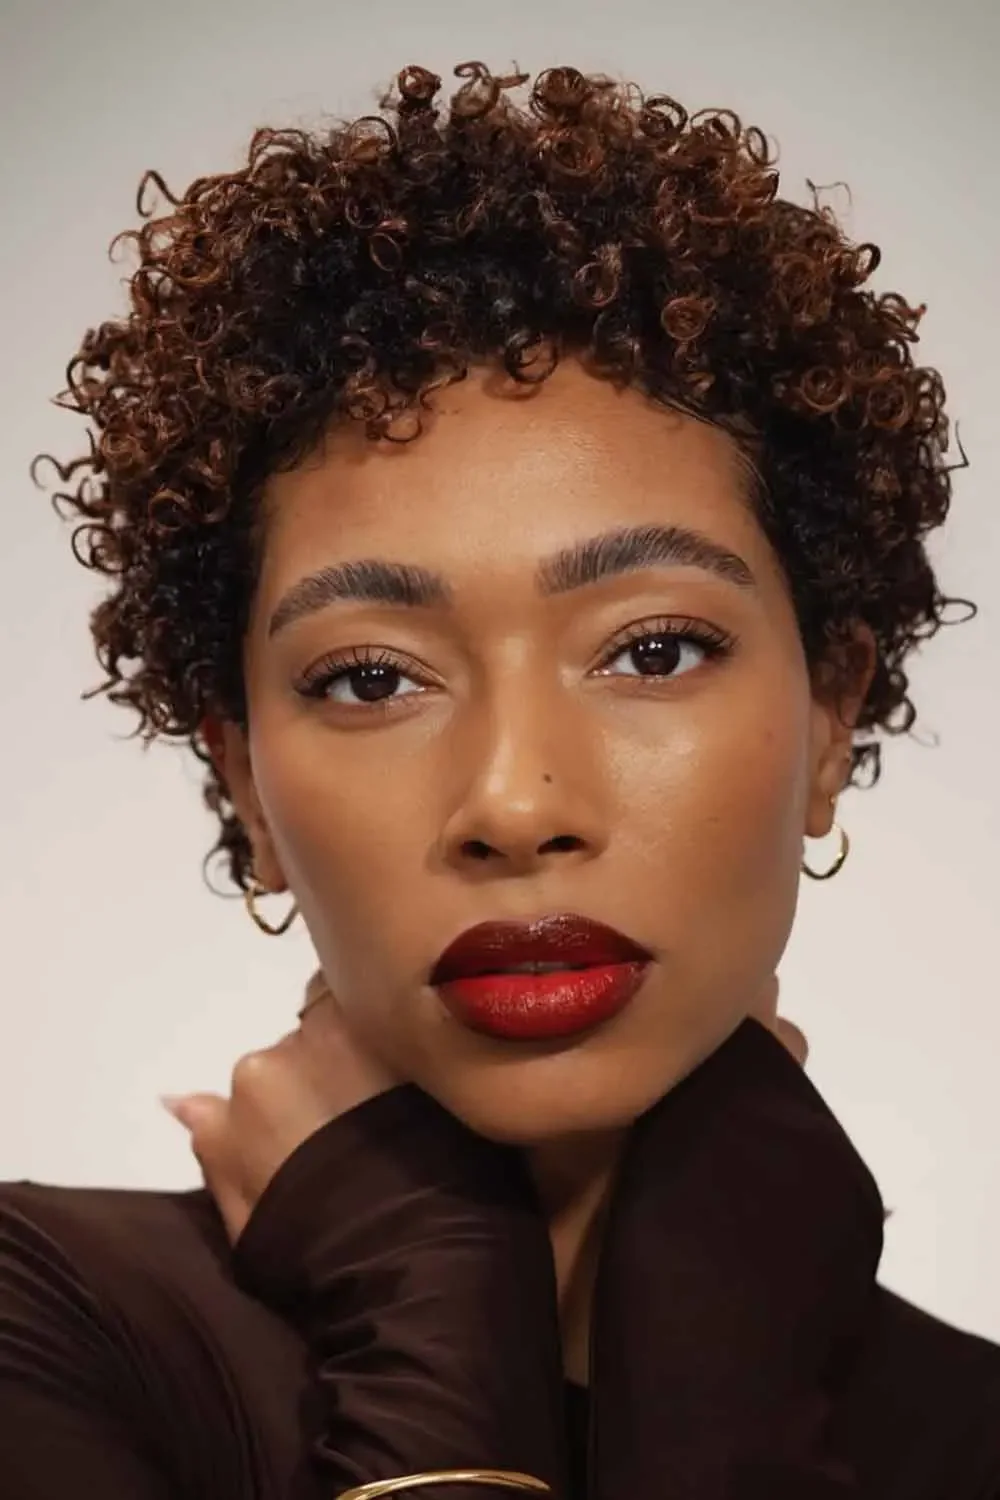
Description
A rounded curly top gives this pixie strong shape, while the short bangs frame the eyes. The style feels full without extra length.
Why it works
The curl pattern builds volume naturally, and the bangs keep the face from looking bare.
Best for
Curly hair, short rounded silhouettes, and bold makeup looks.
Maintenance
Apply leave-in conditioner to the front first, then define the crown with a diffuser.
Try it yourself for Deep Curly Pixie Bangs
How to DIY
- Blot the deep curly pixie bangs gently after washing so the curls in the bang area stay grouped together.
- Work leave-in conditioner through the front curls of the deep curly pixie bangs first, then smooth the remaining product over the crown.
- Press curl cream into the fringe of the deep curly pixie bangs curl by curl, avoiding the scalp so the pixie does not lose lift.
- Use a diffuser on low air around the fringe line, stopping before the curls become fuzzy.
- Separate only the bang curls that block the eyes so the deep curly pixie bangs keeps its natural shape.
12. Golden Curly Pixie Bangs
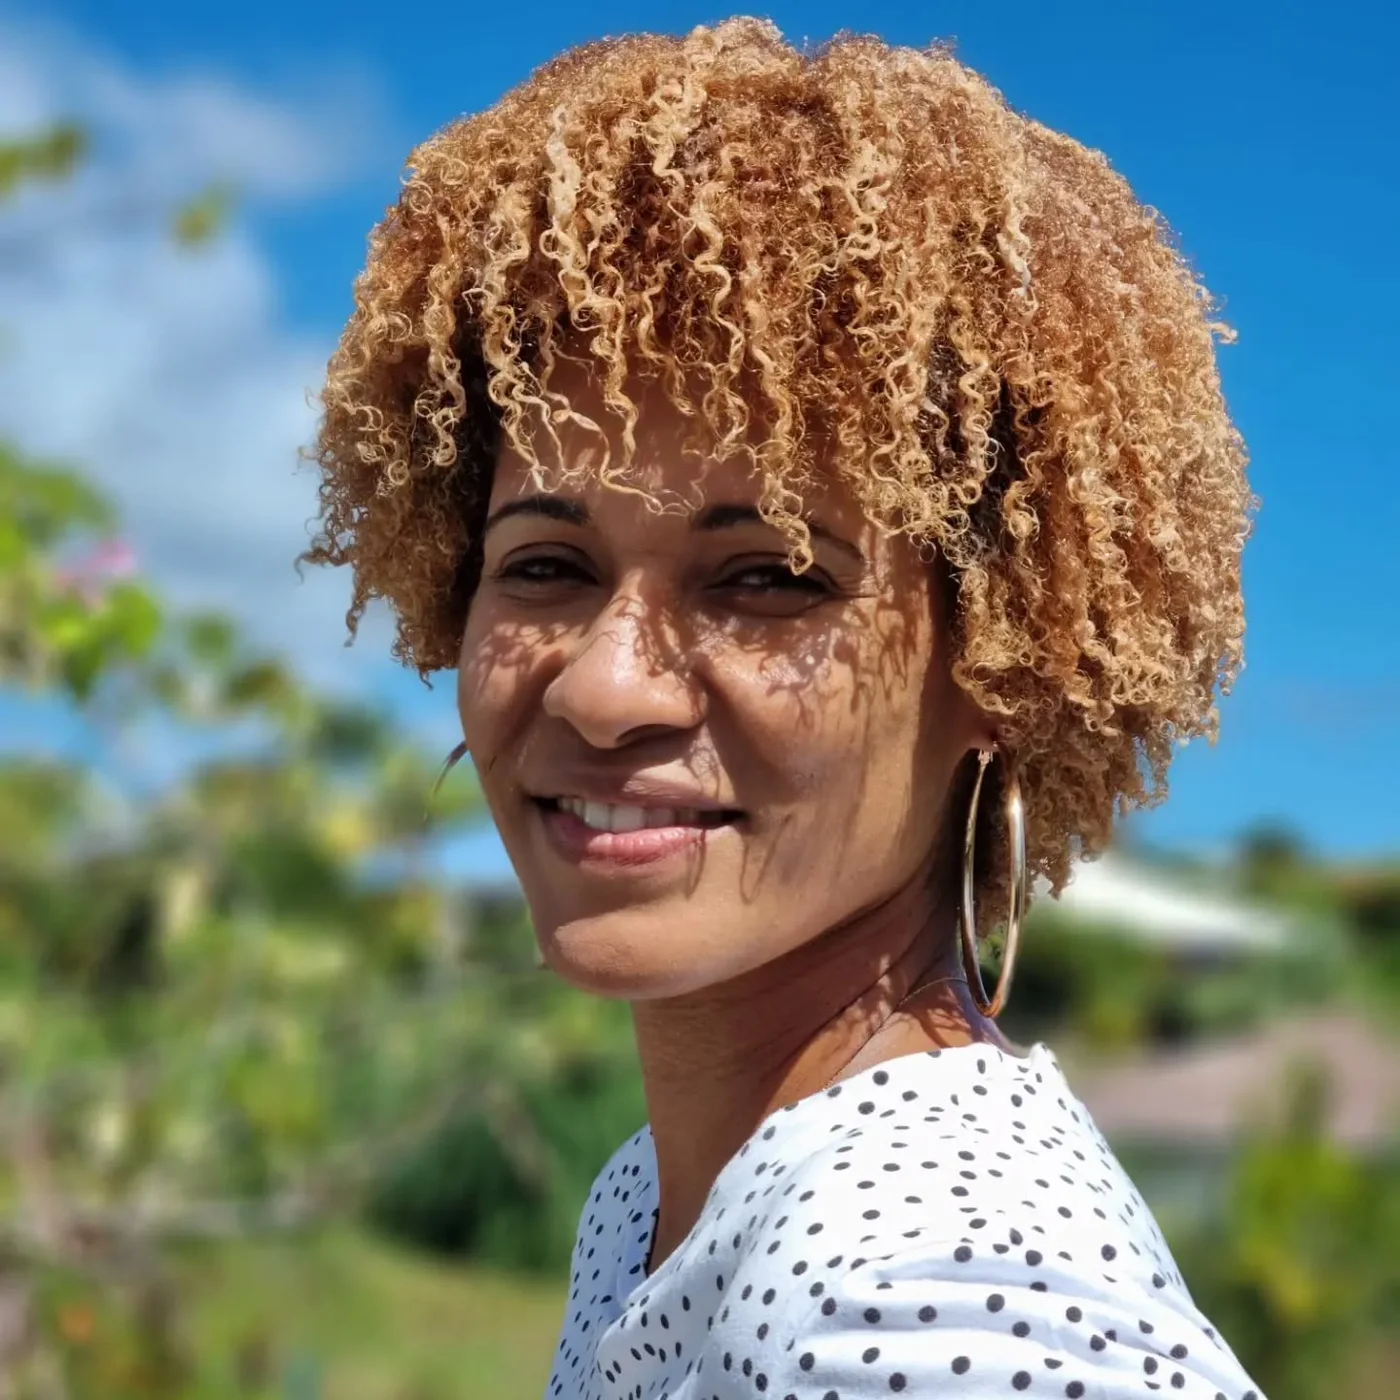
Description
Golden curls create a sunny pixie with soft bang movement at the front. The length is short, but the curls keep it full.
Why it works
The fringe blends into the side curls, so the pixie looks relaxed instead of rigid.
Best for
Loose curls, highlighted color, and soft pixie cuts with bangs.
Maintenance
Use curl cream on the ends and let the front curls fall naturally.
Try it yourself for Golden Curly Pixie Bangs
How to DIY
- Blot the golden curly pixie bangs gently after washing so the curls in the bang area stay grouped together.
- Work leave-in conditioner through the front curls of the golden curly pixie bangs first, then smooth the remaining product over the crown.
- Press curl cream into the fringe of the golden curly pixie bangs curl by curl, avoiding the scalp so the pixie does not lose lift.
- Use a diffuser on low air around the front sweep, stopping before the curls become fuzzy.
- Separate only the bang curls that block the eyes so the golden curly pixie bangs keeps its natural shape.
13. Sculpted Short Pixie Bangs
Description
This sculpted pixie uses molded bangs and a clean hairline for a polished finish. The short length keeps the style close to the head.
Why it works
The shaped fringe gives the crop detail, and the controlled sides keep the look sleek.
Best for
Short natural hair, sculpted styling, and pixies with a dressed-up finish.
Maintenance
Use a light edge control only at the hairline and avoid coating the whole top.
Try it yourself for Sculpted Short Pixie Bangs
How to DIY
- Comb the sculpted short pixie bangs forward first, deciding where the sculpted bang curve should sit before adding wax.
- Use styling wax on the visible curves of the sculpted short pixie bangs fringe, keeping the product away from the fuller crown.
- Detail the sculpted short pixie bangs hairline with an edge brush so the short side looks deliberate beside the bangs.
- Tap texture powder near the crown lift if the pixie needs lift after the molded front is set.
- Check the nape and side outline of the sculpted short pixie bangs last so the fringe keeps its bend through the day.
14. Micro Fringe Pixie Crop
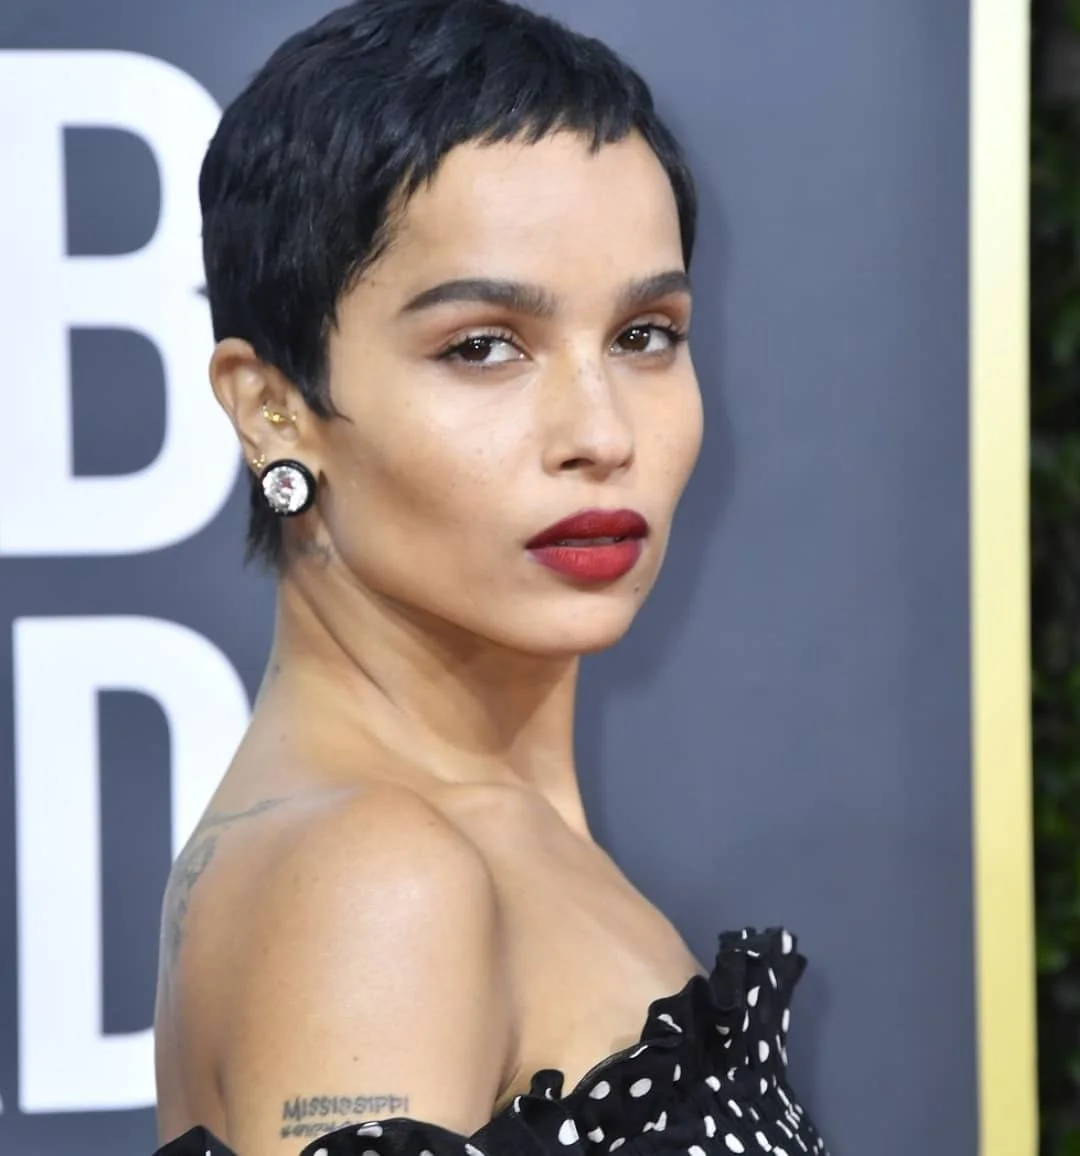
Description
This very short pixie keeps the fringe tiny and close to the forehead. The shape is minimal but still has a clear bang detail.
Why it works
Micro fringe opens the face and gives a short crop a more editorial edge.
Best for
Fine straight hair, bold short cuts, and low-bulk pixies.
Maintenance
Smooth the tiny fringe with a mini iron only if it bends out of place.
Try it yourself for Micro Fringe Pixie Crop
How to DIY
- Dry the side taper of the micro fringe pixie crop first, directing the bangs into their final fall before the crown cools.
- Mist heat protectant over the front pieces of the micro fringe pixie crop, keeping it off the roots so the fringe does not flatten.
- Pass a mini flat iron over only the bang ends of the micro fringe pixie crop, then curve the last inch in the direction it is meant to sweep.
- Use your fingertips to connect the side pieces of the micro fringe pixie crop around the ear with the smooth fringe line.
- Add light shine spray to the outer layer of the micro fringe pixie crop so the pixie outline still looks clean.
15. Glossy Curled Pixie Bangs
Description
Glossy curled bangs make this pixie feel dressed up. The short texture around the front keeps the look playful but controlled.
Why it works
The curled fringe creates a focal point, while the cropped sides keep the style from becoming heavy.
Best for
Event styling, short hair with shine, and pixies that need a glam finish.
Maintenance
Use light hairspray after shaping the front curl so it stays soft.
Try it yourself for Glossy Curled Pixie Bangs
How to DIY
- Brush the bangs of the glossy curled pixie bangs into place while they are still slightly damp, then dry the crown afterward.
- Use a small round brush at the hairline detail, rolling the fringe just enough to create bend without a bubble shape.
- Mist dry texture spray under the top layer of the glossy curled pixie bangs, not directly on the forehead pieces.
- Arrange the side fringe of the glossy curled pixie bangs with your fingers so the short layers frame the eyes naturally.
- Lock the front of the glossy curled pixie bangs with light hairspray from a distance so the front reads polished but not heavy.
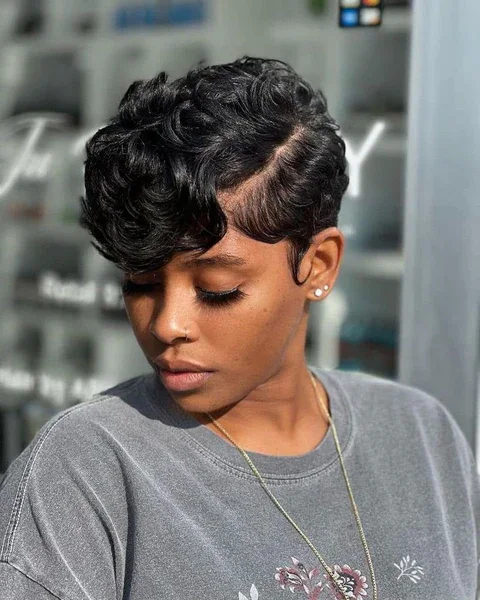
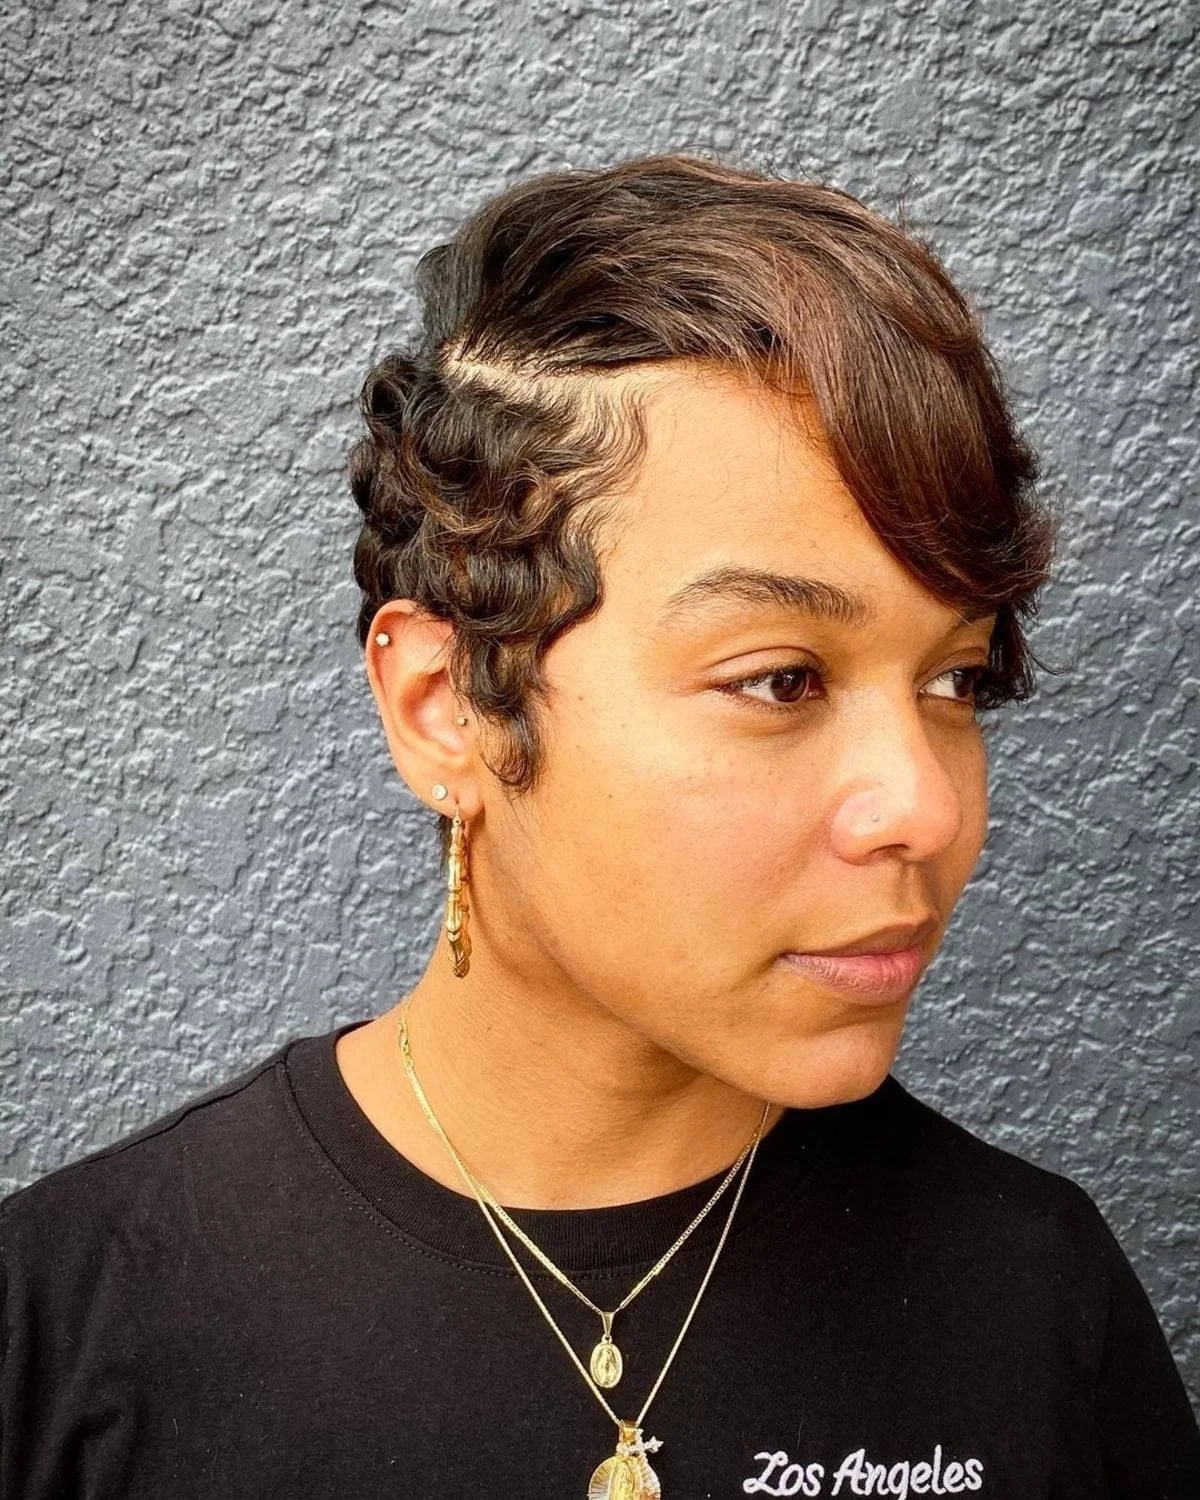
16. Vintage Finger Wave Pixie
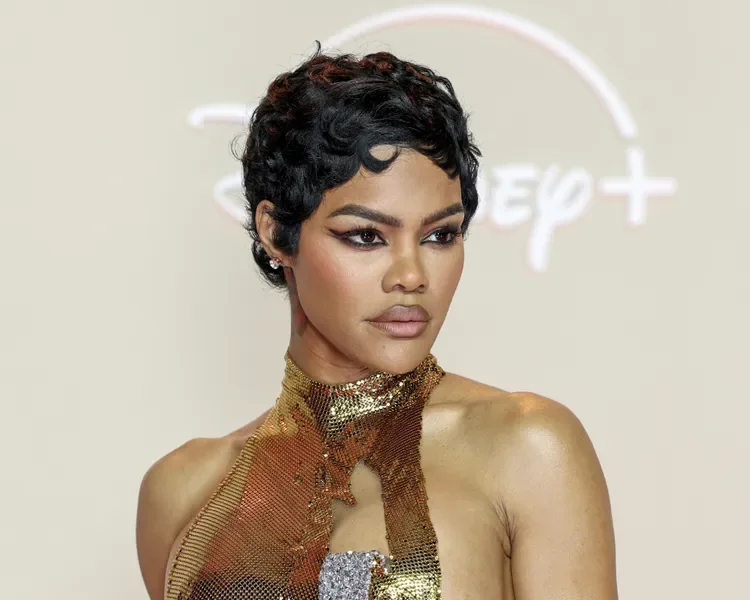
Description
This pixie uses finger-wave style curves across the front, turning the bangs into a statement. The sides stay close and sleek.
Why it works
The sculpted bang pattern adds drama without needing long hair.
Best for
Formal looks, vintage styling, and short hair that can hold a molded shape.
Maintenance
Apply styling wax with a comb and set the front curves before finishing the rest.
Try it yourself for Vintage Finger Wave Pixie
How to DIY
- Comb the vintage finger wave pixie forward first, deciding where the sculpted bang curve should sit before adding wax.
- Use styling wax on the visible curves of the vintage finger wave pixie fringe, keeping the product away from the fuller crown.
- Detail the vintage finger wave pixie hairline with an edge brush so the short side looks deliberate beside the bangs.
- Tap texture powder near the top texture if the pixie needs lift after the molded front is set.
- Check the nape and side outline of the vintage finger wave pixie last so the bangs stay visible without turning stiff.
17. Soft Cropped Pixie Bangs
Description
This cropped pixie has short, soft bangs that sit lightly across the forehead. The finish is simple and wearable.
Why it works
The light fringe keeps the crop feminine while the short layers make styling quick.
Best for
Everyday short hair, natural texture, and simple pixies with bangs.
Maintenance
Use dry texture spray sparingly and smooth only the front pieces.
Try it yourself for Soft Cropped Pixie Bangs
How to DIY
- Brush the bangs of the soft cropped pixie bangs into place while they are still slightly damp, then dry the crown afterward.
- Use a small round brush at the bang ends, rolling the fringe just enough to create bend without a bubble shape.
- Mist dry texture spray under the top layer of the soft cropped pixie bangs, not directly on the forehead pieces.
- Arrange the side fringe of the soft cropped pixie bangs with your fingers so the short layers frame the eyes naturally.
- Lock the front of the soft cropped pixie bangs with light hairspray from a distance so the short shape keeps a touchable finish.
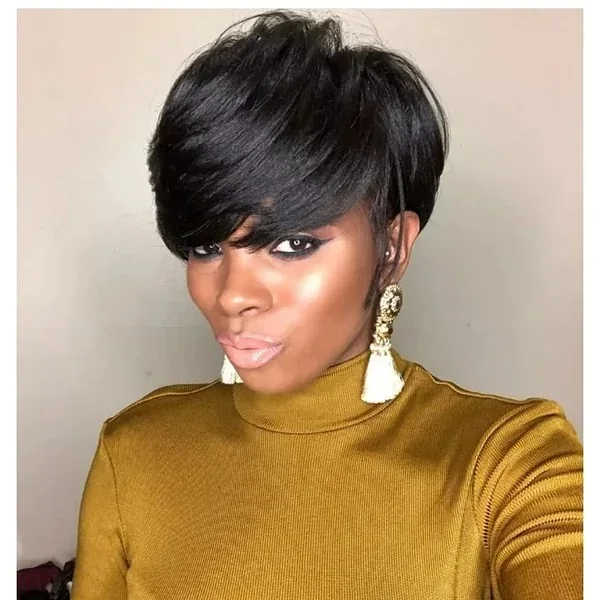
18. Sleek Tapered Pixie With Bangs
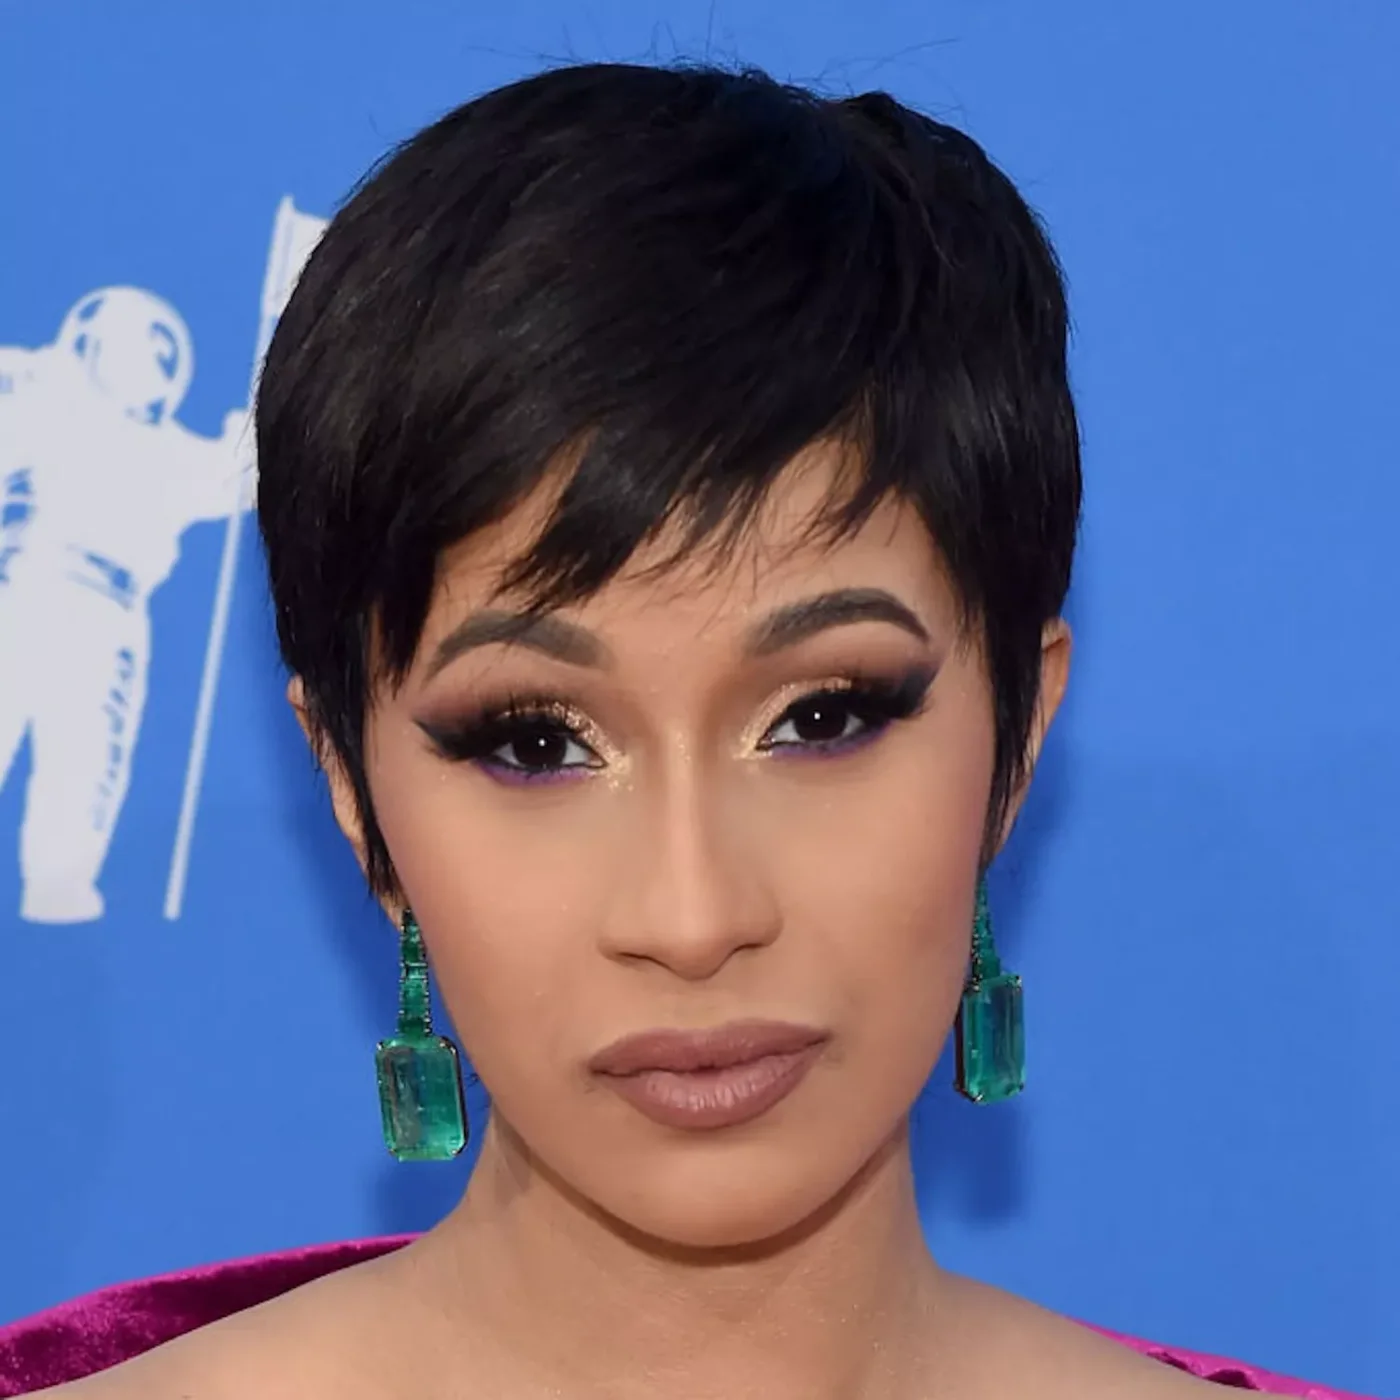
Description
This sleek tapered pixie has side bangs that sweep neatly across the forehead. The shape is short, glossy, and clean.
Why it works
A tapered outline keeps the pixie sharp while the side bang adds softness around the eyes.
Best for
Straight hair, polished pixies, and short cuts that need a defined front.
Maintenance
Use heat protectant before smoothing and finish with a small amount of shine spray.
Try it yourself for Sleek Tapered Pixie With Bangs
How to DIY
- Dry the nape outline of the sleek tapered pixie with bangs first, directing the bangs into their final fall before the crown cools.
- Mist heat protectant over the front pieces of the sleek tapered pixie with bangs, keeping it off the roots so the fringe does not flatten.
- Pass a mini flat iron over only the bang ends of the sleek tapered pixie with bangs, then curve the last inch in the direction it is meant to sweep.
- Use your fingertips to connect the side pieces of the sleek tapered pixie with bangs around the ear with the smooth fringe line.
- Add light shine spray to the outer layer of the sleek tapered pixie with bangs so the fringe keeps its bend through the day.
19. Red Lifted Pixie Bangs
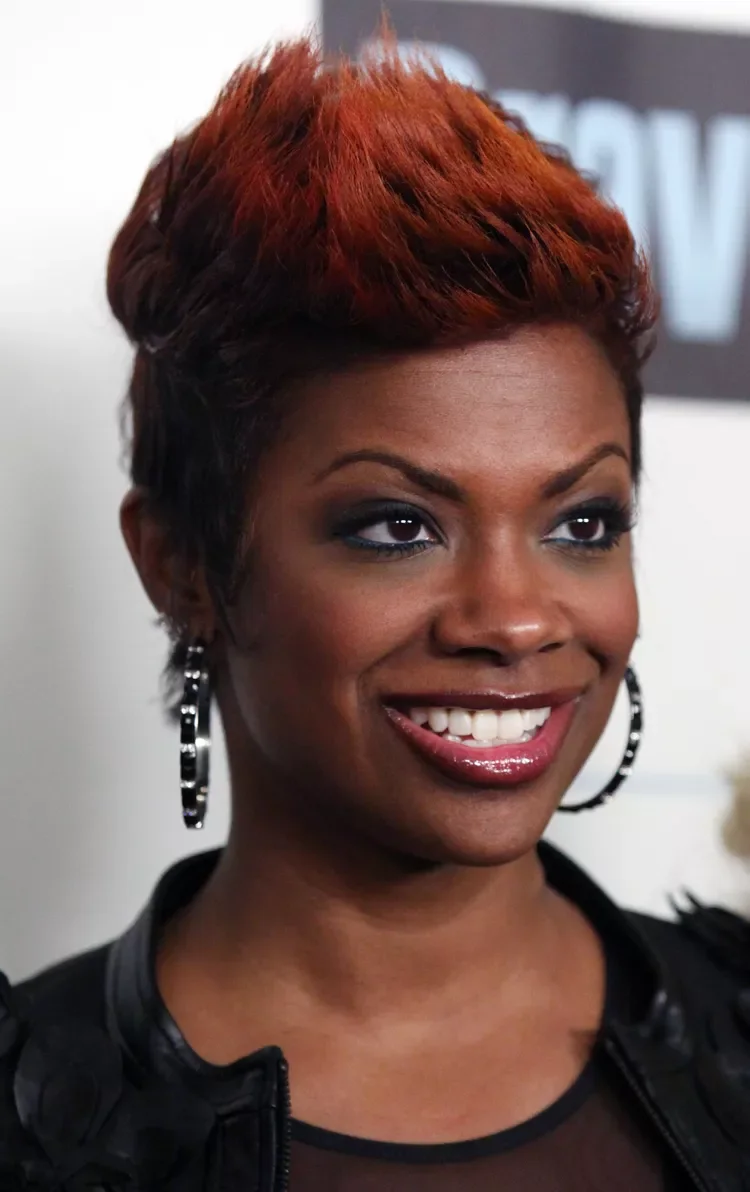
Description
Red color and lifted texture make this pixie stand out. The bangs stay short while the crown rises upward.
Why it works
The height adds energy, and the fringe keeps the look connected to the face.
Best for
Bold color, thicker hair, and pixie cuts that need volume on top.
Maintenance
Use root lift spray at the crown and paste only on the tips.
Try it yourself for Red Lifted Pixie Bangs
How to DIY
- Lift the crown of the red lifted pixie bangs while drying, then let the bangs fall forward before adding product.
- Mist root lift spray at the top of the red lifted pixie bangs only, using your fingers to keep the short layers raised near the short layers.
- Warm texture paste between your fingertips and pinch two or three bang pieces on the red lifted pixie bangs instead of coating the whole fringe.
- Use a fine tooth comb to place the shortest front pieces of the red lifted pixie bangs, then break them apart slightly for movement.
- Tap any leftover paste onto the sideburn area of the red lifted pixie bangs so the pixie outline still looks clean.
20. Soft Curly Side Bang Pixie
Description
This curly side bang pixie has a soft swoop across the forehead. The short side keeps the curls from overwhelming the face.
Why it works
The curl bend makes the bangs look natural, and the taper keeps the shape modern.
Best for
Curly short hair, side parts, and pixies with a softer front.
Maintenance
Press curl cream into the swoop and let the side stay close.
Try it yourself for Soft Curly Side Bang Pixie
How to DIY
- Blot the soft curly side bang pixie gently after washing so the curls in the bang area stay grouped together.
- Work leave-in conditioner through the front curls of the soft curly side bang pixie first, then smooth the remaining product over the crown.
- Press curl cream into the fringe of the soft curly side bang pixie curl by curl, avoiding the scalp so the pixie does not lose lift.
- Use a diffuser on low air around the face frame, stopping before the curls become fuzzy.
- Separate only the bang curls that block the eyes so the soft curly side bang pixie keeps its natural shape.
21. Full Black Pixie Bangs

Description
Full black bangs give this pixie a dramatic front. The sides are short enough to keep the face framed clearly.
Why it works
The full fringe draws attention to the eyes and gives the short cut a strong style direction.
Best for
Thick straight hair, glossy finishes, and high-impact pixie bangs.
Maintenance
Smooth the bangs in small sections and keep shine spray below the fringe.
Try it yourself for Full Black Pixie Bangs
How to DIY
- Dry the fringe line of the full black pixie bangs first, directing the bangs into their final fall before the crown cools.
- Mist heat protectant over the front pieces of the full black pixie bangs, keeping it off the roots so the fringe does not flatten.
- Pass a mini flat iron over only the bang ends of the full black pixie bangs, then curve the last inch in the direction it is meant to sweep.
- Use your fingertips to connect the side pieces of the full black pixie bangs around the ear with the smooth fringe line.
- Add light shine spray to the outer layer of the full black pixie bangs so the bangs stay visible without turning stiff.
22. Polished Natural Pixie Bangs

Description
This natural pixie keeps the bangs soft and close to the forehead. The tapered sides give the style a clean everyday shape.
Why it works
The short fringe adds detail while the simple outline keeps the pixie easy to maintain.
Best for
Natural texture, neat short cuts, and low-fuss pixie bangs.
Maintenance
Use curl defining cream lightly and tie a satin scarf around the hairline overnight.
Try it yourself for Polished Natural Pixie Bangs
How to DIY
- Dampen the front of the polished natural pixie bangs lightly, then press the coils forward where the bang shape should sit.
- Use curl defining cream on the top coils of the polished natural pixie bangs first, keeping the tapered side cleaner than the fringe.
- Smooth a small amount of edge control around the polished natural pixie bangs hairline only where the pixie needs polish.
- Tie a satin scarf over the front for a few minutes if the front sweep needs a more controlled finish.
- Lift the coils with your fingertips before leaving so the polished natural pixie bangs keeps softness at the bangs.
23. Copper Wave Pixie Bangs
Description
Copper waves give this pixie a vintage feel. The side bangs curve smoothly into the short side texture.
Why it works
The wave pattern makes the fringe look intentional and adds polish to the cropped shape.
Best for
Wavy short hair, copper color, and pixie cuts with a soft retro mood.
Maintenance
Comb the wave into place while damp and set it with light hairspray.
Try it yourself for Copper Wave Pixie Bangs
How to DIY
- Brush the bangs of the copper wave pixie bangs into place while they are still slightly damp, then dry the crown afterward.
- Use a small round brush at the crown lift, rolling the fringe just enough to create bend without a bubble shape.
- Mist dry texture spray under the top layer of the copper wave pixie bangs, not directly on the forehead pieces.
- Arrange the side fringe of the copper wave pixie bangs with your fingers so the short layers frame the eyes naturally.
- Lock the front of the copper wave pixie bangs with light hairspray from a distance so the fringe keeps its bend through the day.
24. Soft Blue-Black Pixie Bangs
Description
Blue-black texture gives this pixie a modern finish. The bangs sit forward with enough pieceiness to show the shape.
Why it works
The short fringe adds structure, and the color makes the textured pieces easy to see.
Best for
Fashion color, thick short hair, and pixies with a bold fringe.
Maintenance
Warm a tiny amount of texture paste between fingers and tap it onto the bang ends.
Try it yourself for Soft Blue-Black Pixie Bangs
How to DIY
- Lift the crown of the soft blue-black pixie bangs while drying, then let the bangs fall forward before adding product.
- Mist root lift spray at the top of the soft blue-black pixie bangs only, using your fingers to keep the short layers raised near the side taper.
- Warm texture paste between your fingertips and pinch two or three bang pieces on the soft blue-black pixie bangs instead of coating the whole fringe.
- Use a fine tooth comb to place the shortest front pieces of the soft blue-black pixie bangs, then break them apart slightly for movement.
- Tap any leftover paste onto the sideburn area of the soft blue-black pixie bangs so the pixie outline still looks clean.
25. Sweeping Black Pixie Bangs
Description
This sweeping black pixie has a long bang section that moves across one eye. The short sides keep the shape balanced.
Why it works
The long fringe creates drama while the taper keeps the haircut wearable.
Best for
Thick hair, side-swept bangs, and pixies with a glamorous front.
Maintenance
Smooth the sweep with a mini flat iron and mist only the outer layer.
Try it yourself for Sweeping Black Pixie Bangs
How to DIY
- Dry the hairline detail of the sweeping black pixie bangs first, directing the bangs into their final fall before the crown cools.
- Mist heat protectant over the front pieces of the sweeping black pixie bangs, keeping it off the roots so the fringe does not flatten.
- Pass a mini flat iron over only the bang ends of the sweeping black pixie bangs, then curve the last inch in the direction it is meant to sweep.
- Use your fingertips to connect the side pieces of the sweeping black pixie bangs around the ear with the smooth fringe line.
- Add light shine spray to the outer layer of the sweeping black pixie bangs so the front reads polished but not heavy.
26. Copper Curly Pixie Bangs
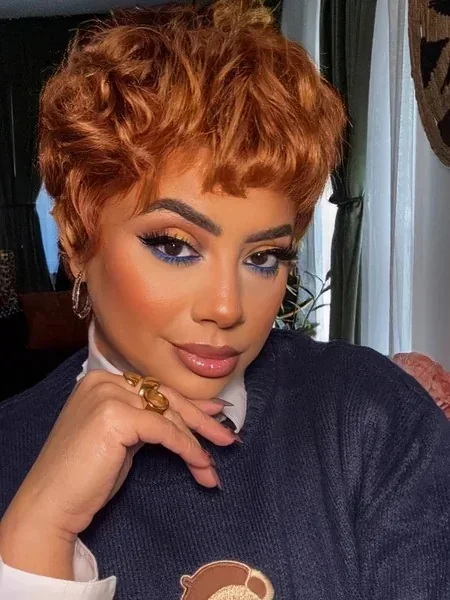
Description
Copper curls make this short pixie bright and dimensional. The fringe curves forward and keeps the face framed.
Why it works
The curly bang shape adds softness, while the cropped length keeps the color from feeling too heavy.
Best for
Curly hair, copper color, and short cuts with personality.
Maintenance
Use curl cream on the fringe and let the top dry with minimal touching.
Try it yourself for Copper Curly Pixie Bangs
How to DIY
- Blot the copper curly pixie bangs gently after washing so the curls in the bang area stay grouped together.
- Work leave-in conditioner through the front curls of the copper curly pixie bangs first, then smooth the remaining product over the crown.
- Press curl cream into the fringe of the copper curly pixie bangs curl by curl, avoiding the scalp so the pixie does not lose lift.
- Use a diffuser on low air around the top texture, stopping before the curls become fuzzy.
- Separate only the bang curls that block the eyes so the copper curly pixie bangs keeps its natural shape.
27. Tiny Micro Bang Pixie

Description
Tiny micro bangs give this pixie a neat, quirky edge. The short crop keeps the look simple and face-focused.
Why it works
Micro bangs reveal more of the face while still giving the pixie a clear fringe detail.
Best for
Straight hair, petite fringe, and readers who like a bold short cut.
Maintenance
Keep the micro bangs dry and smooth before adding any product to the crown.
Try it yourself for Tiny Micro Bang Pixie
How to DIY
- Dry the bang ends of the tiny micro bang pixie first, directing the bangs into their final fall before the crown cools.
- Mist heat protectant over the front pieces of the tiny micro bang pixie, keeping it off the roots so the fringe does not flatten.
- Pass a mini flat iron over only the bang ends of the tiny micro bang pixie, then curve the last inch in the direction it is meant to sweep.
- Use your fingertips to connect the side pieces of the tiny micro bang pixie around the ear with the smooth fringe line.
- Add light shine spray to the outer layer of the tiny micro bang pixie so the short shape keeps a touchable finish.
28. Soft Blonde Wispy Pixie
Description
Wispy blonde bangs make this pixie feel light and classic. The sides are cropped, but the front stays soft.
Why it works
The airy fringe flatters the forehead without covering it too heavily.
Best for
Fine hair, blonde pixies, and soft everyday bangs.
Maintenance
Use a small round brush on the fringe and finish with a light hold spray.
Try it yourself for Soft Blonde Wispy Pixie
How to DIY
- Brush the bangs of the soft blonde wispy pixie into place while they are still slightly damp, then dry the crown afterward.
- Use a small round brush at the nape outline, rolling the fringe just enough to create bend without a bubble shape.
- Mist dry texture spray under the top layer of the soft blonde wispy pixie, not directly on the forehead pieces.
- Arrange the side fringe of the soft blonde wispy pixie with your fingers so the short layers frame the eyes naturally.
- Lock the front of the soft blonde wispy pixie with light hairspray from a distance so the fringe keeps its bend through the day.
29. Layered Blonde Pixie Bangs
Description
This layered blonde pixie has side bangs that blend into the crown. The shape looks full without needing much length.
Why it works
Layered bangs create movement at the front, and the soft crown gives the cut lift.
Best for
Fine to medium hair, blonde short cuts, and grown-out pixie shapes.
Maintenance
Lift the crown with root spray and separate the fringe with a fine tooth comb.
Try it yourself for Layered Blonde Pixie Bangs
How to DIY
- Lift the crown of the layered blonde pixie bangs while drying, then let the bangs fall forward before adding product.
- Mist root lift spray at the top of the layered blonde pixie bangs only, using your fingers to keep the short layers raised near the short layers.
- Warm texture paste between your fingertips and pinch two or three bang pieces on the layered blonde pixie bangs instead of coating the whole fringe.
- Use a fine tooth comb to place the shortest front pieces of the layered blonde pixie bangs, then break them apart slightly for movement.
- Tap any leftover paste onto the sideburn area of the layered blonde pixie bangs so the pixie outline still looks clean.
30. Tousled Blonde Pixie Bangs
Description
Tousled blonde layers make this pixie feel relaxed, while the wispy bangs keep the front soft. The finish is casual rather than sleek.
Why it works
Choppy texture adds movement, and the light fringe keeps the haircut from looking too severe.
Best for
Fine hair, casual pixies, and readers who want easy texture with bangs.
Maintenance
Use dry texture spray through the top and keep paste on only a few bang pieces.
Try it yourself for Tousled Blonde Pixie Bangs
How to DIY
- Lift the crown of the tousled blonde pixie bangs while drying, then let the bangs fall forward before adding product.
- Mist root lift spray at the top of the tousled blonde pixie bangs only, using your fingers to keep the short layers raised near the face frame.
- Warm texture paste between your fingertips and pinch two or three bang pieces on the tousled blonde pixie bangs instead of coating the whole fringe.
- Use a fine tooth comb to place the shortest front pieces of the tousled blonde pixie bangs, then break them apart slightly for movement.
- Tap any leftover paste onto the sideburn area of the tousled blonde pixie bangs so the front reads polished but not heavy.
What bang type works best with a pixie cut
Side-swept bangs are usually the most forgiving because they blend into the top layers and grow out softly. Wispy bangs feel lighter and work well when the pixie already has texture through the crown.
Micro bangs and blunt bangs are stronger choices. They make the pixie look more intentional, but they also need more frequent trims because the shape is obvious.
How to style pixie bangs without making them heavy
Style the bangs first, then the crown. Pixie fringe is short, so it sets quickly and can become flat if product is added before the shape is dry.
Use paste, wax, curl cream, or serum in tiny amounts. Product should sit on the bang ends, curl tips, or side pieces rather than coating the whole haircut.
What to ask your stylist for
Bring a photo that shows the exact bang shape, not just the pixie length. Ask whether the fringe should be point-cut, softened, curled, or kept blunt.
Also ask how often the bangs need trimming. The shorter the fringe, the faster the shape changes, especially with micro bangs or very sleek pixie cuts.

About the author
Bella Ross
Bella Ross is the hairstyle editor behind Latest Easy Hairstyles. She curates practical haircut, braid, color, and styling ideas with a focus on looks that are easy to browse, realistic to recreate, and useful for everyday hair decisions.