Before you choose
Soft updos that help fine thin hair look fuller
Updos for fine thin hair should add shape without making the hair feel coated or stiff. A low chignon can make the ends look fuller, a high bun can add height, and a braided or twisted detail can give the style more texture from the back. If you are choosing between cut and style, start with haircuts for thin fine hair first.
The visual reference
29+ Updos for Fine Thin Hair That Add Soft Volume
Fine thin hair usually holds an updo better with texture spray, powder, pins, and lightweight hairspray instead of heavy creams.
Idea 01
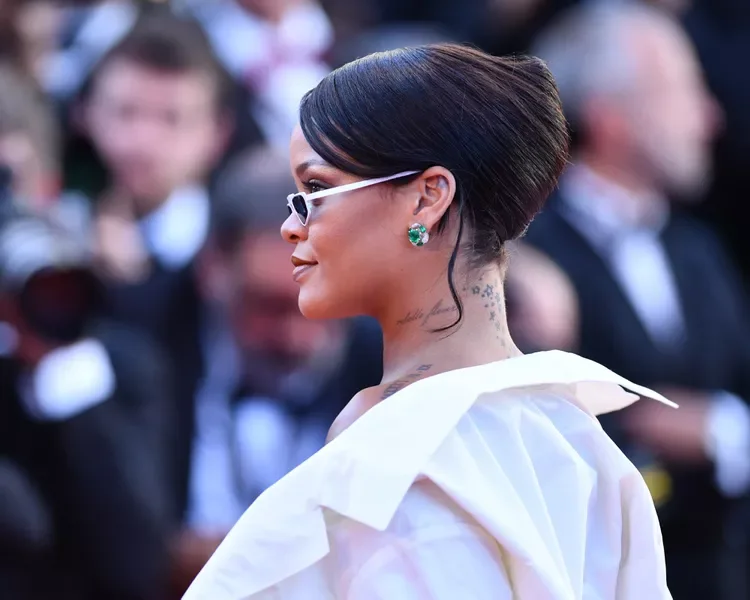
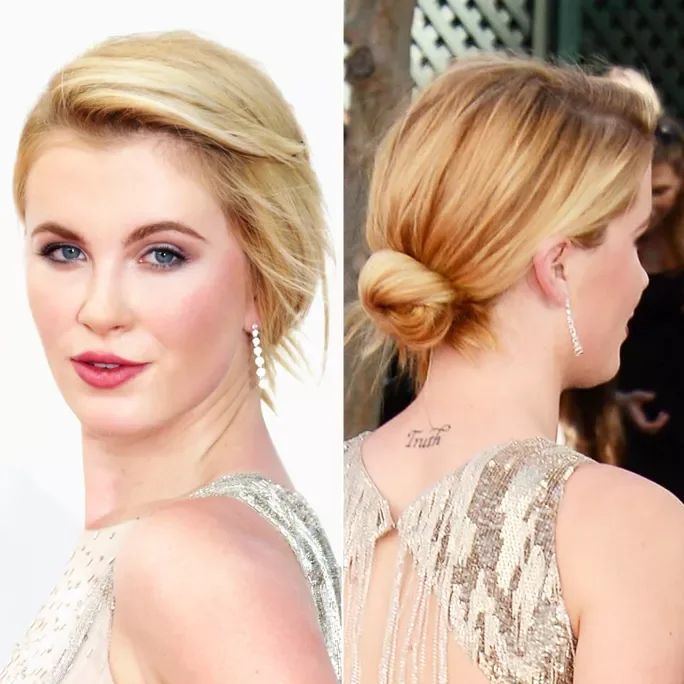
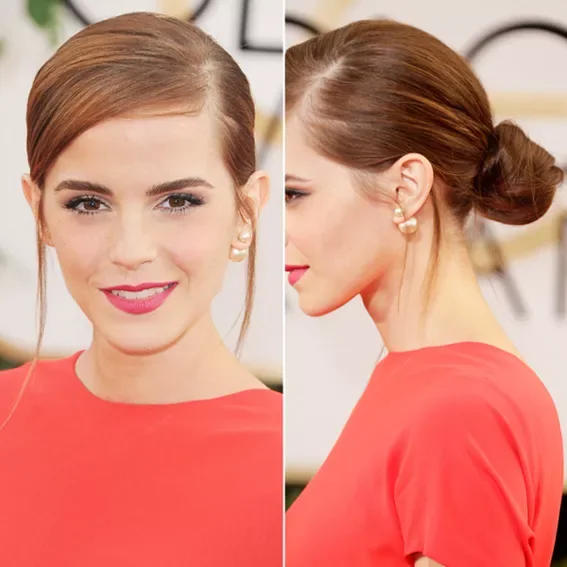
Sleek Tucked Updo With Side Part
A sleek tucked updo with a clean side part and smooth nape shape.
- Style
- Bun
- Texture
- Straight
- Finish
- Sleek
The hair is controlled without looking bulky, which helps fine thin hair look polished. The tucked back keeps the outline compact, while the side part creates direction and makes the front look fuller. Fine straight hair, formal outfits, work events, and anyone who wants a neat updo with very little frizz. In the photograph, Sleek Tucked Updo With Side Part keeps its side part readable beside the medium layering, which is the useful relationship to compare within updos for fine thin hair. Sleek Tucked Updo With Side Part provides the specific example here: the sleek finish is also visible enough to discuss without assuming that the same finish will behave identically on every density.
Wearability note: Keep the cream light and place pins under the tuck so the surface stays clean.
Idea 02
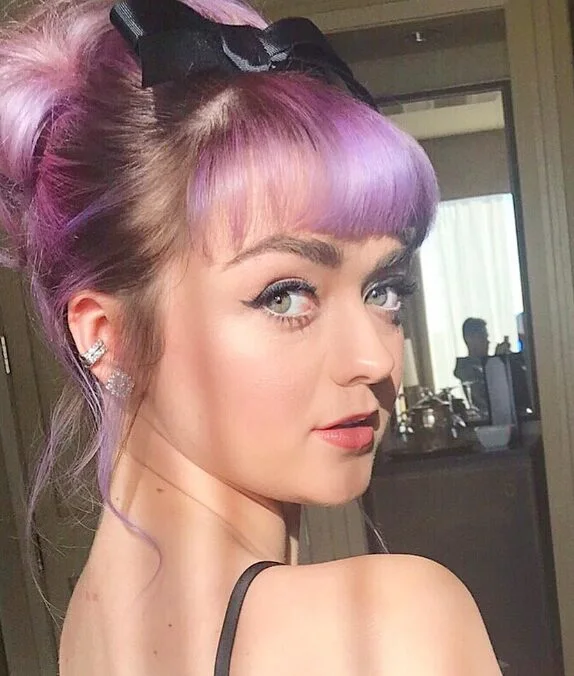
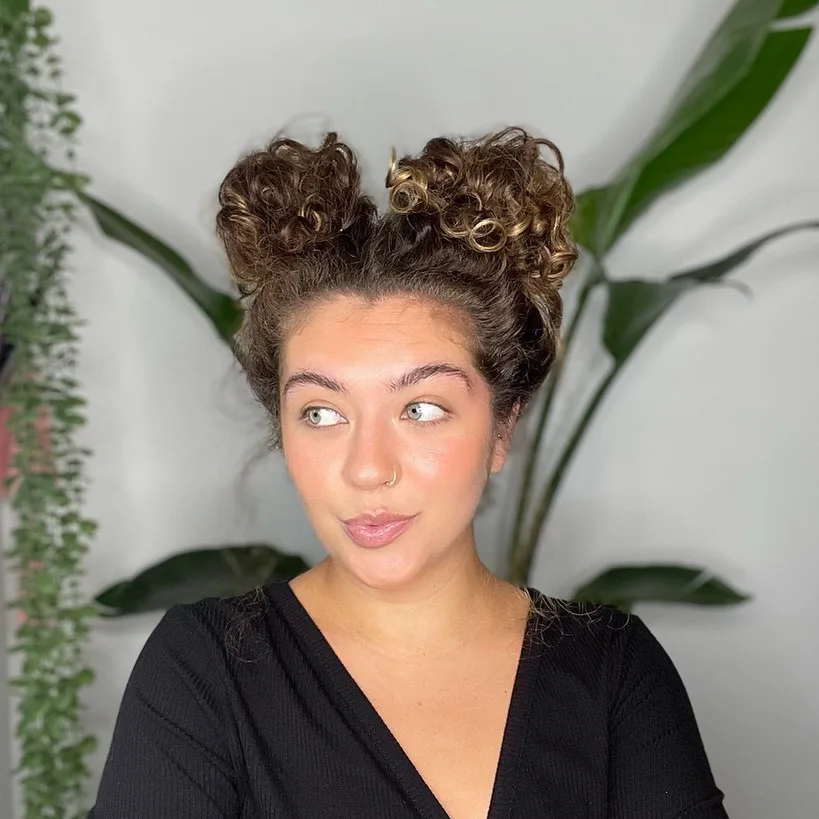
Pink Textured Twist Updo
A pink textured twist updo with lifted pieces at the crown and a soft fringe.
- Style
- Updo
- Texture
- Straight
The color makes the shape playful, but the styling still gives fine hair height. The lift sits high instead of wide, so thin hair looks airy and intentional rather than over-teased. Fine hair with color, party looks, creative styling, and short to medium lengths that need crown height. Pink Textured Twist Updo gives a clear view of the micro fringe and the way it meets the straight texture. For someone comparing updos for fine thin hair, that transition matters because it affects the outline more directly than the model's exact color or styling product.
Wearability note: Refresh the crown with texture spray and avoid brushing the lifted pieces flat.
Idea 03
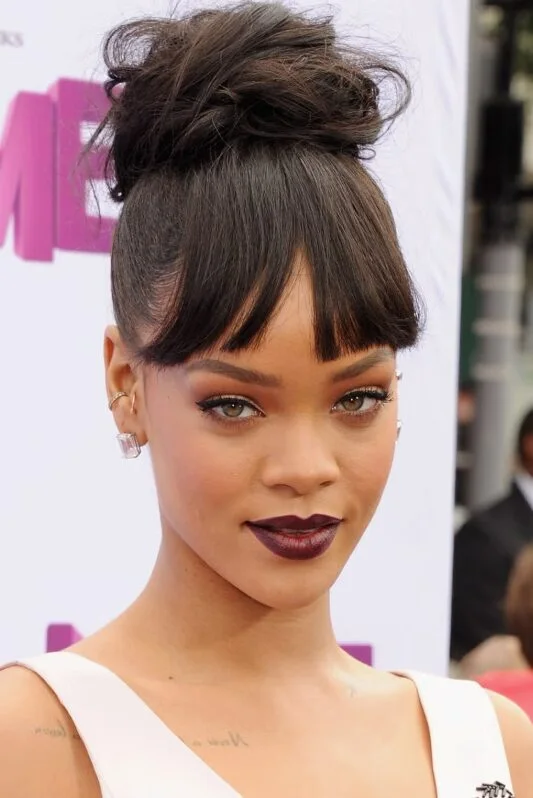
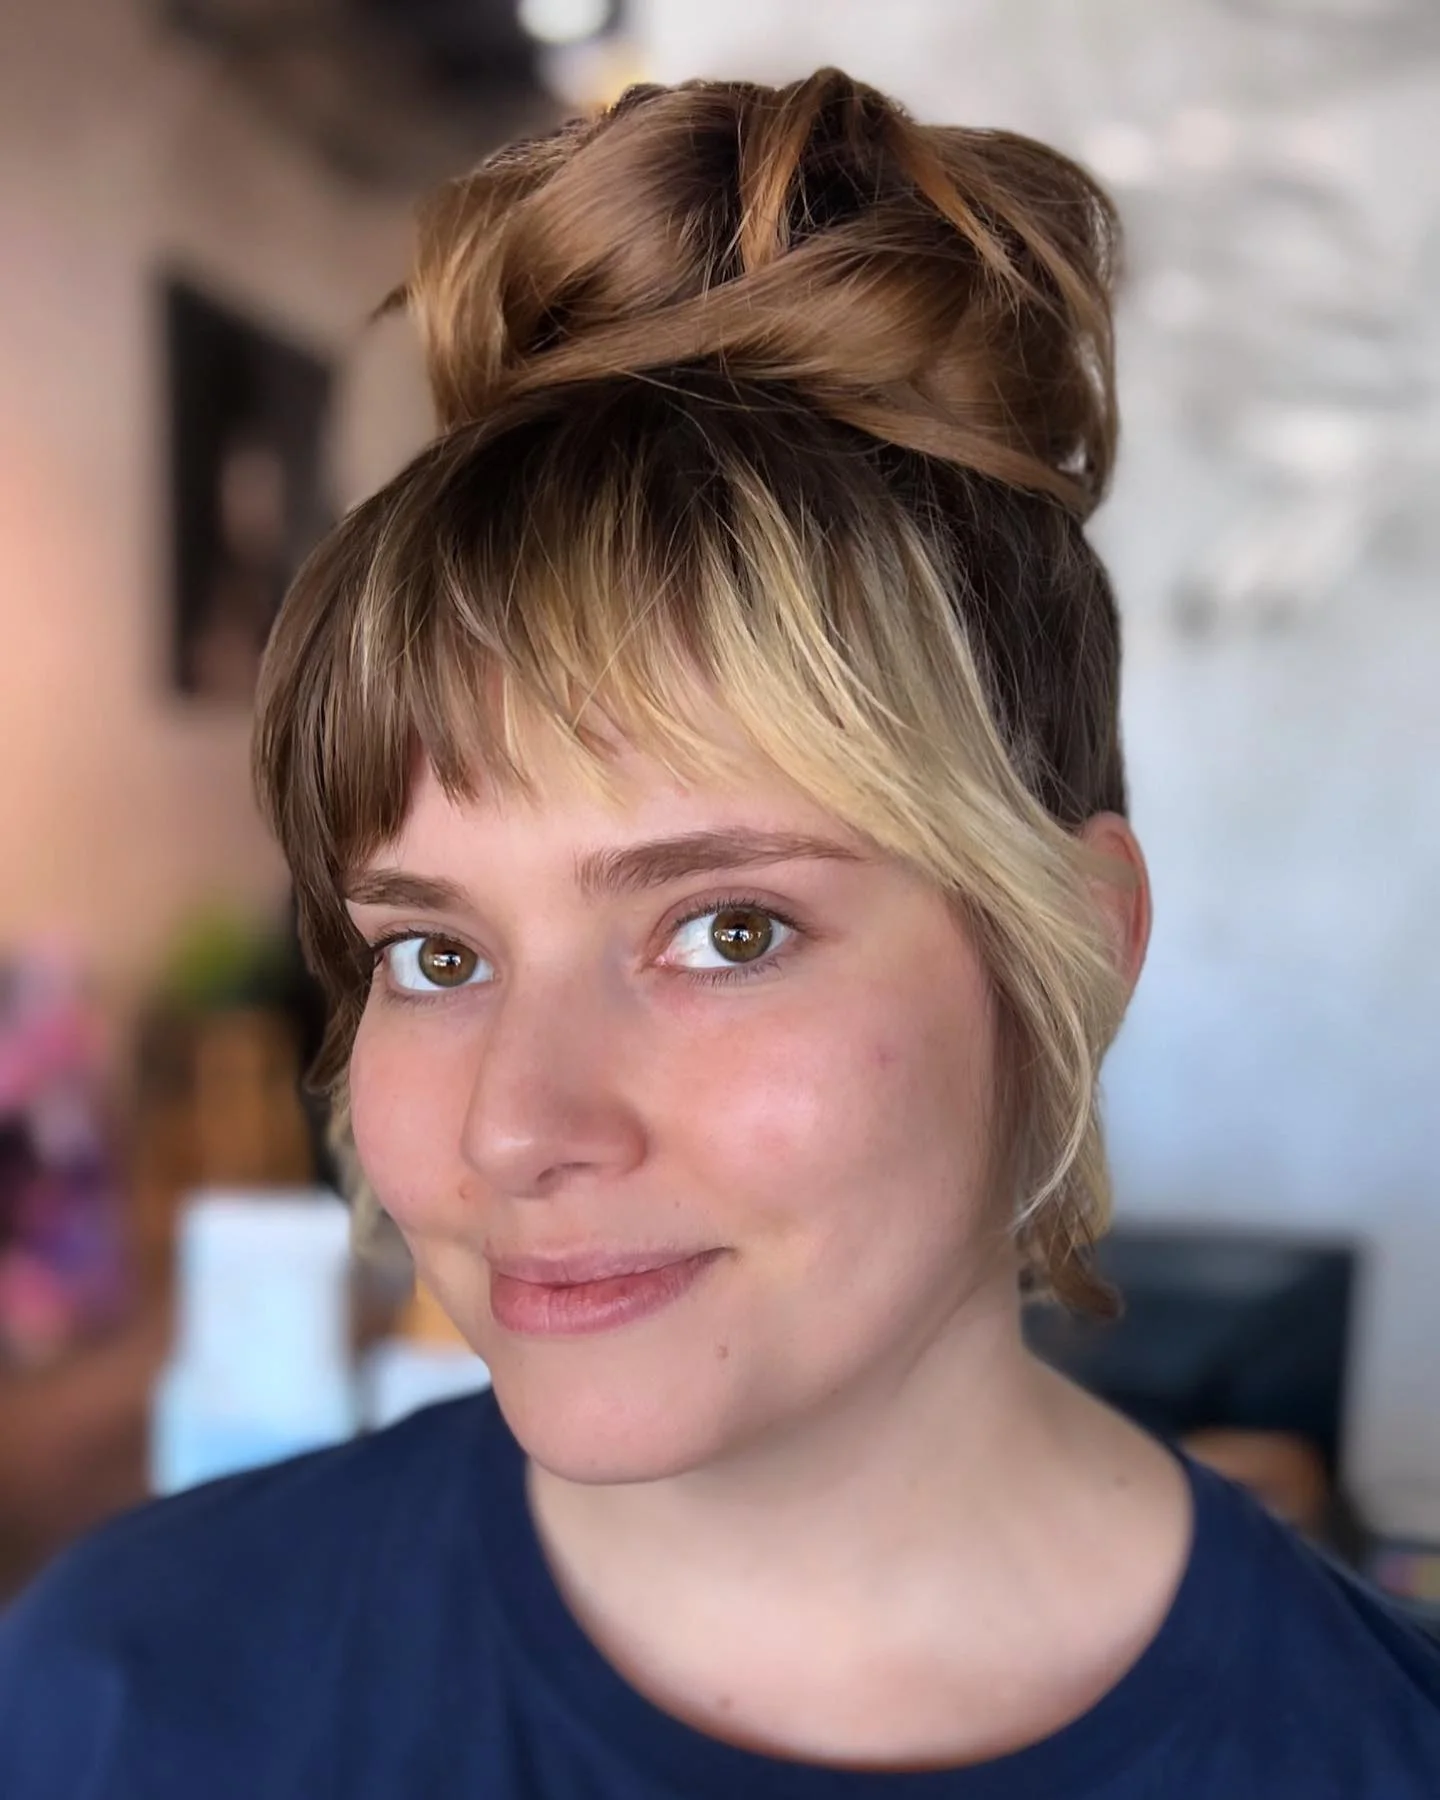
High Bun With Soft Bangs
A high bun with soft bangs and clean lifted sides.
- Style
- Updo
- Texture
- Straight
- Finish
- Sleek
The bun sits high enough to create height while the fringe keeps the face shape soft. Fine thin hair often needs vertical lift, and a high bun gives that lift without needing a wide heavy base. Fine hair with bangs, oval or heart face shapes, and dressy looks that need height. What separates High Bun With Soft Bangs from nearby updos for fine thin hair options is the balance between the micro fringe, sleek finish, and straight texture. High Bun With Soft Bangs provides the specific example here: those visible proportions can be carried into a consultation even when the final texture or color will be different.
Wearability note: Use powder at the base and keep the bangs separate from the bun products.
Choose your direction
Best for volume
A high bun, curled updo, or lifted crown updo with texture spray at the roots.
Best for formal events
A low chignon, pearl pin updo, or sleek low bun with hidden pins.
Best for short fine hair
A small high bun, tucked twist, or pinned side updo that does not need much length.
Best low-tension option
A loose low bun or soft chignon with face-framing pieces.
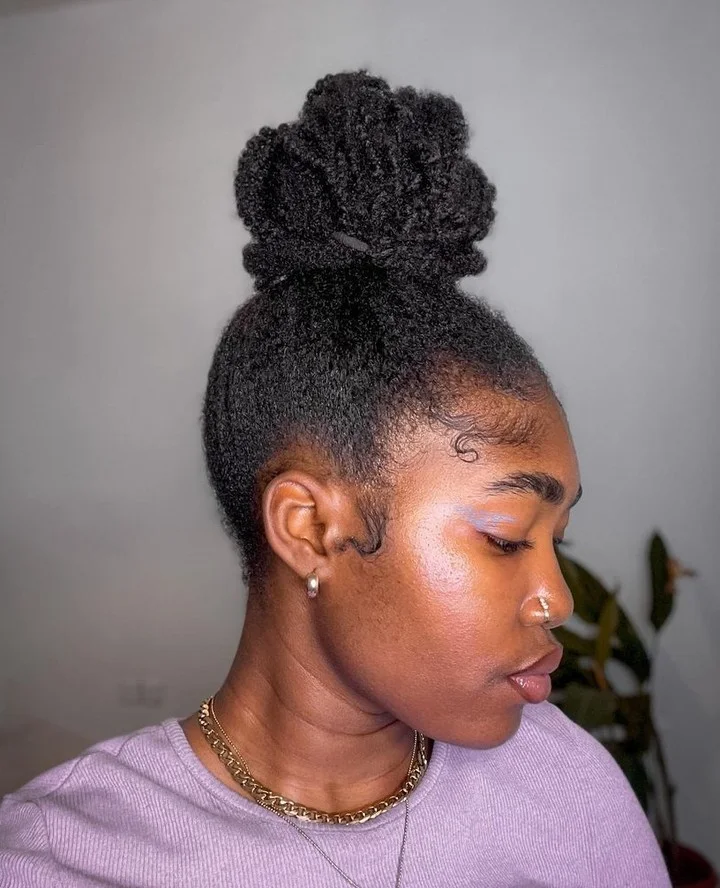
Idea 04
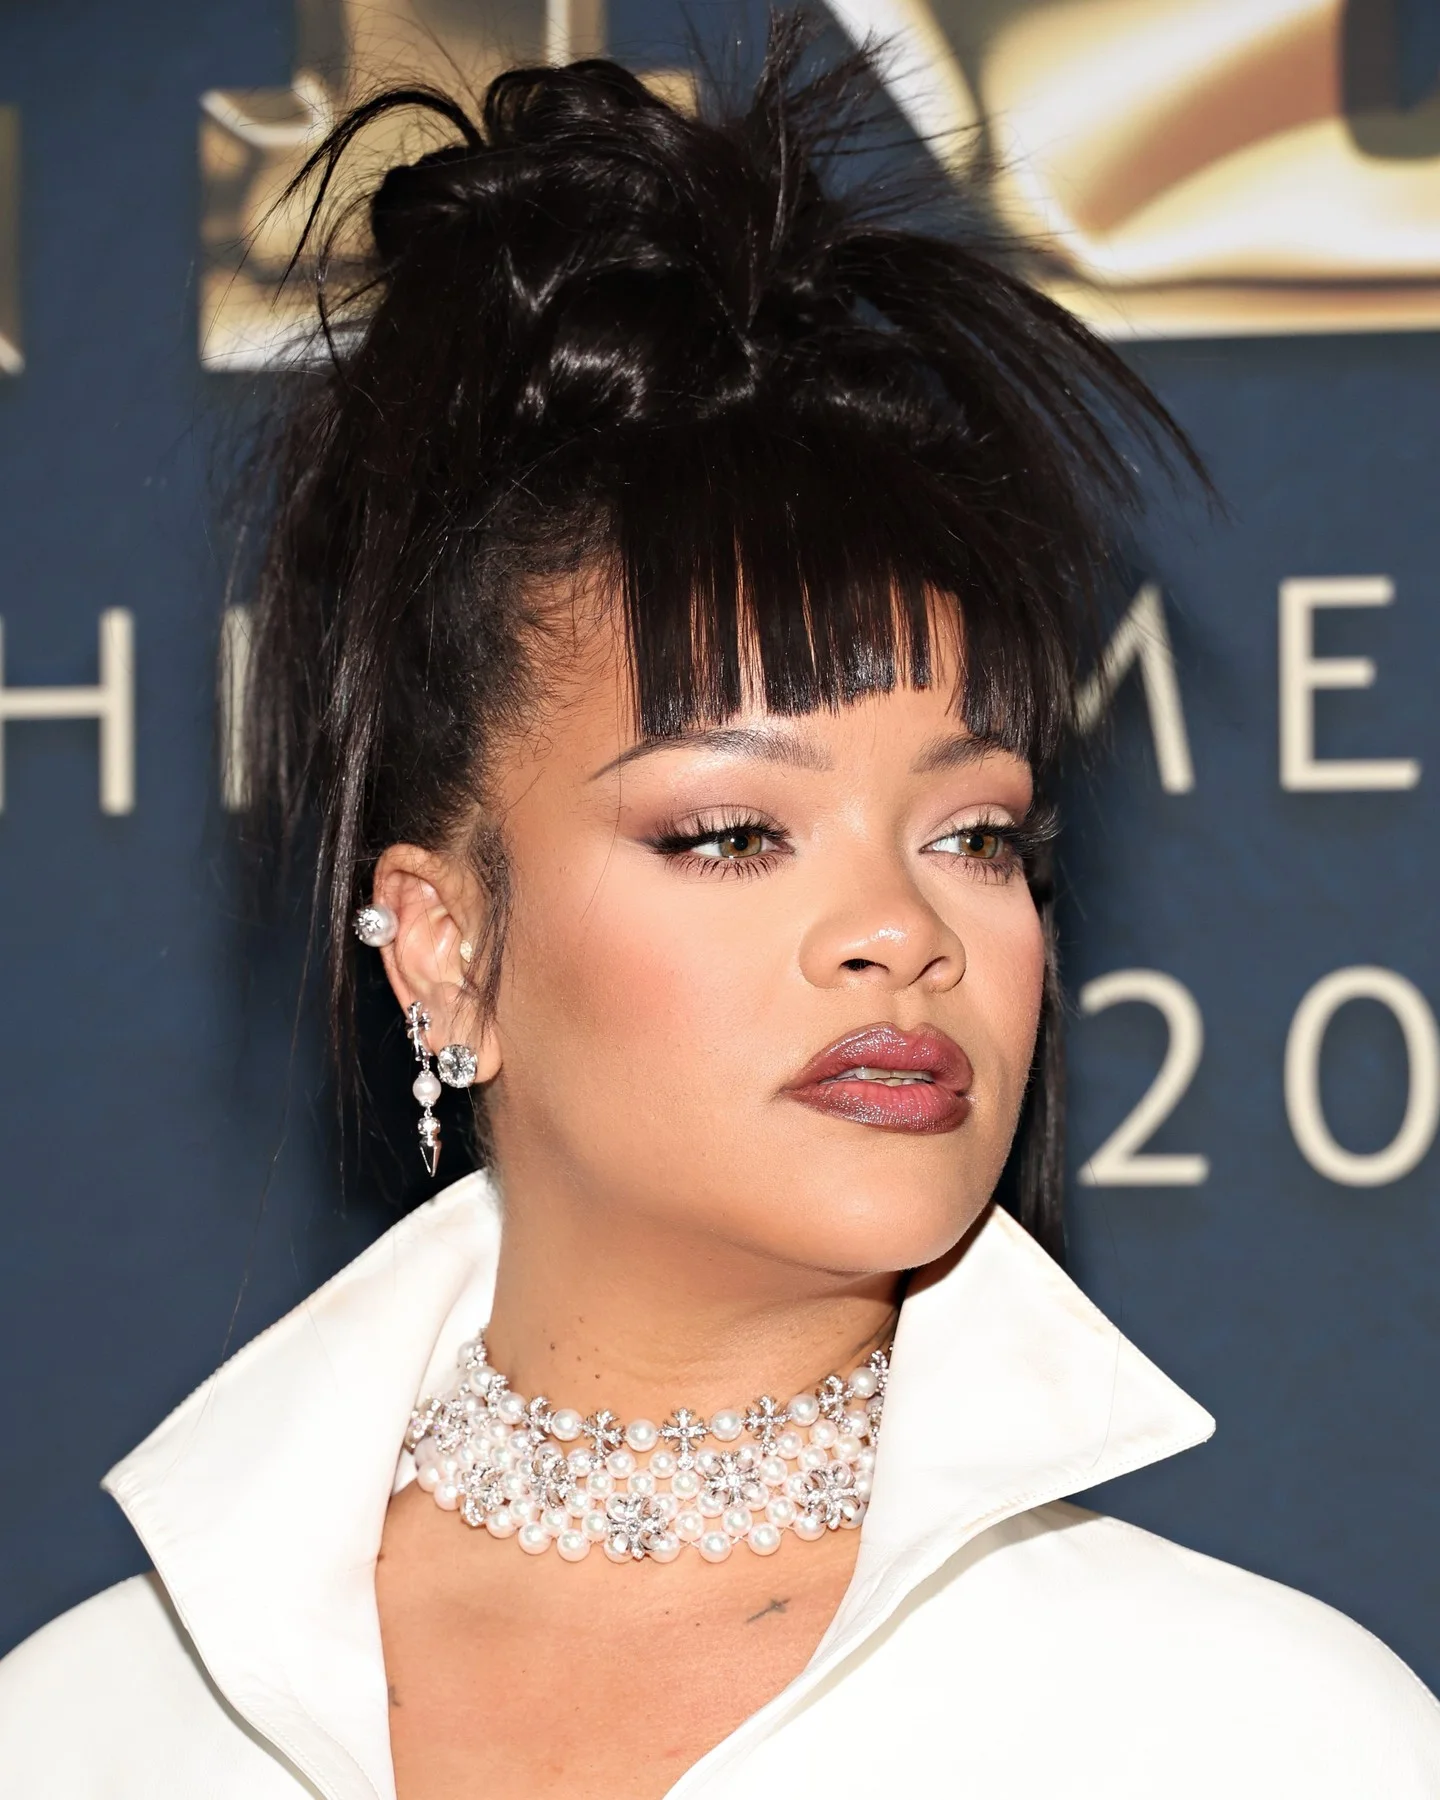
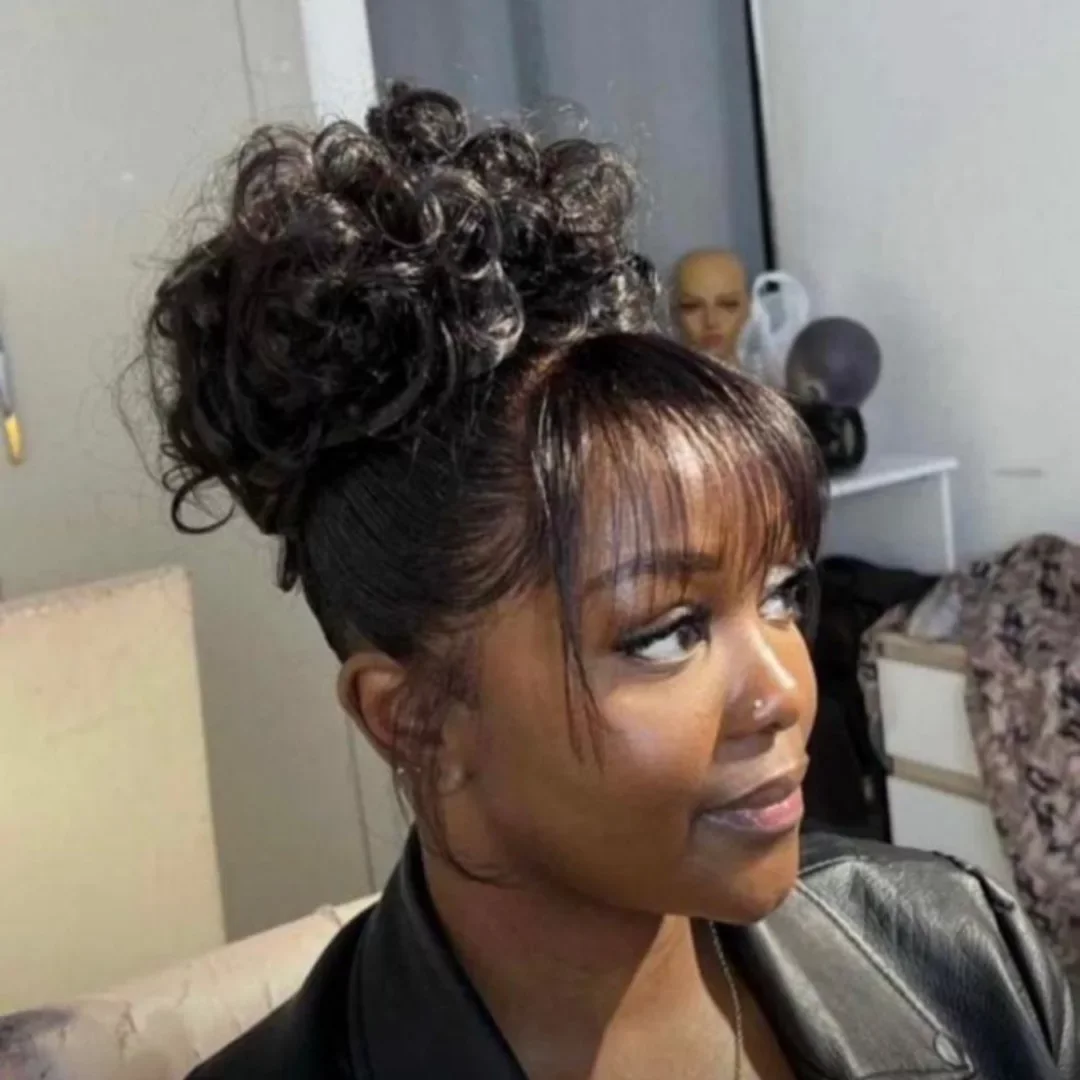
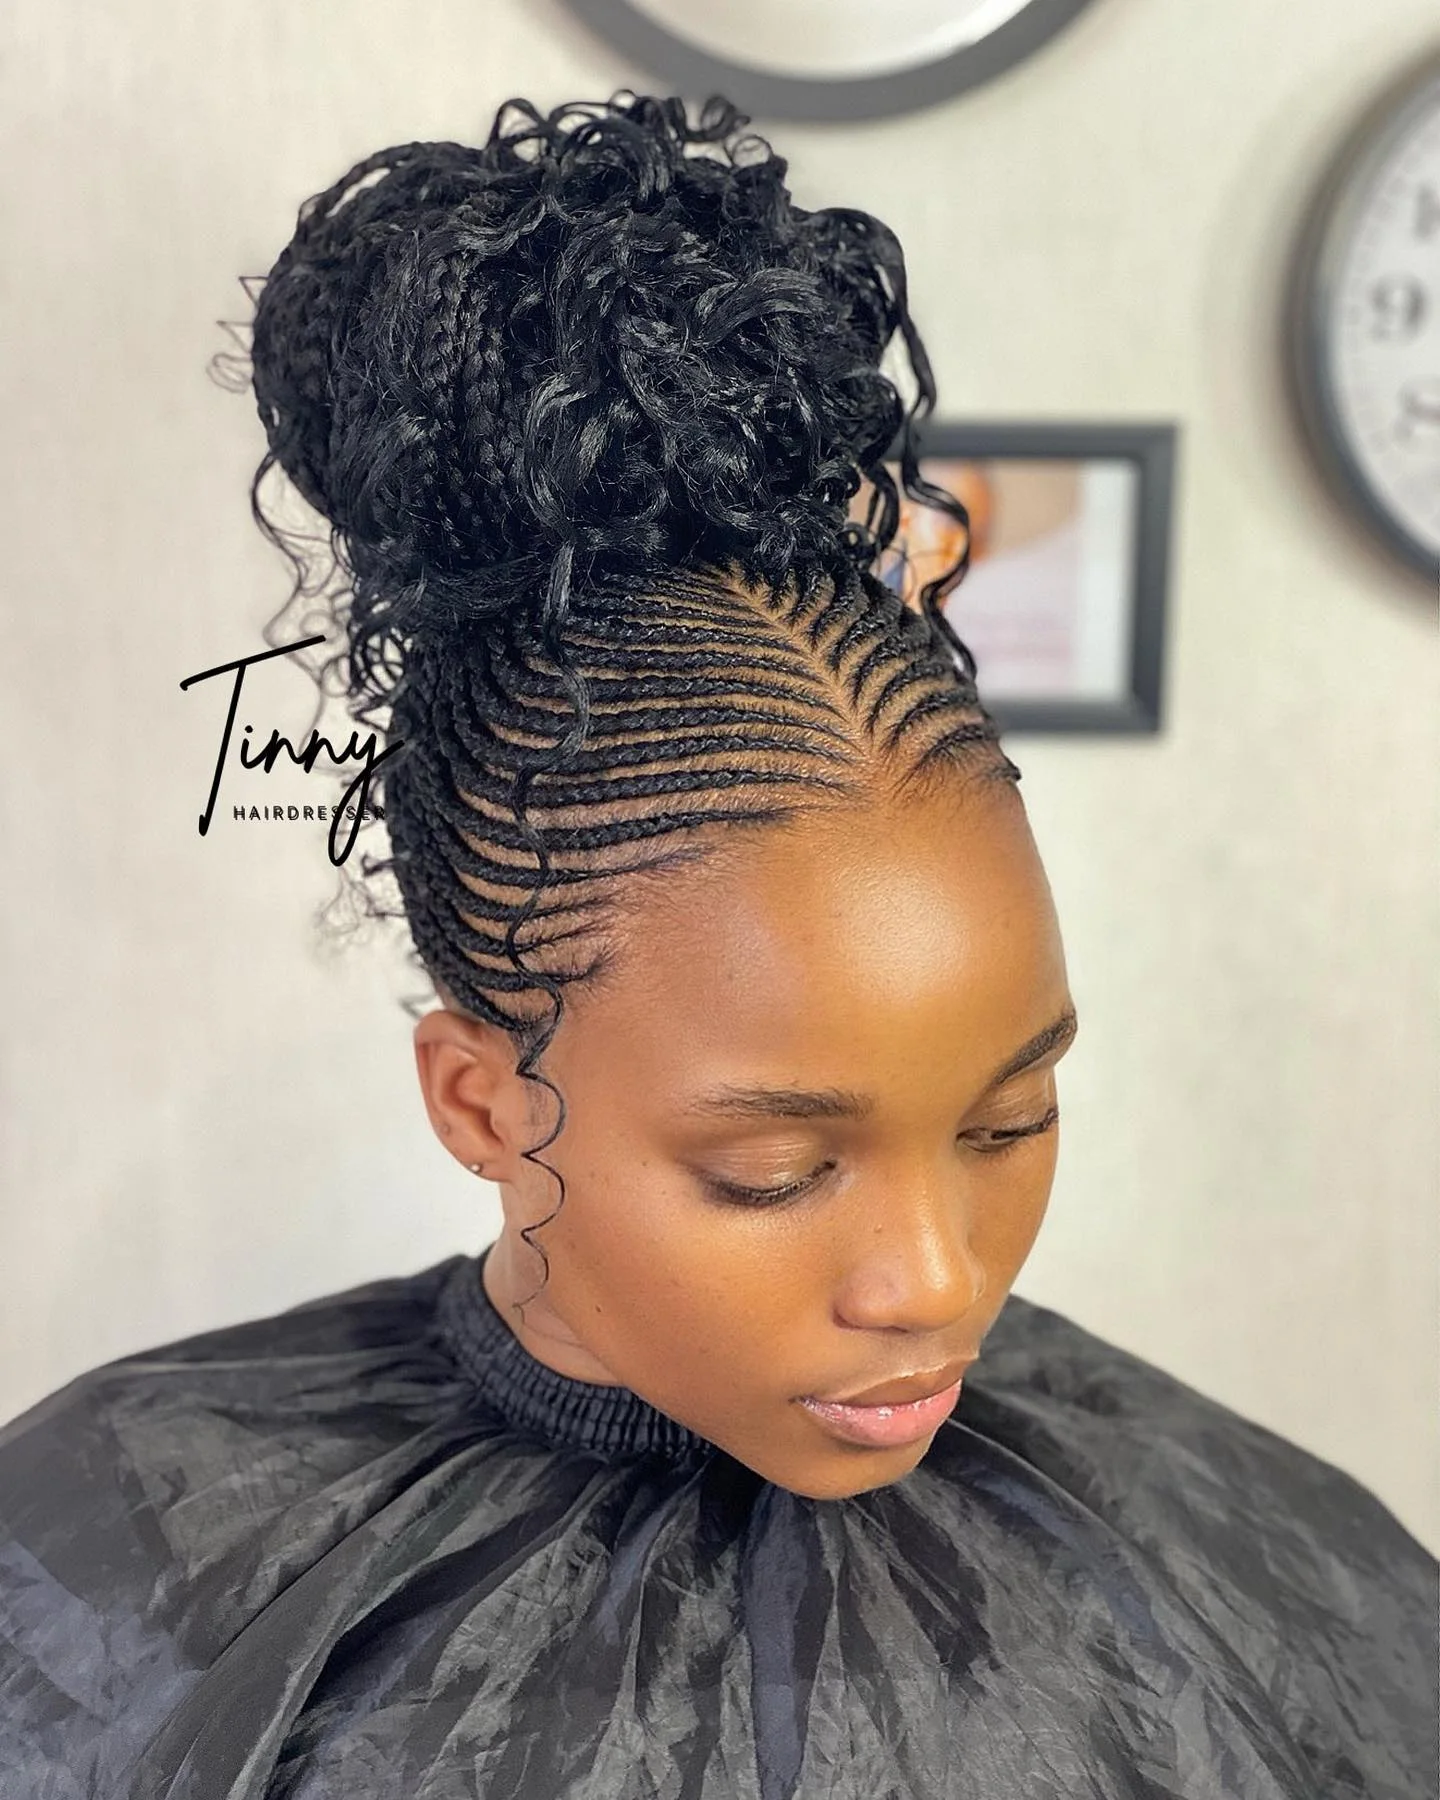
Polished High Updo With Micro Fringe
A polished high updo with a short fringe and sculpted top.
- Style
- Updo
- Texture
- Straight
- Parting
- Center
The finish is smooth, sharp, and good for fine hair that can look messy too quickly. A clean surface makes the updo look deliberate, while the high placement creates more presence from the front. Fine straight hair, short fringe, formal styling, and strong makeup looks. The photographed black woman high messy updo with bangs makes the wispy fringe easy to locate before the eye moves to the center part. That order is helpful when deciding which part of this updos for fine thin hair idea should remain strongest after it is adapted.
Wearability note: Mist the surface from a distance and touch flyaways with a small brush, not extra cream.
Idea 05
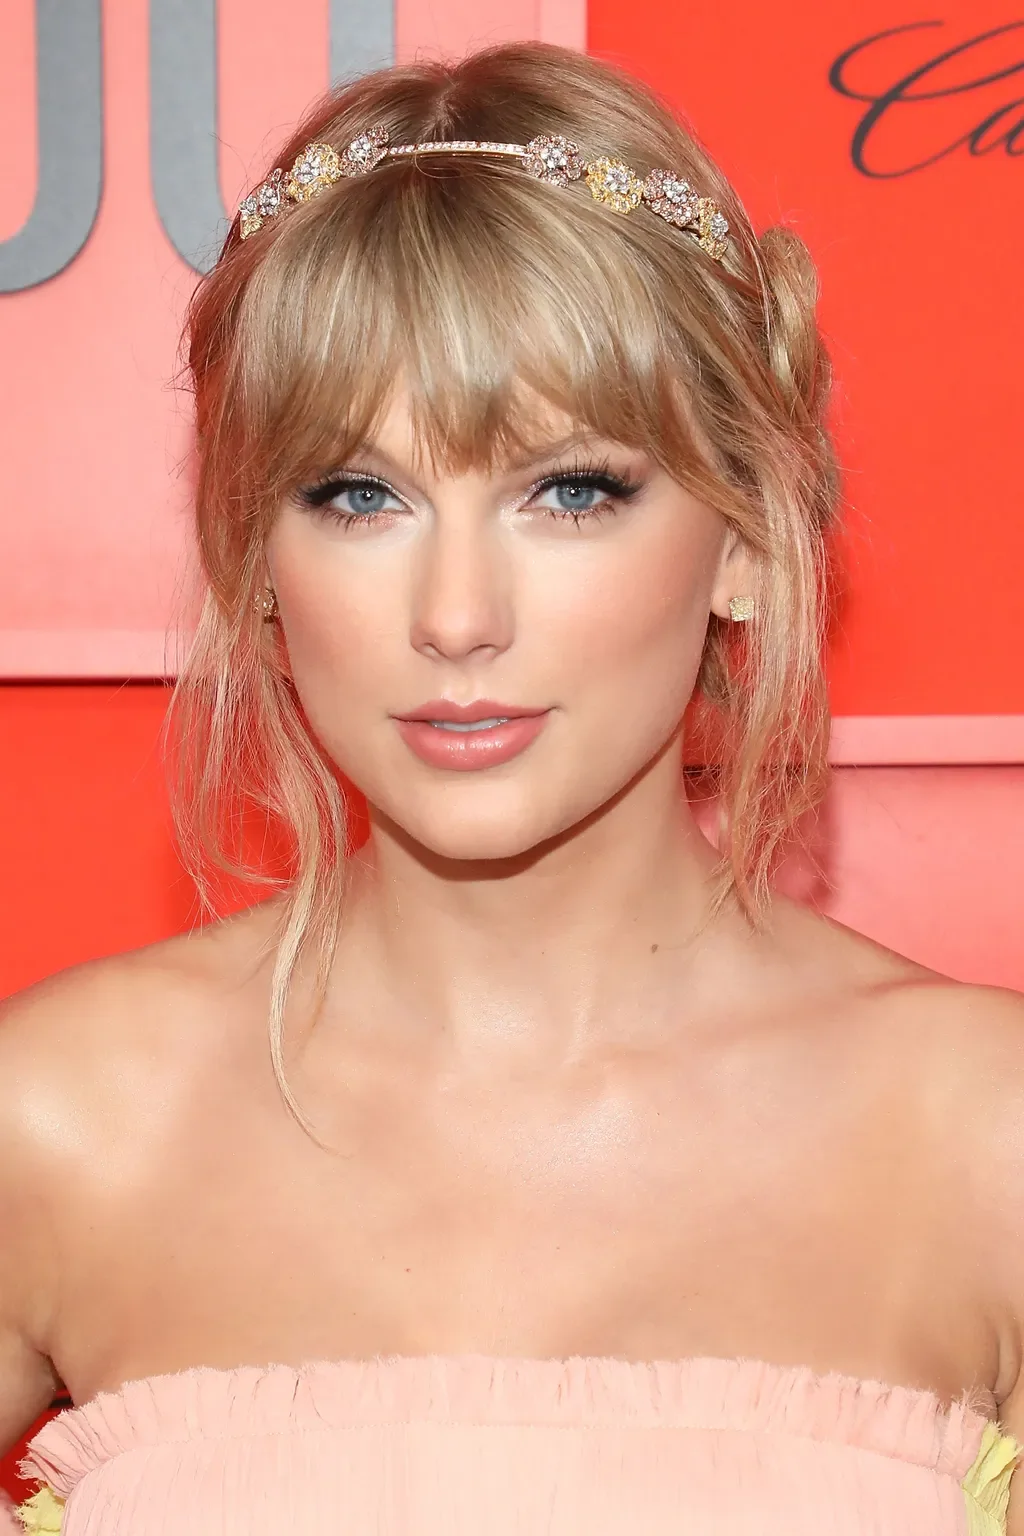
Soft Blonde Crown Updo
A soft blonde crown updo with face-framing bangs and a delicate headband.
- Style
- Updo
- Texture
- Wavy
- Parting
- Center
It feels romantic without asking fine hair to hold a large bun. The headband creates a focal point, and the soft fringe makes thinner front pieces look intentional. Fine blonde hair, bridal showers, date nights, and soft formal outfits. In soft blonde crown updo, the anchor point, surface finish, and loose pieces are the clearest details to compare before choosing a direction.
Wearability note: Secure the base first, then add the headband as decoration instead of support.
Idea 06
Loose Blonde Low Updo
A loose blonde low updo with soft side pieces and a gentle pinned base.
- Style
- Updo
- Texture
- Wavy
- Parting
- Center
It keeps the hair gathered while leaving enough movement around the face. The low placement avoids tension, and the loose front pieces add softness where fine hair can look sparse. Fine blonde hair, wedding guests, mature formal style, and soft low-tension updos. Use loose blonde low updo to decide how much emphasis you want on the anchor point, surface finish, and loose pieces.
Wearability note: Pin short pieces in small sections and refresh the side pieces separately.

Idea 07
Voluminous Curled High Updo
A voluminous curled high updo with lifted crown pieces and long face-framing strands.
- Style
- Updo
- Texture
- Curly
- Parting
- Center
It gives fine hair a bigger silhouette without hiding the texture. Curling before pinning creates shape that fine thin hair can hold more easily than a smooth oversized bun. Fine hair with layers, formal nights, and anyone who wants height with a soft finish. The photograph of voluminous curled high updo keeps the anchor point, surface finish, and loose pieces visible enough for a useful salon conversation.
Wearability note: Let curls cool before pinning and use flexible spray between layers.
Idea 08
Curly High Puff Updo
A curly high puff updo with defined coils and soft bangs.
- Style
- Updo
- Texture
- Curly
- Parting
- Center
The height comes from natural texture, so the style looks full without heavy padding. Curly texture fills the shape visually, while the high base keeps the updo lifted and balanced. Fine to medium curly hair, natural texture, date nights, and dressy casual outfits. The practical question is whether your hair can support the medium length, curly texture, natural finish within the amount of styling you normally do.
Wearability note: Refresh curls with mousse and pin the base without pulling tightly at the hairline.
Idea 09
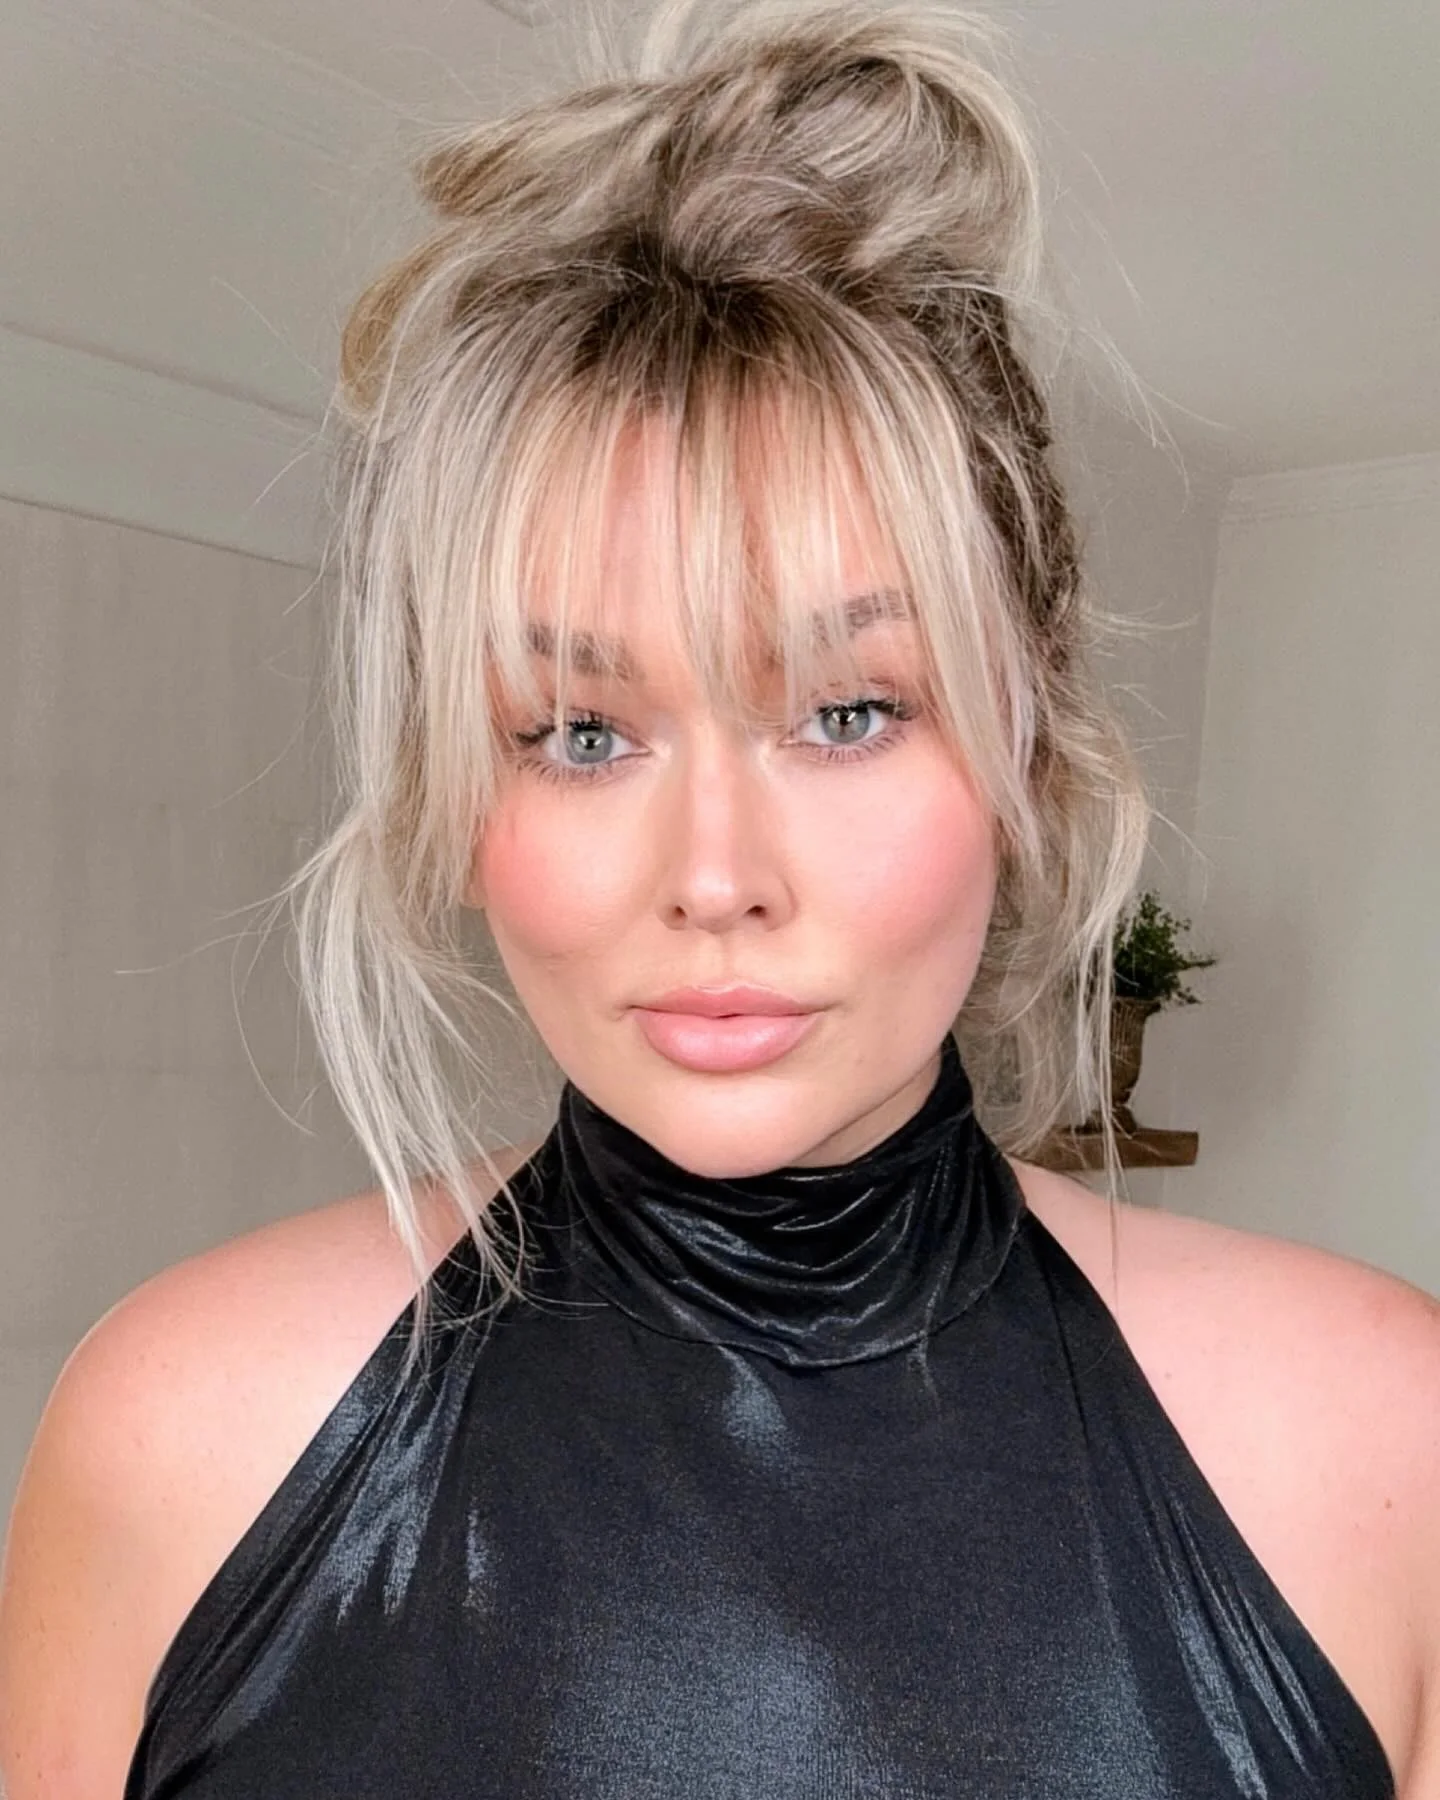
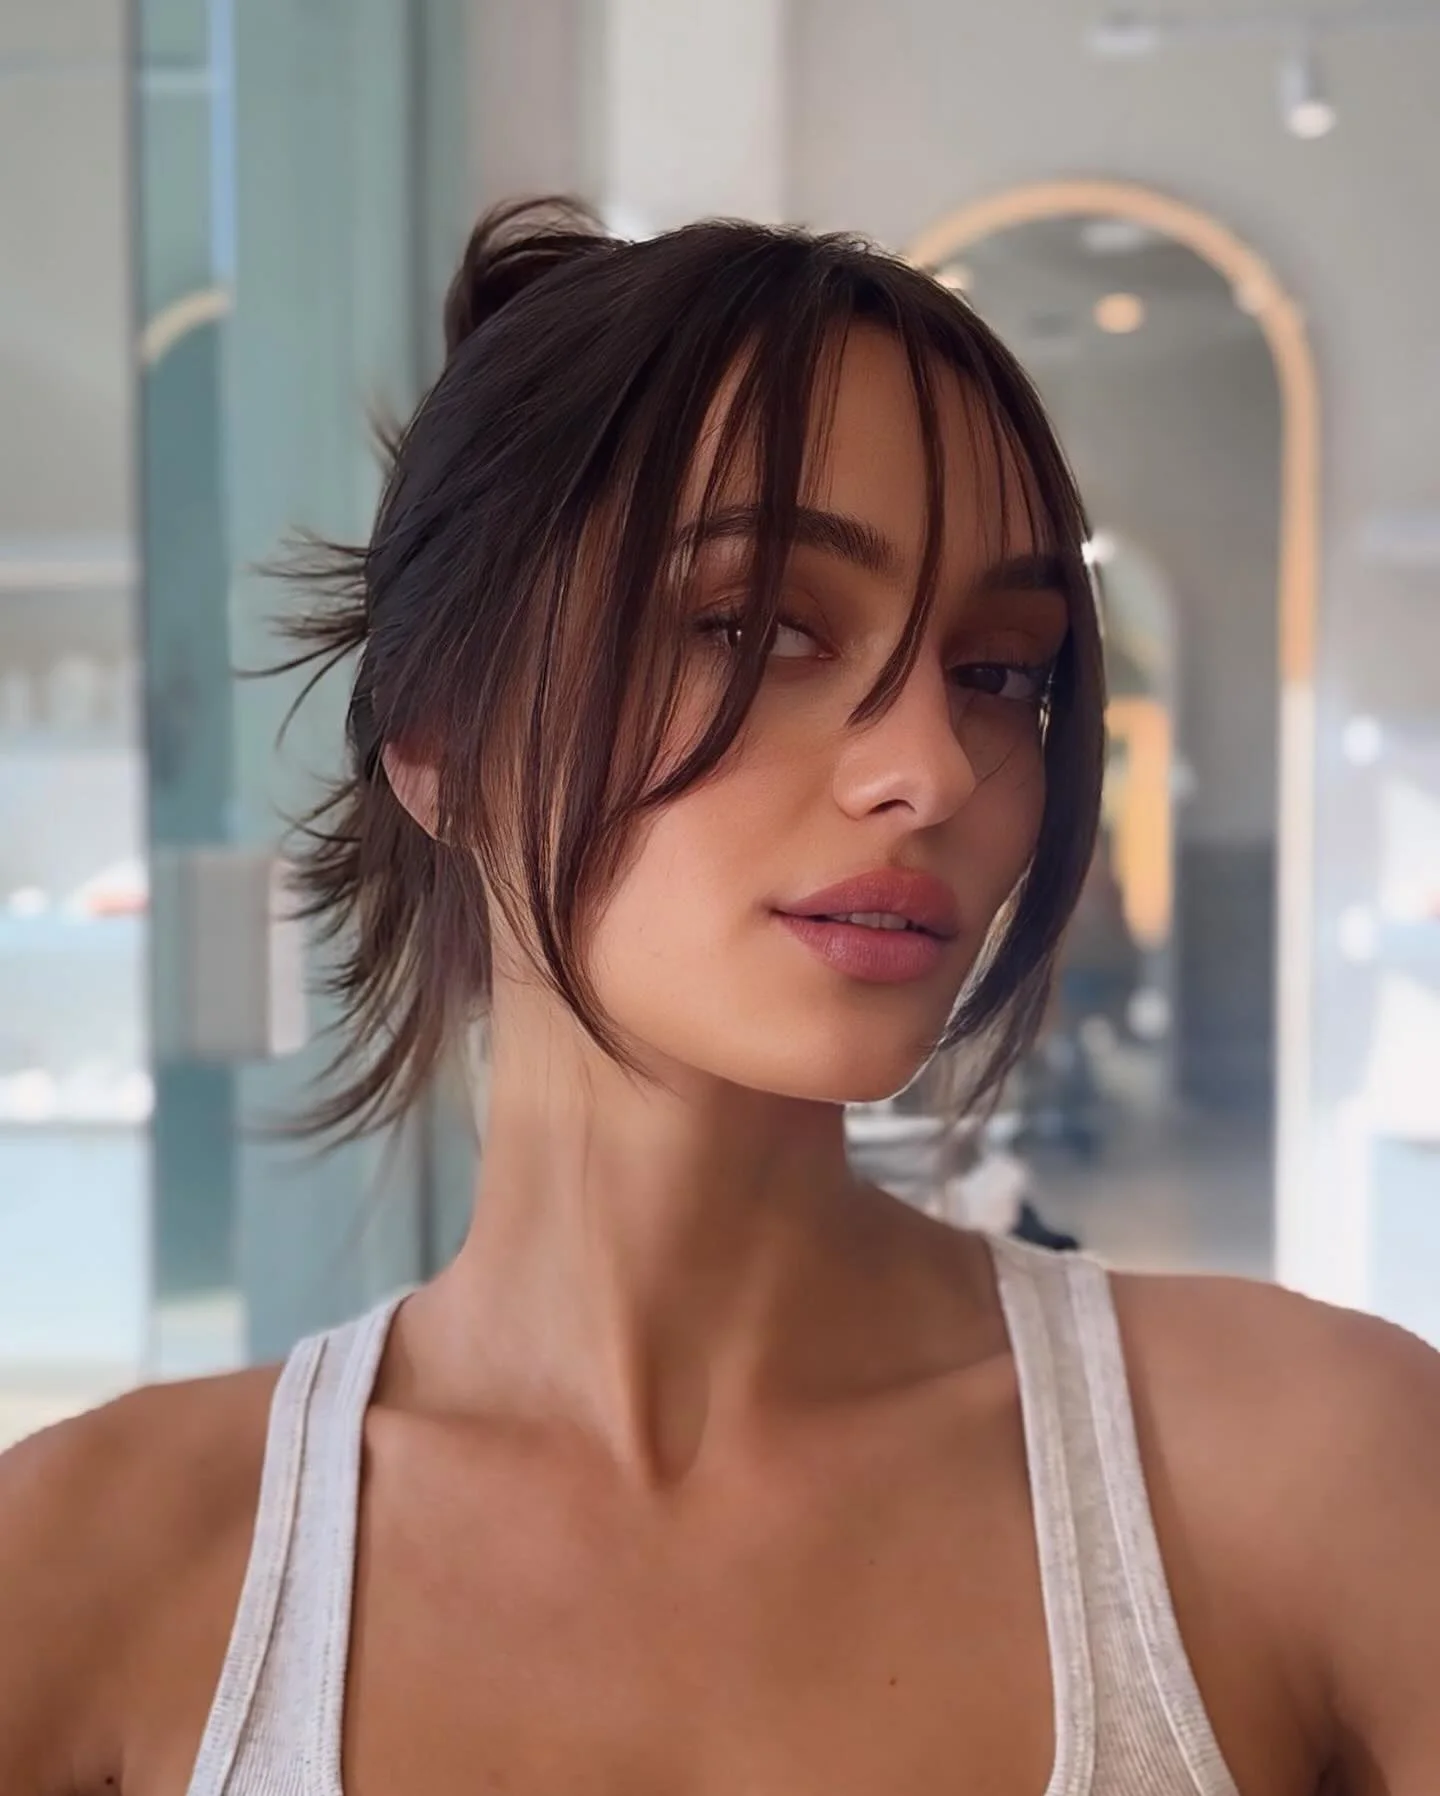
Messy Blonde Top Knot With Bangs
A messy blonde top knot with airy bangs and soft texture through the crown.
- Style
- Updo
- Texture
- Wavy
- Parting
- Center
It is casual, lifted, and useful when fine hair needs quick height. The undone texture makes a smaller bun look fuller, while the bangs keep the front from looking bare. Fine hair with bangs, second-day hair, casual outfits, and quick weekend styling. What distinguishes messy blonde top knot with bangs is the balance between the fringe line, face frame, and transition into the sides.
Wearability note: Keep the bun loose but pin the base firmly so it does not collapse.
Idea 10
Small High Bun With Wispy Bangs
A small high bun with wispy bangs and a relaxed crown.
- Style
- Bun
- Texture
- Straight
- Parting
- Center
The bun is not oversized, which keeps the style believable for fine thin hair. A smaller bun can look more polished than a forced large bun, especially when the fringe adds softness. Fine hair, shorter lengths, soft bangs, and everyday updos. Small High Bun With Wispy Bangs makes the micro fringe, center part, and straight texture visible in the same frame. Their spacing gives a more reliable basis for choosing this updos for fine thin hair direction than copying the model's color or assuming the finish will transfer unchanged.
Wearability note: Use U pins around the bun and leave the wispy bangs product-light.
Idea 11
Soft Face-Framing Pinned Updo
A soft face-framing pinned updo with loose layers around the cheeks.
- Style
- Updo
- Texture
- Wavy
- Parting
- Center
The back is gathered, but the front keeps the style light and flattering. Fine hair can look fuller when the front pieces are shaped instead of pulled tightly back. Fine layered hair, oval or heart face shapes, and soft event styling. The curtain fringe in Soft Face-Framing Pinned Updo establishes the first line of the silhouette, and the center part carries it toward the wavy texture. This is the part of the updos for fine thin hair photograph worth discussing when placement and proportion are the main decision.
Wearability note: Curl the loose pieces first and avoid spraying them until they cool.
Idea 12
Classic Low Bun With Side Sweep
A classic low bun with a side-swept front and smooth nape.
- Style
- Updo
- Texture
- Straight
- Parting
- Side
It is simple, elegant, and easy to adapt for thin hair. The side sweep adds movement at the front, while the low bun makes the ends look gathered and dense. Fine straight hair, wedding guests, work events, and polished evening looks. The photo is most useful as a reference for straight texture, polished finish, while the final amount of polish can be adjusted to suit an everyday routine.
Wearability note: Place the bun low and pin underneath so the side sweep stays clean.
Idea 13
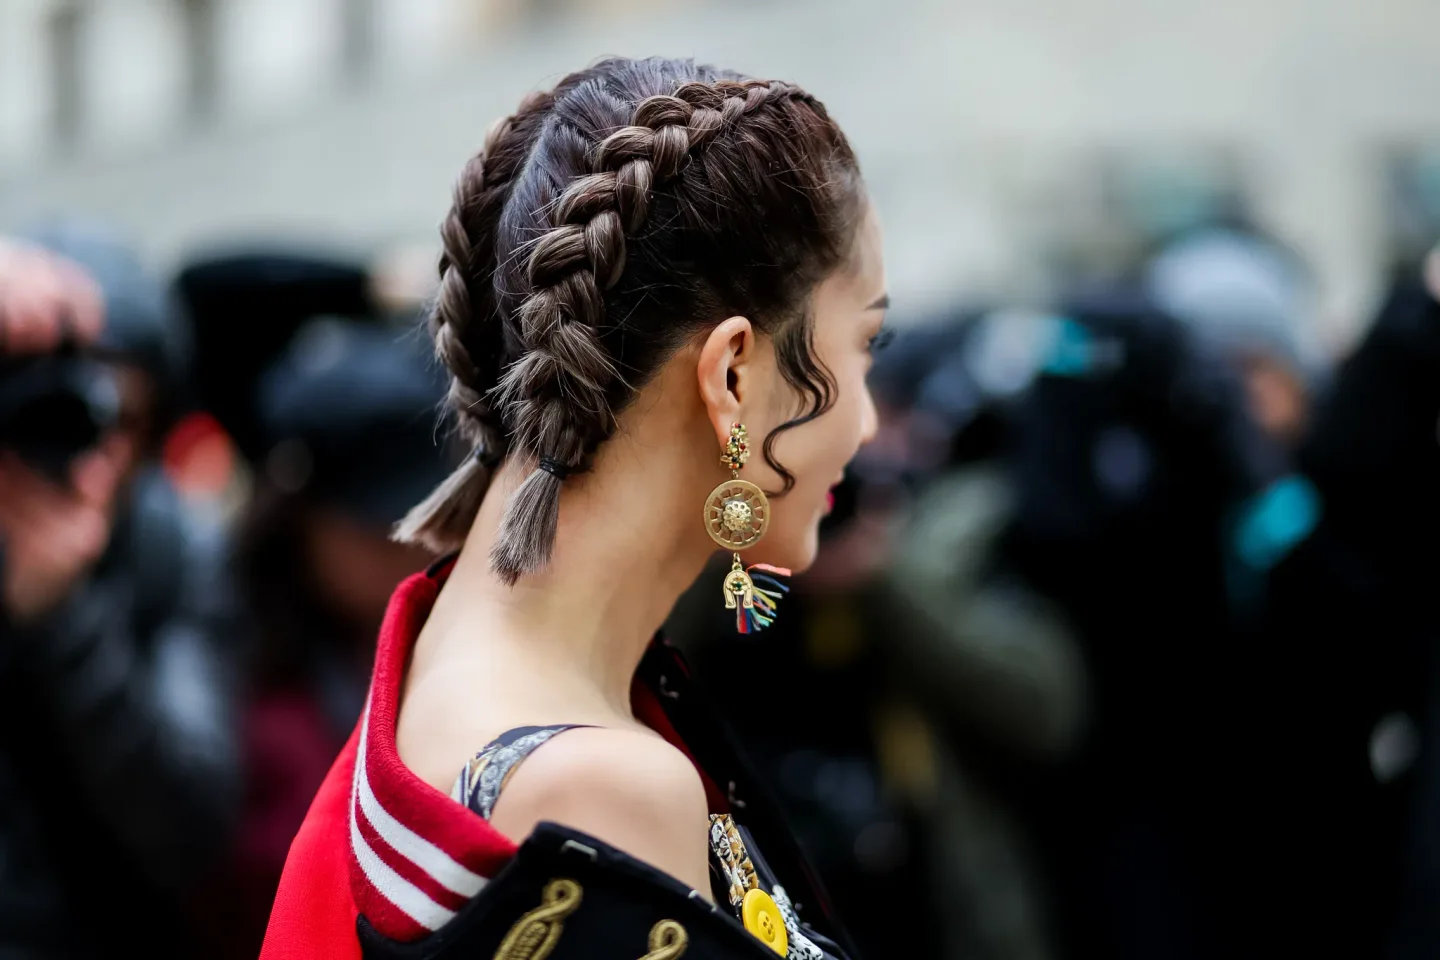
Braided Low Updo With Loose Curl
A braided low updo with one loose curl near the face.
- Style
- Updo
- Texture
- Curly
- Parting
- Side
The braid adds visible texture and makes the pinned shape feel more detailed. Braiding gives fine hair surface pattern, which can make a smaller updo look more substantial. Fine hair with enough length to braid, formal events, and soft romantic styling. In the photograph, Braided Low Updo With Loose Curl keeps its dutch braid pattern readable beside the side part, which is the useful relationship to compare within updos for fine thin hair. Braided Low Updo With Loose Curl provides the specific example here: the curly texture is also visible enough to discuss without assuming that the same finish will behave identically on every density.
Wearability note: Widen the braid gently after tying it, then pin it before adding spray.
Idea 14
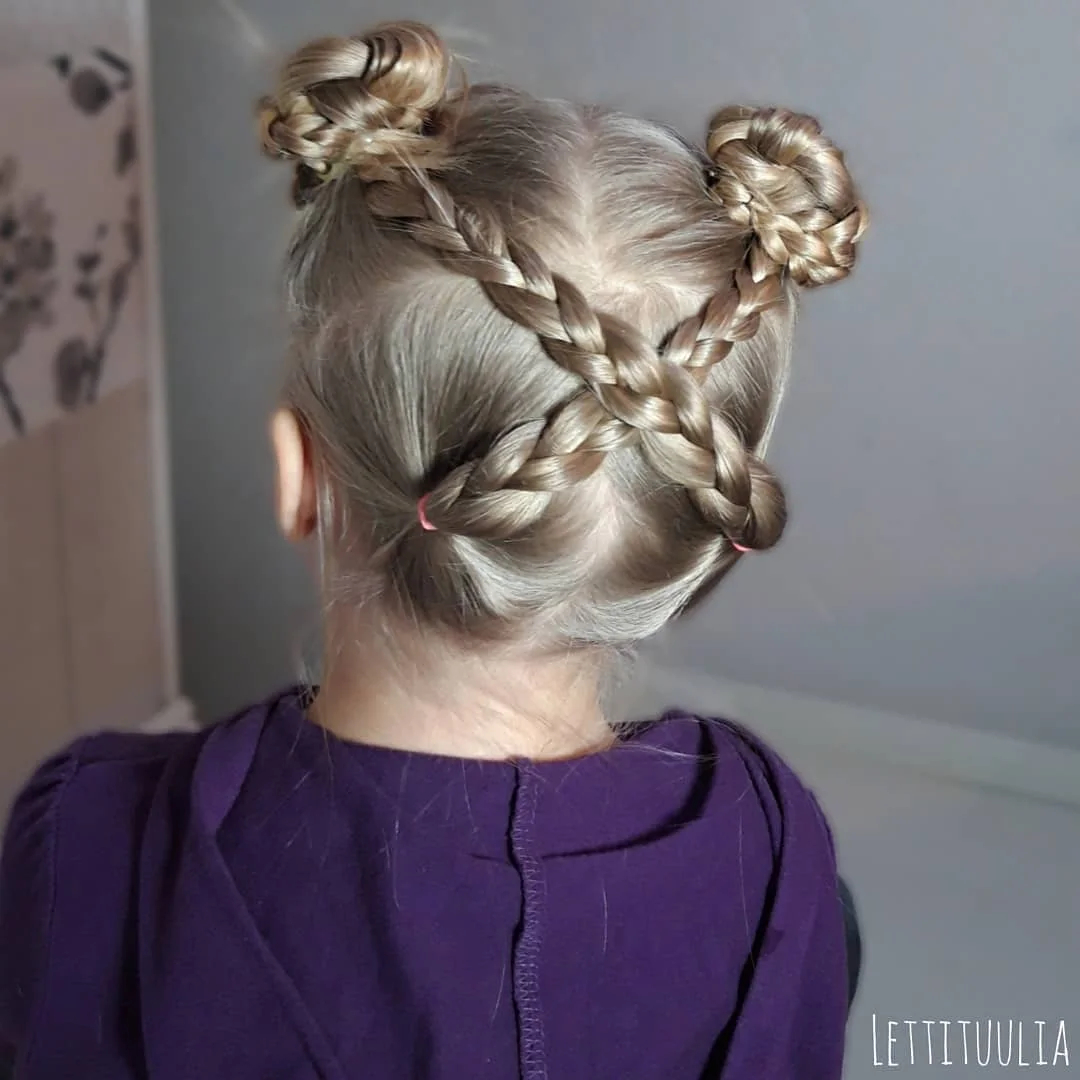
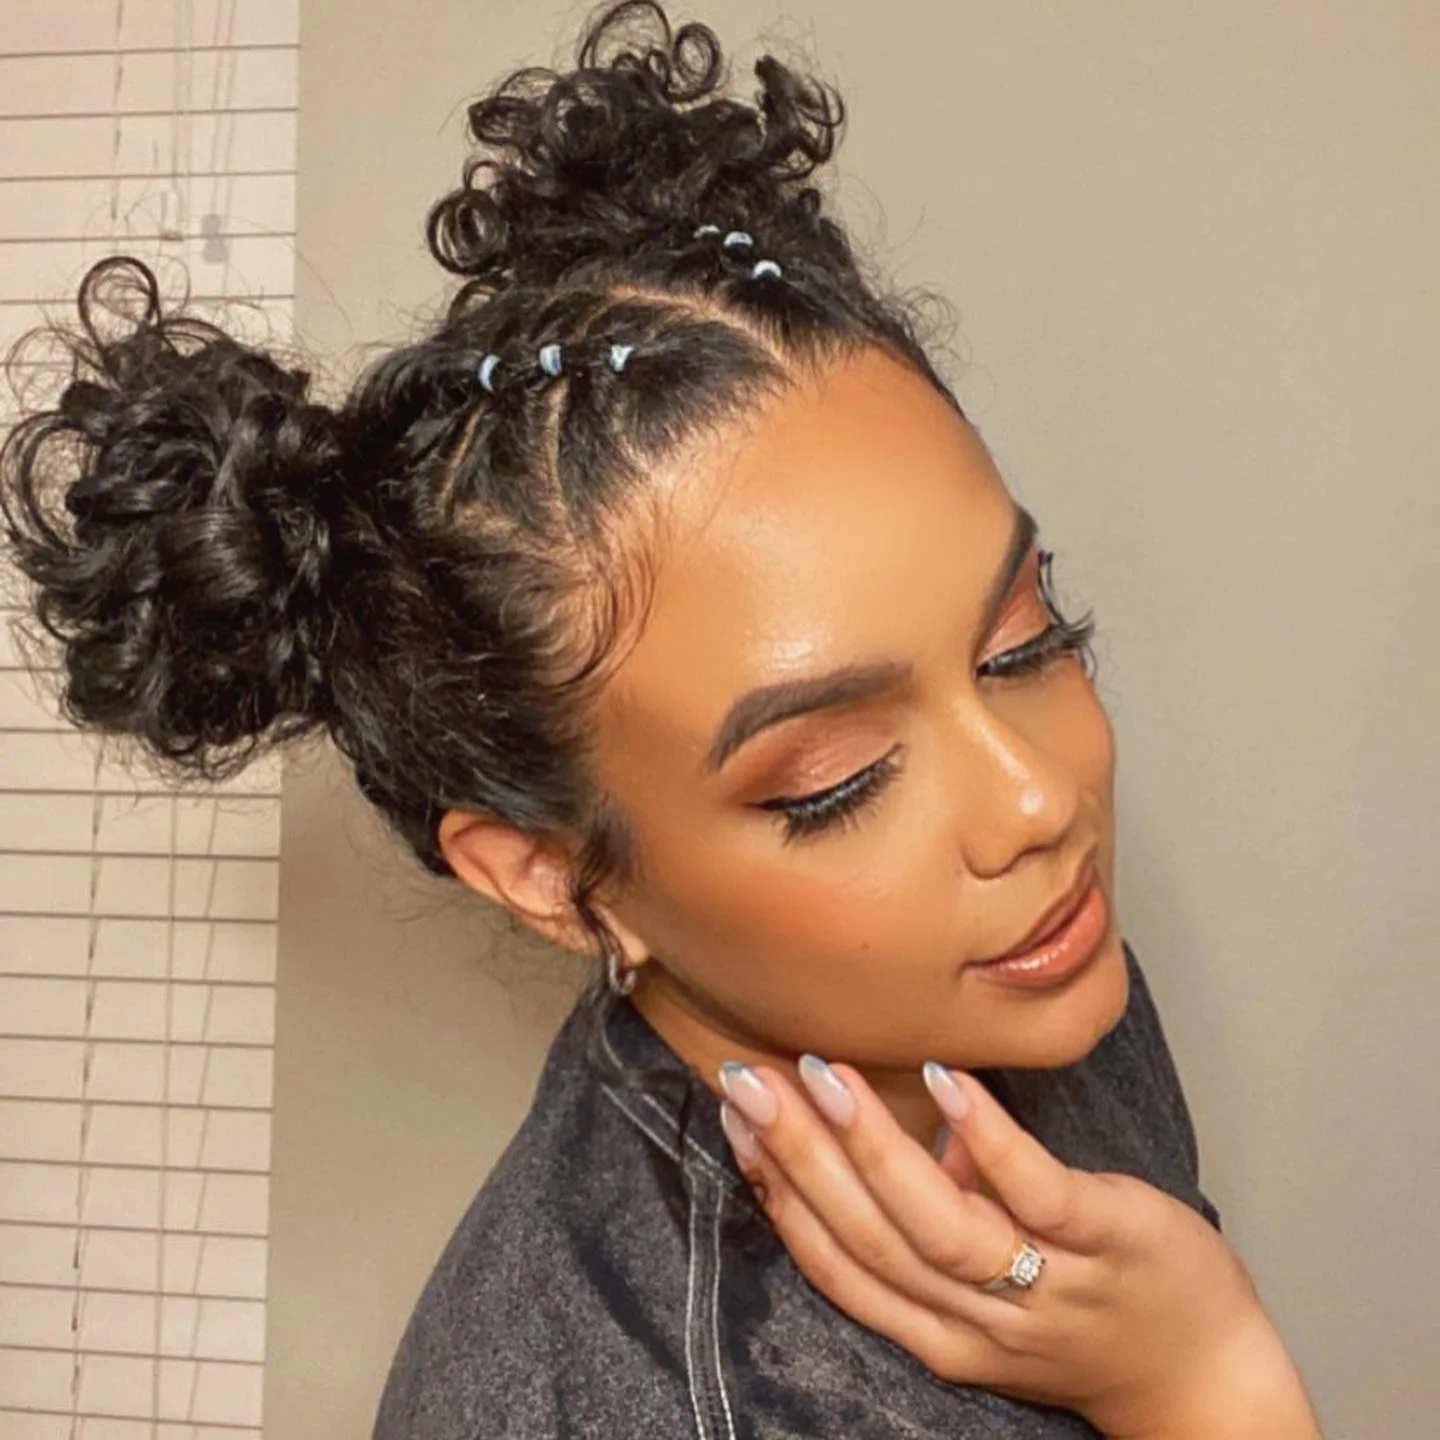
Braided Double Bun Updo
A braided double bun updo with two compact buns at the back.
- Style
- Bun
- Texture
- Braids
- Parting
- Center
The braids create structure, so fine hair does not need a large loose bun. Dividing the hair into two buns creates fullness across the back while keeping each section secure. Fine to medium hair, creative updos, festivals, and braided styling. The practical question is whether your hair can support the medium length, braided texture within the amount of styling you normally do.
Wearability note: Keep the elastics hidden and pin the braid ends under each bun.
Idea 15
Curly Braided High Bun
A curly braided high bun with a defined braided base and full top.
- Style
- Bun
- Texture
- Curly
- Parting
- Center
The texture gives the updo volume and shape from every angle. A braided base creates grip, and the curly top adds visible fullness without smooth teasing. Curly or coily hair, protective styling, and high updos with a secure base. What separates Curly Braided High Bun from nearby updos for fine thin hair options is the balance between the center part, curly texture, and chest length. Curly Braided High Bun provides the specific example here: those visible proportions can be carried into a consultation even when the final texture or color will be different.
Wearability note: Moisturize the curls before styling and keep the braided sections neat at the roots.
Idea 16
Copper Low Wedding Updo
A copper low wedding updo with a smooth side part and tucked bun.
- Style
- Updo
- Texture
- Straight
- Finish
- Sleek
The warm color makes the simple shape feel rich. A clean low bun concentrates fine hair into one polished shape instead of spreading it thin. Fine copper or auburn hair, weddings, formal dinners, and classic low updos. The photographed updo makes the side part easy to locate before the eye moves to the light layering. Copper Low Wedding Updo provides the specific example here: that order is helpful when deciding which part of this updos for fine thin hair idea should remain strongest after it is adapted.
Wearability note: Use a smoothing brush at the part and pin the bun before adding shine spray.
Idea 17
Side Braided Bun
A side braided bun with a compact braided base and soft gathered finish.
- Style
- Bun
- Texture
- Curly
- Finish
- Textured
It adds detail without needing a lot of hair density. The braid creates texture at the side, and the bun keeps the ends tucked into one fuller point. Fine hair with medium length, casual events, and low-effort braid lovers. Side Braided Bun should be judged first by its center part, then by how the light layering supports the textured finish. This photograph keeps all three areas visible, so it can guide a precise conversation about updos for fine thin hair rather than only naming a trend.
Wearability note: Start with light texture spray so the braid grips without feeling dry.
Idea 18
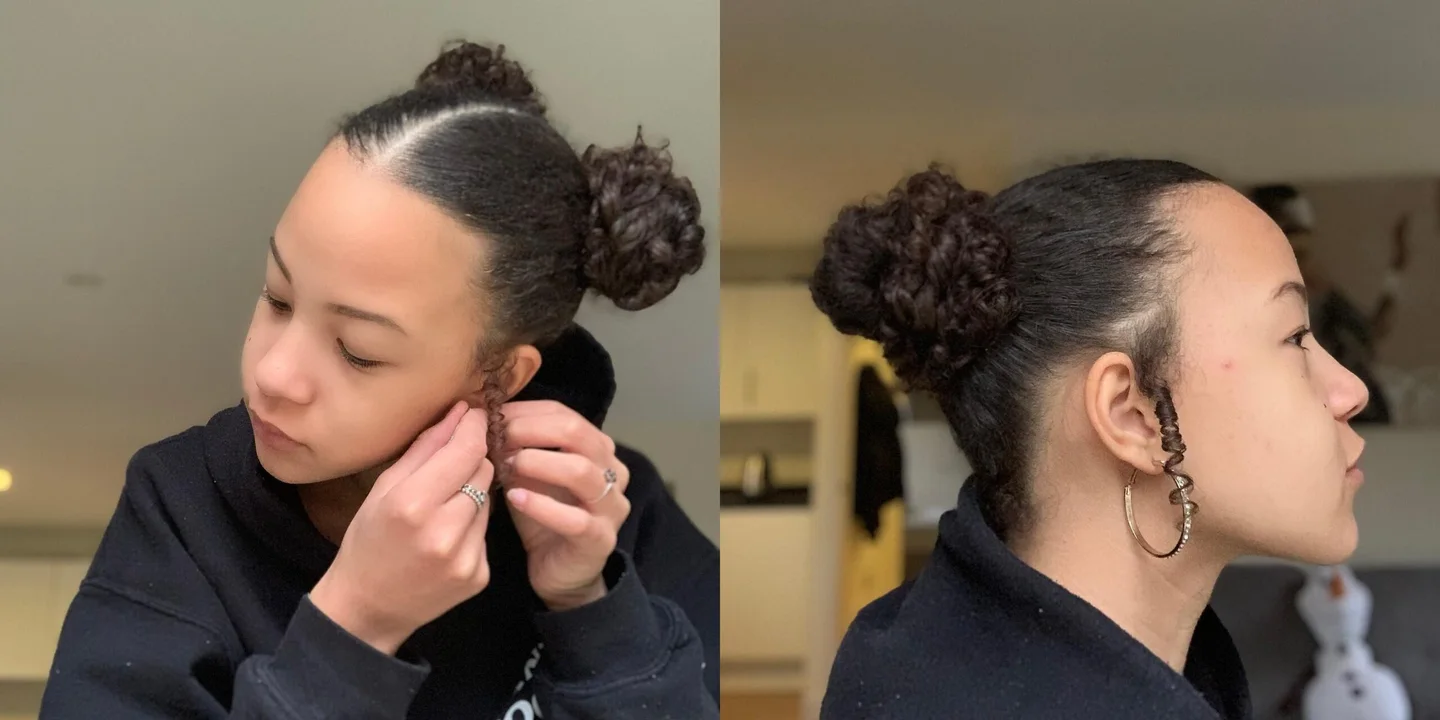
Curly Double Bun Updo
A curly double bun updo with two soft high buns and natural volume.
- Style
- Bun
- Texture
- Curly
- Finish
- Voluminous
The shape is playful but still adult and polished. Two smaller buns are easier for fine curly hair to support than one oversized bun. Curly fine hair, relaxed weekends, parties, and playful going-out looks. The photo is most useful as a reference for curly texture, polished finish, while the final amount of polish can be adjusted to suit an everyday routine.
Wearability note: Pin each bun separately and refresh the curls around the edges with mousse.
Idea 19
Curly Side Bun Updo
A curly side bun updo with defined texture and a lifted side profile.
- Style
- Bun
- Texture
- Curly
- Finish
- Voluminous
It keeps curls gathered while still showing their shape. The side placement makes the updo visible from the front, which helps fine hair feel more styled. Curly hair, medium density, date nights, and dressy natural texture. The visual evidence in Curly Side Bun Updo is concentrated in the light layering and voluminous finish. Together they control how the curly texture reads, giving this updos for fine thin hair example a specific shape that can be compared with the rest of the gallery.
Wearability note: Use pins in a cross pattern at the base so the side bun stays balanced.
Idea 20
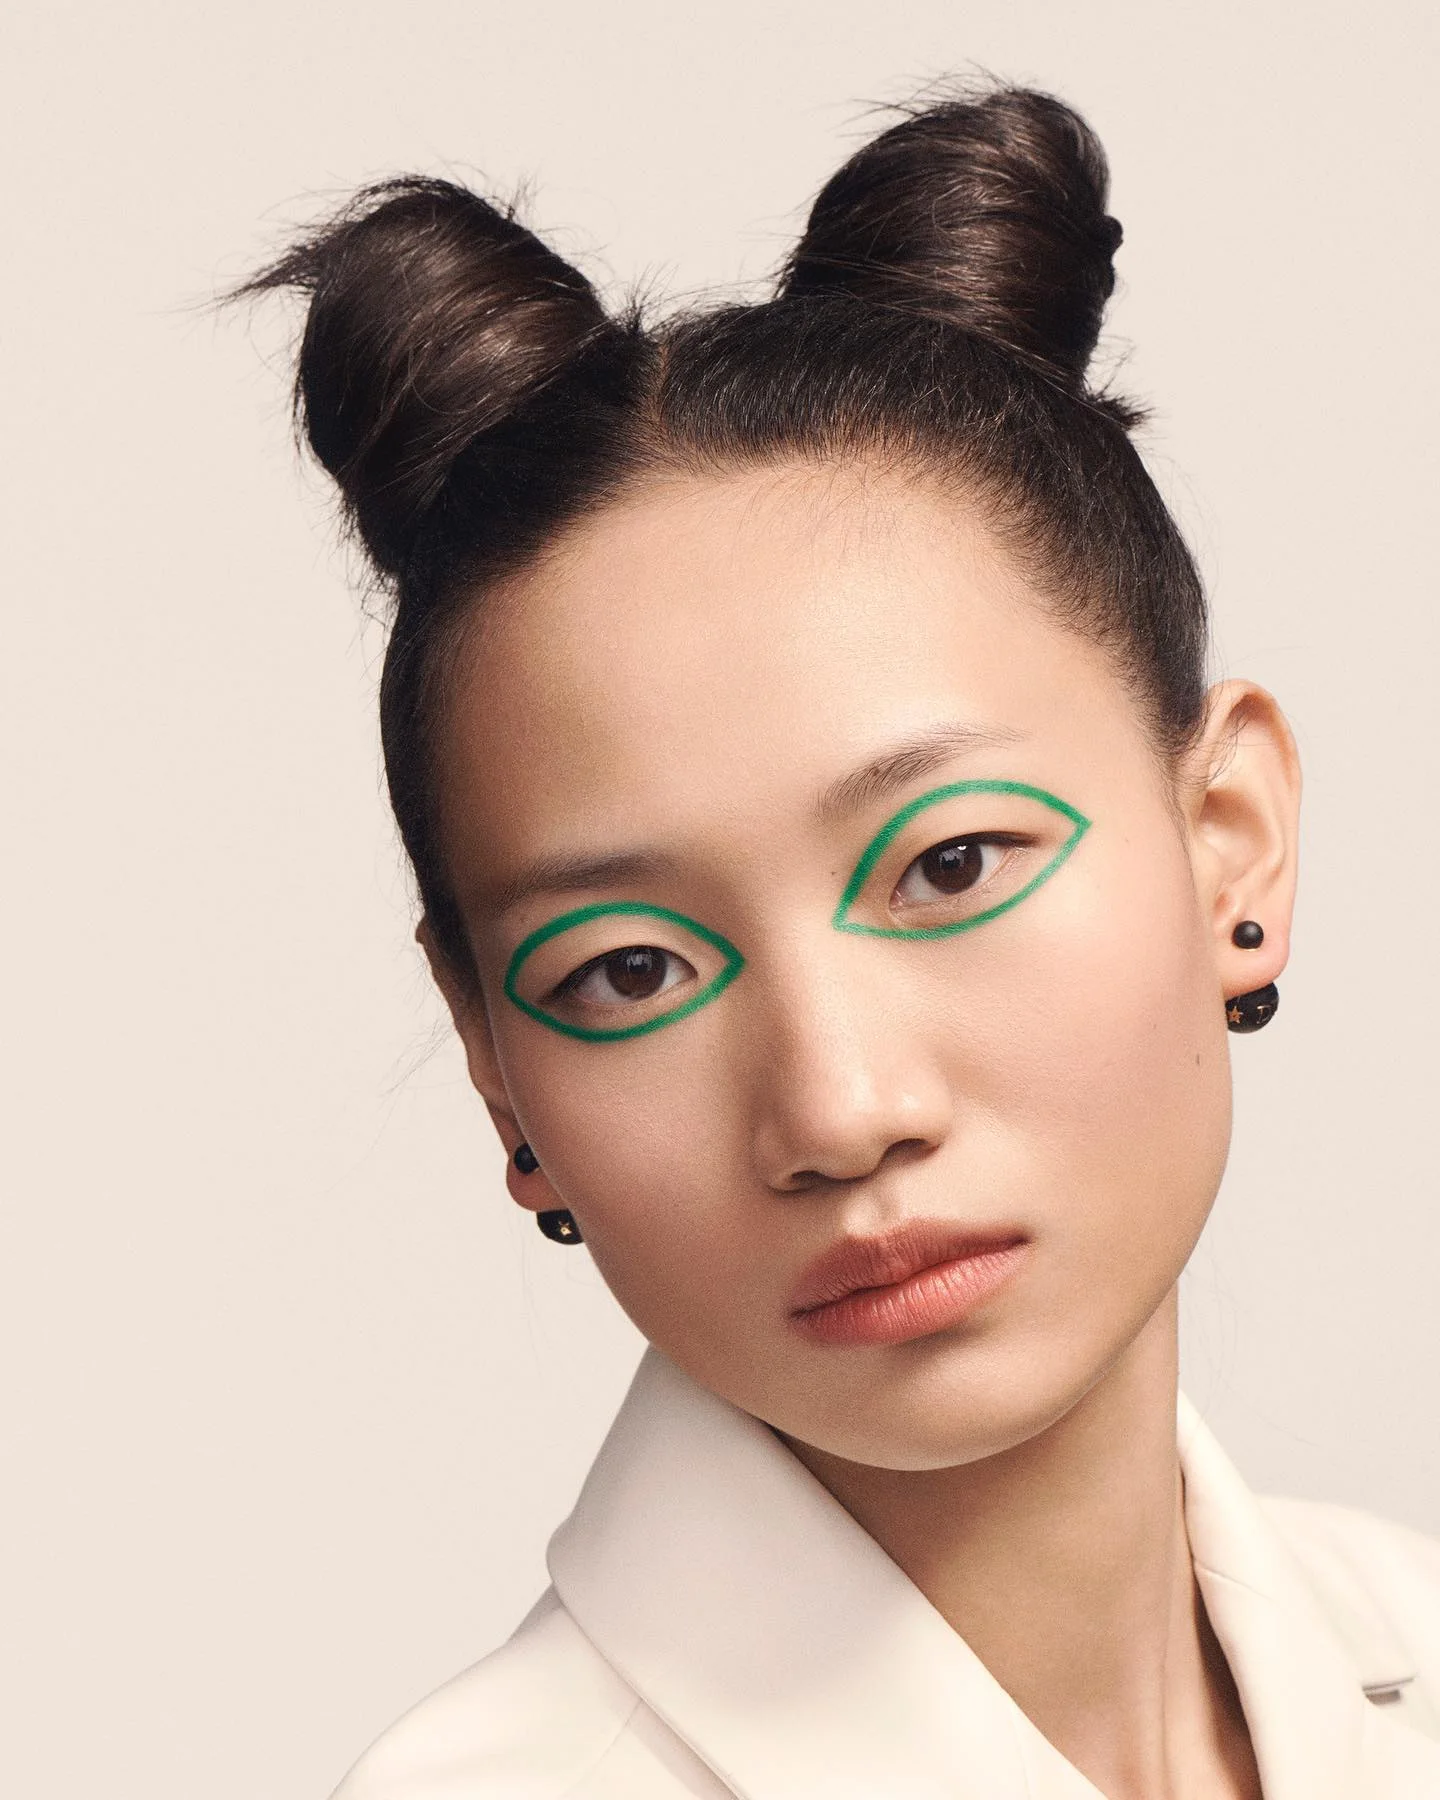
Sculpted High Knot
A sculpted high knot with clean sides and a strong top shape.
- Style
- Bun
- Texture
- Straight
- Finish
- Sleek
It is sharp, modern, and useful when fine hair needs a defined outline. The smooth sides direct attention to the knot, making a compact amount of hair look intentional. Fine straight hair, editorial outfits, evening looks, and sleek styling. The practical question is whether your hair can support the straight texture, sculpted finish within the amount of styling you normally do.
Wearability note: Control the sides with a brush and pin the knot before applying finishing spray.
Idea 21
Soft Curly High Updo
A soft curly high updo with natural lift and an open neckline.
- Style
- Bun
- Texture
- Coily
- Finish
- Natural
The curls create volume without needing a heavy accessory. The texture fills the crown, while the high placement makes fine curls look fuller from the side. Fine curly hair, shoulder length curls, and simple dressy styling. For Soft Curly High Updo, the medium layering remains the clearest fixed point in the photograph. Compare its scale with the natural finish and coily texture; those relationships reveal how this updos for fine thin hair option is constructed and how much daily definition it may need.
Wearability note: Lift the curls from underneath and avoid combing the outer layer after pinning.
Idea 22
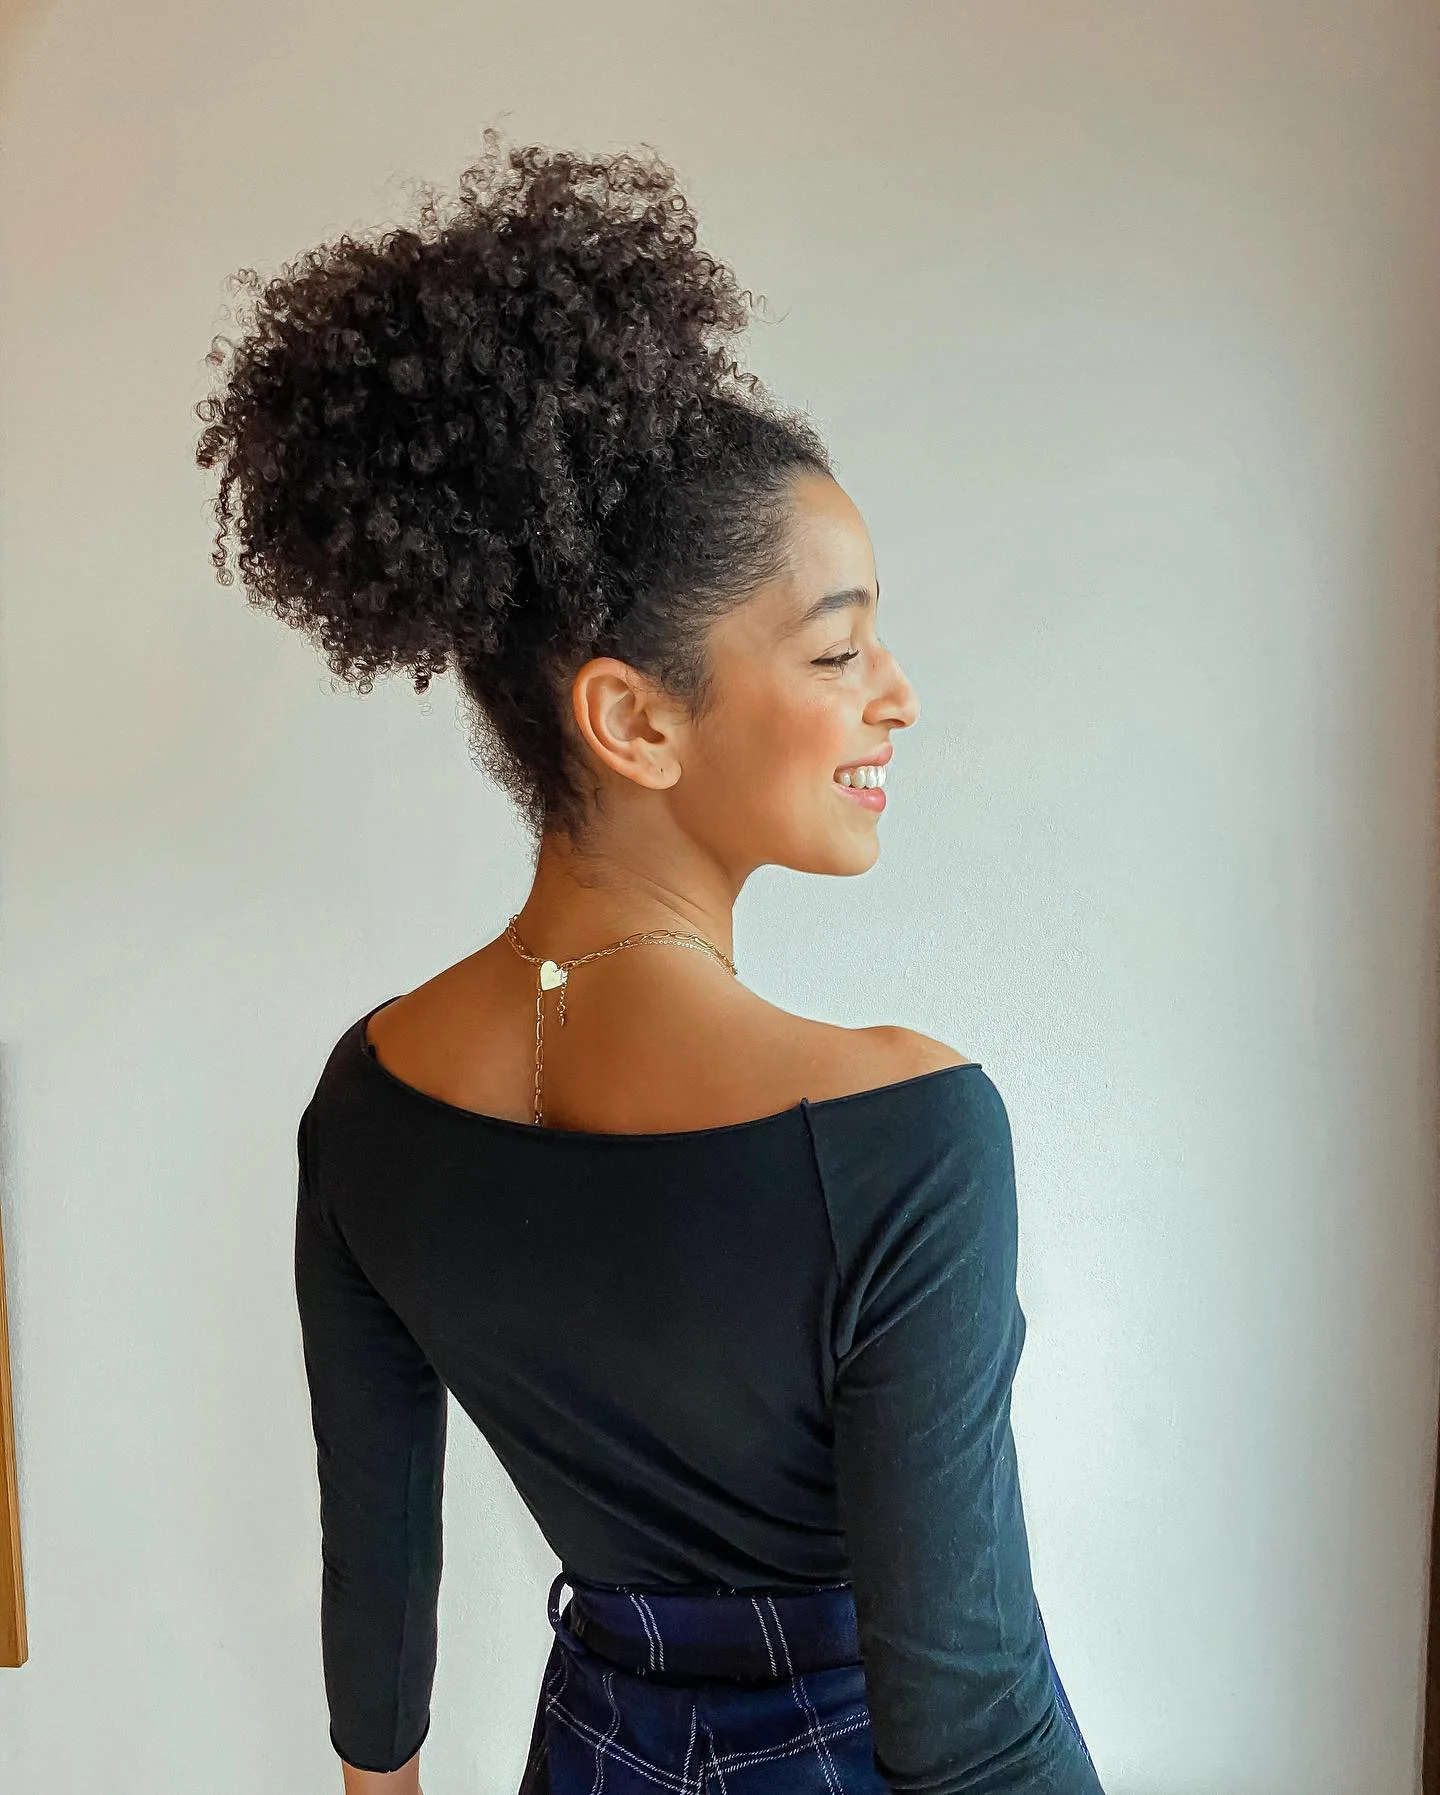
Tall Textured Puff Updo
A tall textured puff updo with a secure base and defined edges.
- Style
- Bun
- Texture
- Coily
- Finish
- Natural
It gives natural hair height while keeping the nape clear. The height creates instant presence, and the textured puff makes fine hair look fuller than a flat bun. Natural curls, fine to medium density, active days, and polished casual outfits. Tall Textured Puff Updo makes the medium layering, natural finish, and coily texture visible in the same frame. Tall Textured Puff Updo provides the specific example here: their spacing gives a more reliable basis for choosing this updos for fine thin hair direction than copying the model's color or assuming the finish will transfer unchanged.
Wearability note: Keep the base comfortable and refresh the puff with leave-in spray.
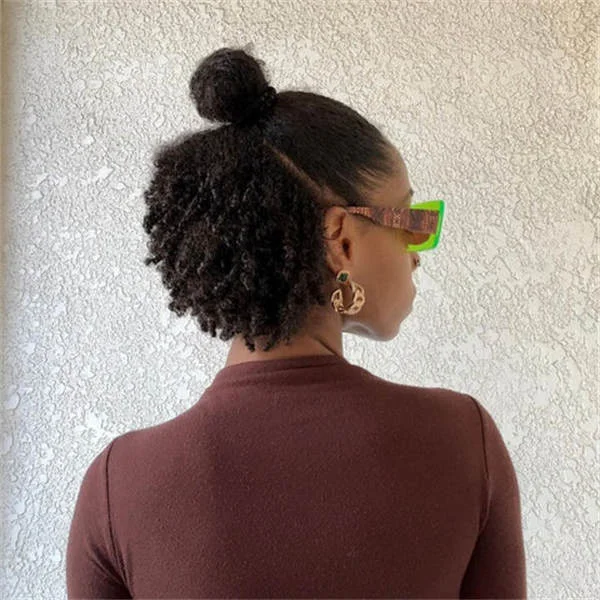
Idea 23
Low Puff Bun With Glasses
A low puff bun with soft texture and glasses.
- Style
- Bun
- Texture
- Coily
- Finish
- Natural
The bun sits low enough to feel easy but still gives the back of the style shape. A low puff keeps tension away from the hairline and lets texture create the fullness. Fine curly hair, glasses, everyday styling, and low-tension updos. The medium layering in Low Puff Bun With Glasses establishes the first line of the silhouette, and the natural finish carries it toward the coily texture. Low Puff Bun With Glasses provides the specific example here: this is the part of the updos for fine thin hair photograph worth discussing when placement and proportion are the main decision.
Wearability note: Use a soft tie and keep product away from the frames.
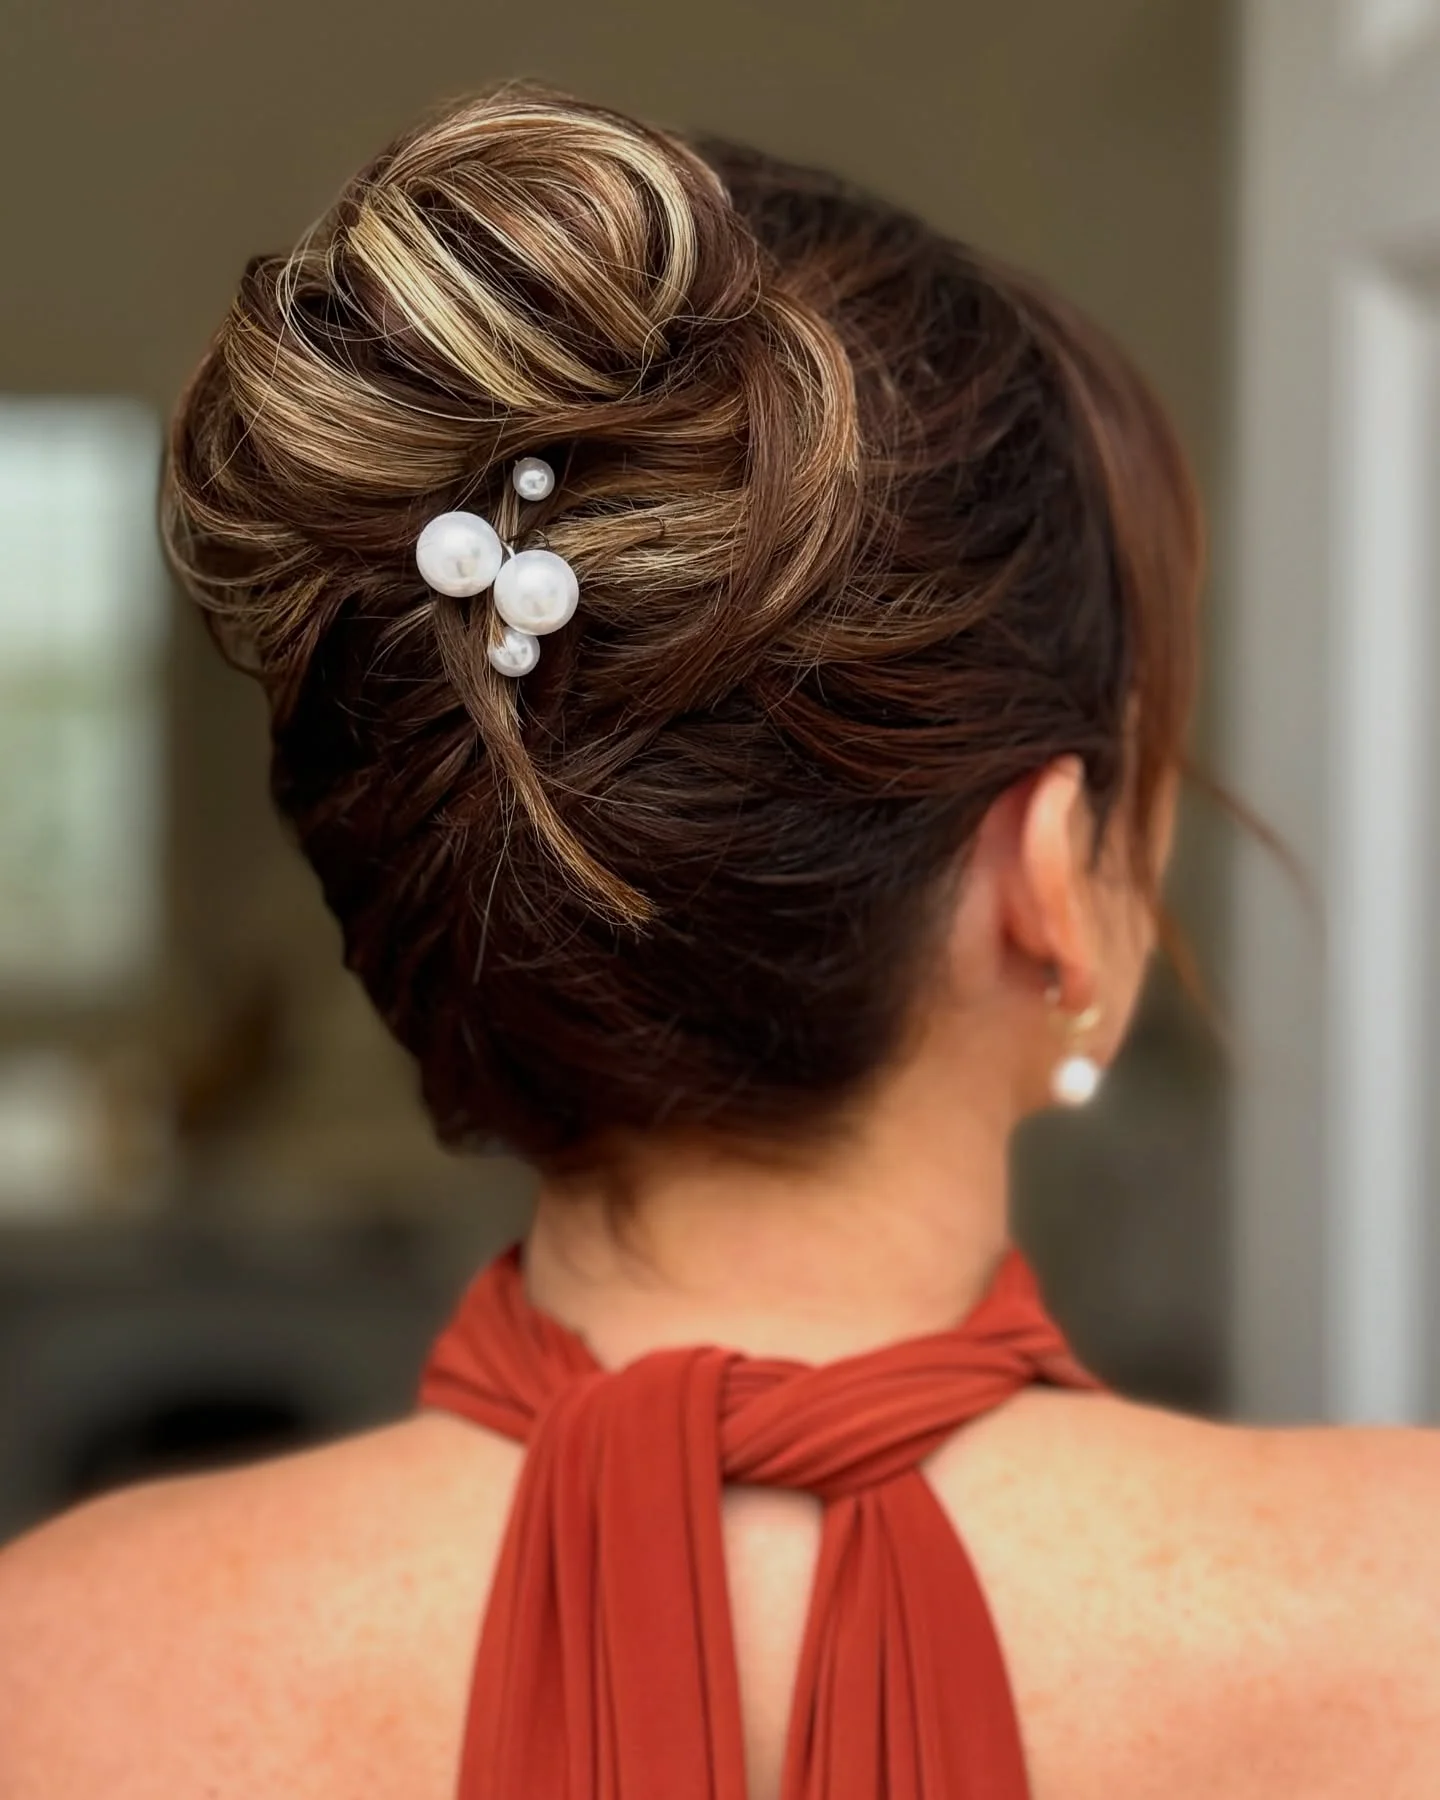
Idea 24
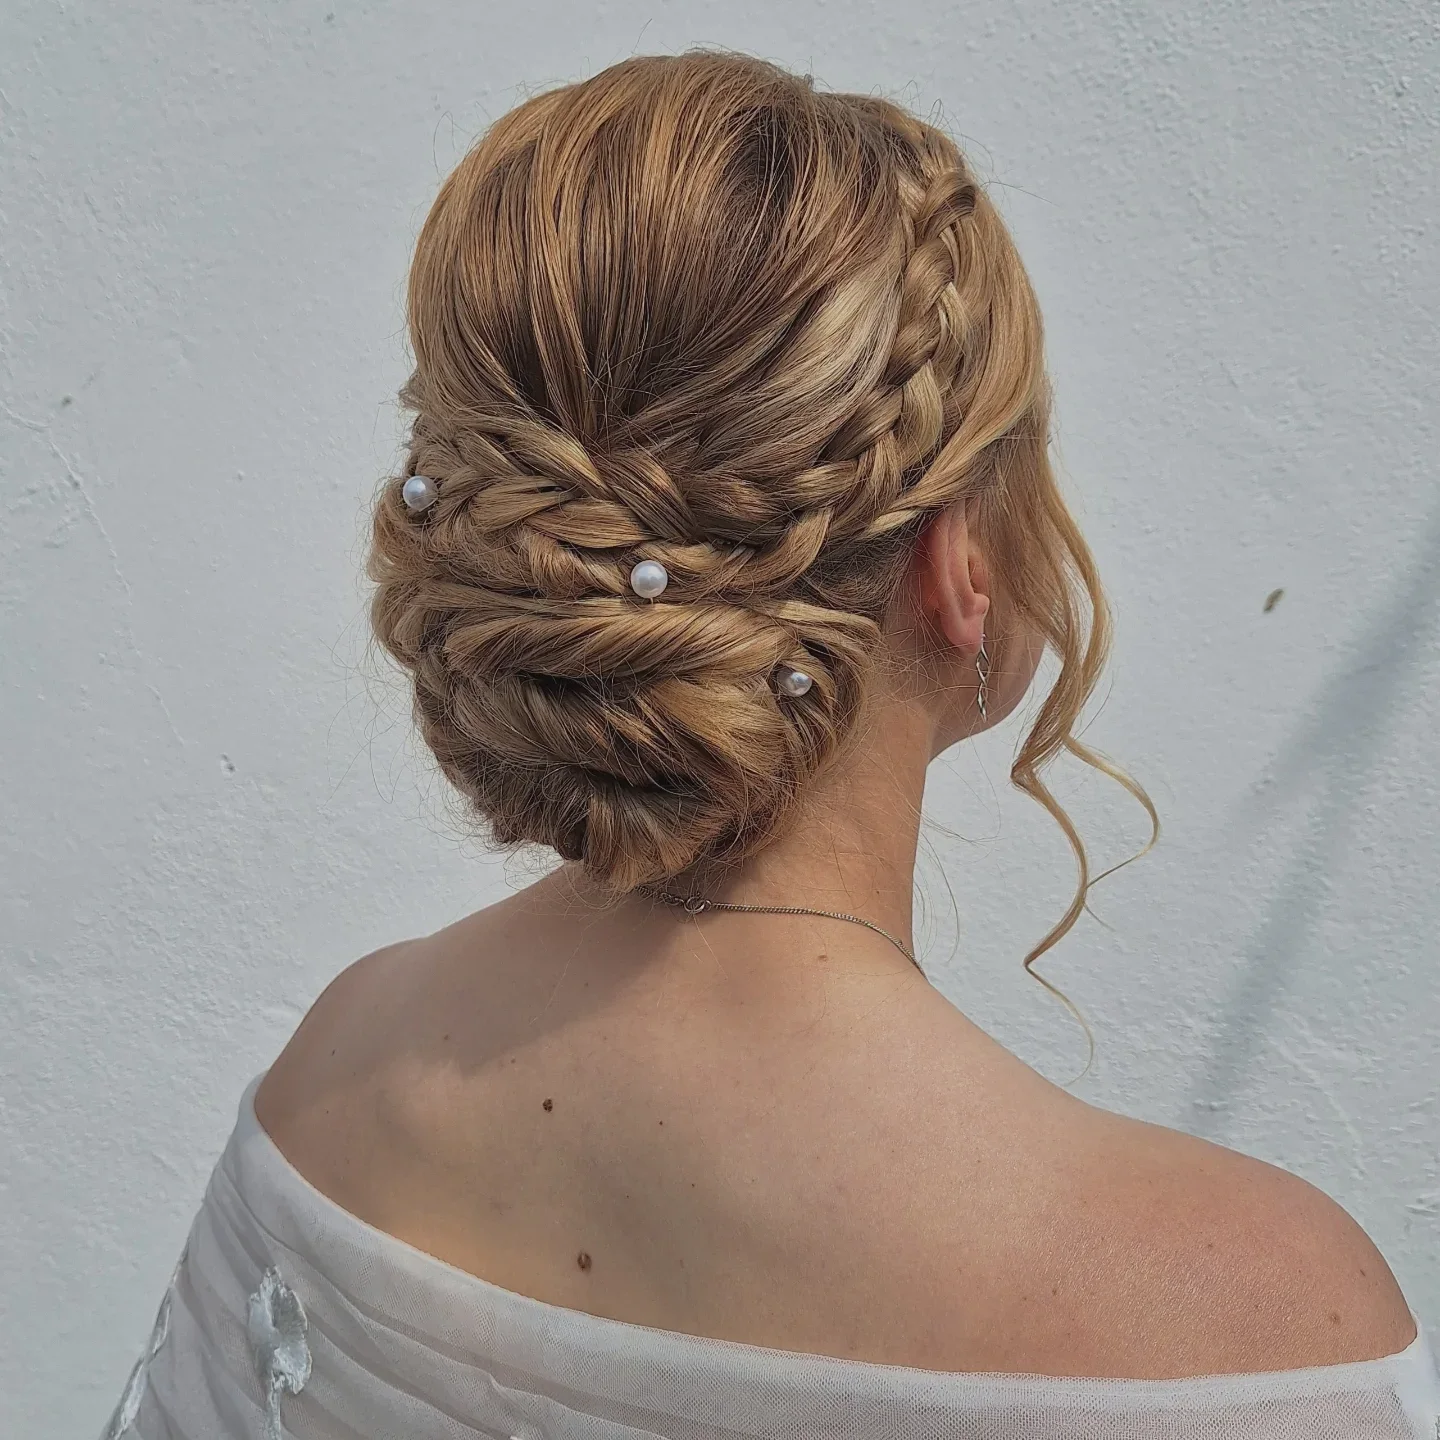
Pearl Pin Low Updo
A pearl pin low updo with soft brown texture and a tucked back shape.
- Style
- Updo
- Texture
- Wavy
- Finish
- Glossy
The pearls add interest without making the fine hair carry extra weight. Small pins create a focal point, while the low twist gathers the hair into a fuller-looking shape. Fine hair, bridesmaids, wedding guests, and soft formal occasions. The anchor point, surface finish, and loose pieces give pearl pin low updo its own silhouette within updos for fine thin hair.
Wearability note: Anchor pearl pins into the twist, not just the top layer.
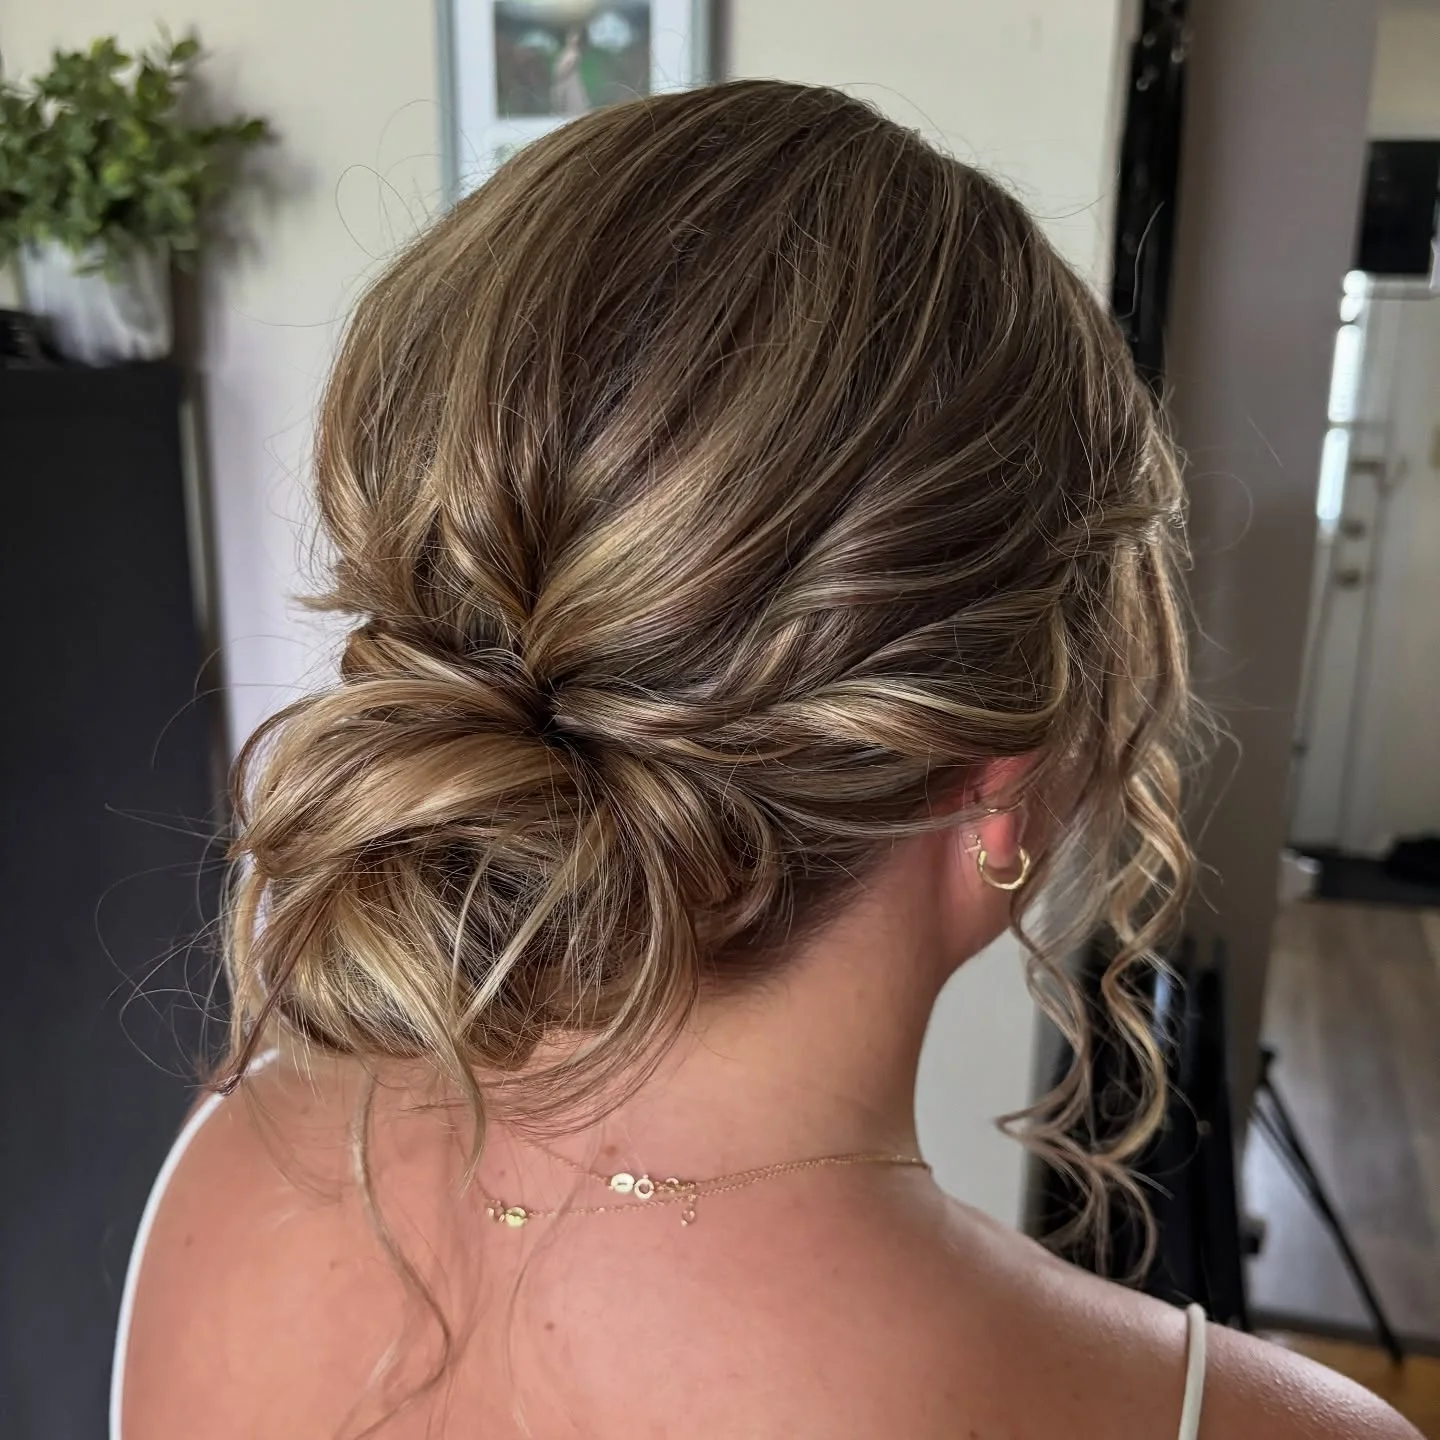
Idea 25
Loose Textured Low Bun
A loose textured low bun with soft blonde dimension and face-framing pieces.
- Style
- Updo
- Texture
- Wavy
- Finish
- Glossy
It feels relaxed but still event-ready. Texture makes the bun look fuller, and loose pieces keep fine hair from looking pulled too tight. Fine blonde hair, medium length layers, wedding guests, and romantic outfits. In the photograph, Loose Textured Low Bun keeps its side part readable beside the medium layering, which is the useful relationship to compare within updos for fine thin hair. Loose Textured Low Bun provides the specific example here: the glossy finish is also visible enough to discuss without assuming that the same finish will behave identically on every density.
Wearability note: Pin the inner bun securely, then loosen only the outer surface.
Idea 26
Braided Blonde Low Bun
A braided blonde low bun with a soft woven back and a few pearl accents.
- Style
- Updo
- Texture
- Wavy
- Finish
- Glossy
The braid gives fine hair a thicker-looking surface. The woven pattern spreads the hair visually, so the low bun looks more detailed and full. Fine blonde hair, formal events, bridesmaids, and medium to long lengths. The practical question is whether your hair can support the medium length, braided texture, soft finish within the amount of styling you normally do.
Wearability note: Pancake the braid gently before pinning and keep the pearls small.
Idea 27
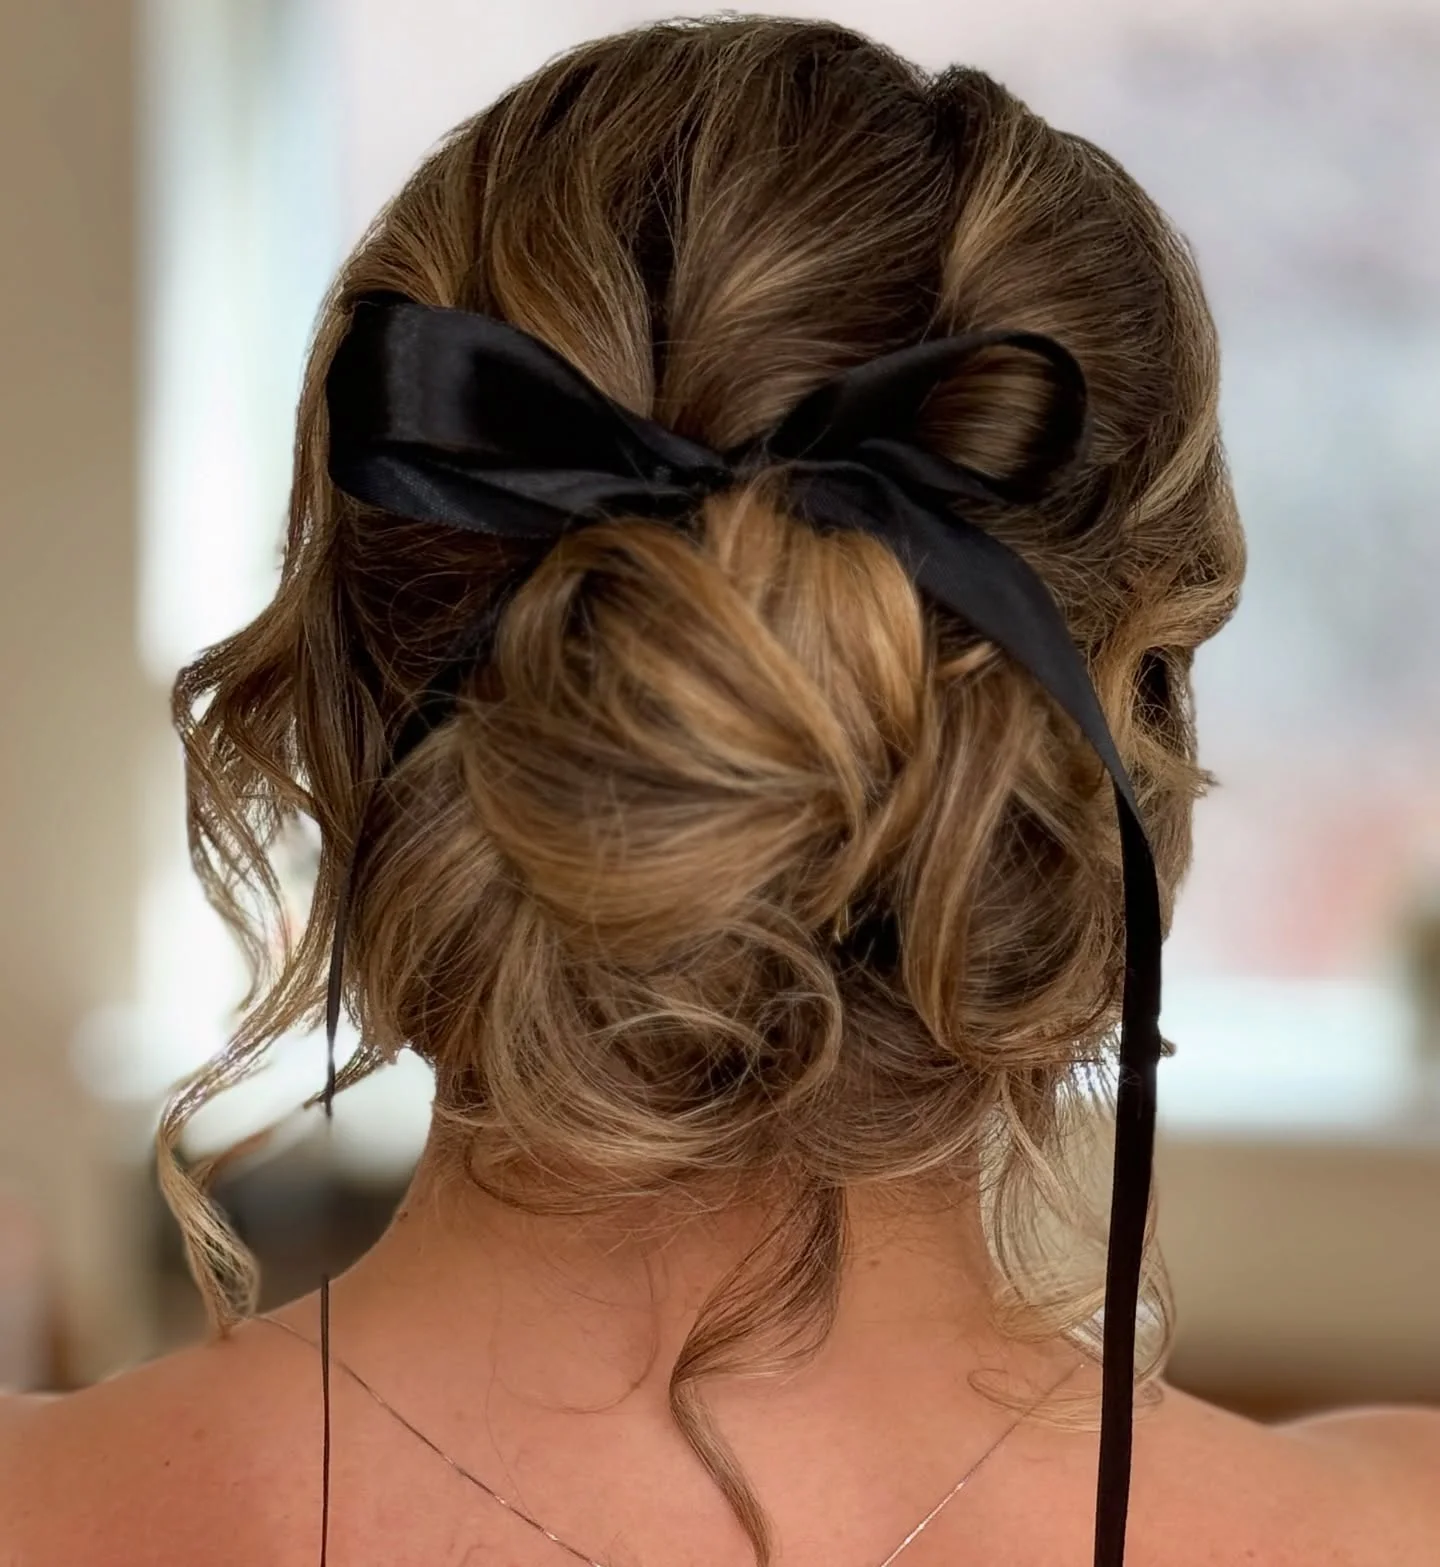
Ribbon Textured Low Updo
A textured low updo with a black ribbon and soft twisted shape.
- Style
- Updo
- Texture
- Wavy
- Finish
- Glossy
The ribbon gives the look a finished point without needing a huge bun. The accessory adds contrast, and the loose texture makes fine hair look fuller from the back. Fine hair, holiday outfits, date nights, and soft formal styling. What separates Ribbon Textured Low Updo from nearby updos for fine thin hair options is the balance between the side part, medium layering, and glossy finish. Ribbon Textured Low Updo provides the specific example here: those visible proportions can be carried into a consultation even when the final texture or color will be different.
Wearability note: Tie the ribbon over a pinned base so it decorates the updo instead of holding it.

Idea 28
Floral Sleek Low Bun
A floral sleek low bun with a smooth dark finish and small flowers tucked into the side.
- Style
- Updo
- Texture
- Wavy
- Finish
- Glossy
It is formal, clean, and visually rich. The sleek surface makes the hair look polished, while the flowers add volume where fine hair may look flat. Fine dark hair, weddings, formal events, and low buns with accessories. The photographed black french makes the side part easy to locate before the eye moves to the medium layering. Floral Sleek Low Bun provides the specific example here: that order is helpful when deciding which part of this updos for fine thin hair idea should remain strongest after it is adapted.
Wearability note: Pin flowers into the side after the bun is fully secure.
Idea 29
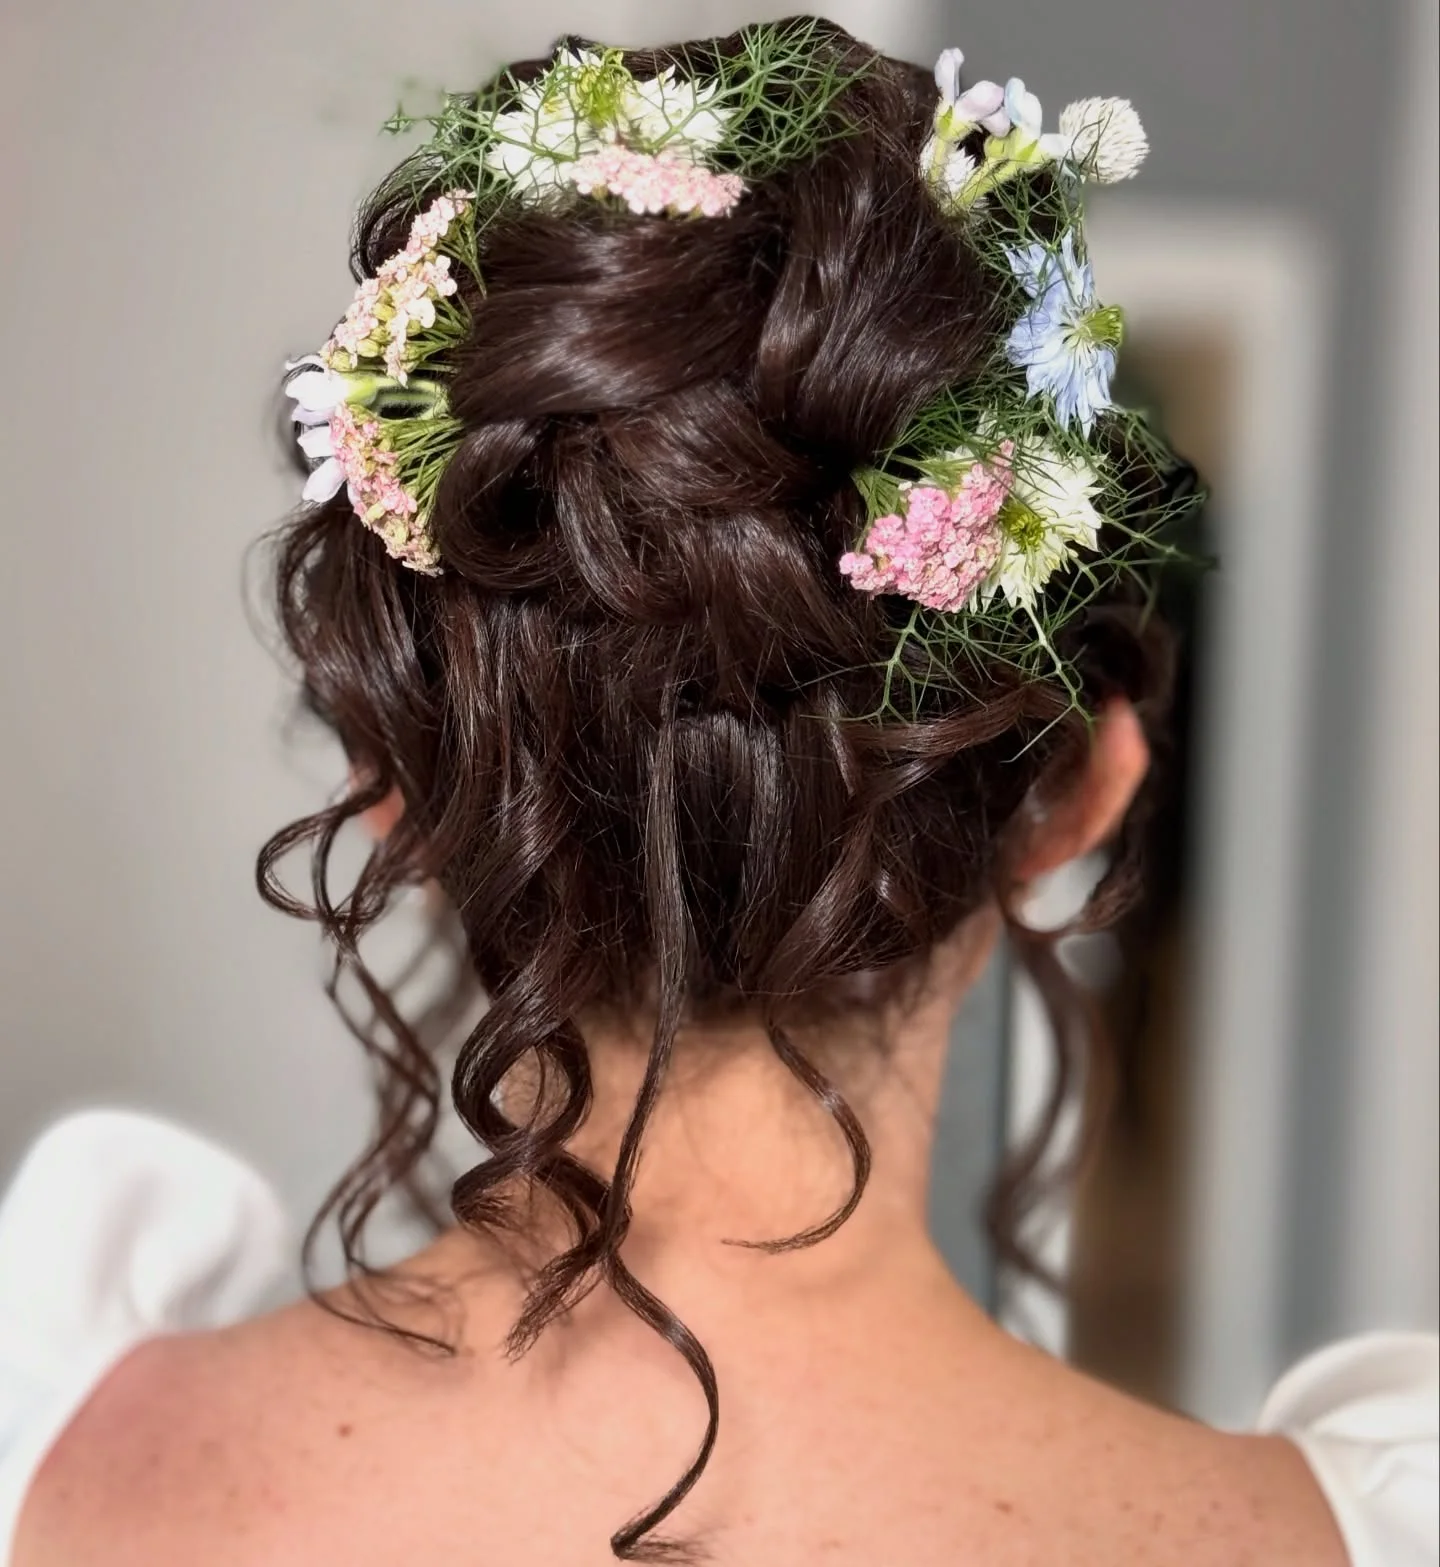
Garden Curly Low Updo
A garden curly low updo with soft curls, floral pins, and loose tendrils.
- Style
- Updo
- Texture
- Wavy
- Finish
- Glossy
It gives fine hair texture and a romantic outline. The curls add air and movement, while the floral pins fill the shape without making it heavy. Fine curly hair, outdoor weddings, bridesmaids, and soft garden-party looks. In garden curly low updo, the anchor point, surface finish, and loose pieces are the clearest details to compare before choosing a direction.
Wearability note: Set the curls before pinning and use humidity spray only around the finished shape.
Idea 30
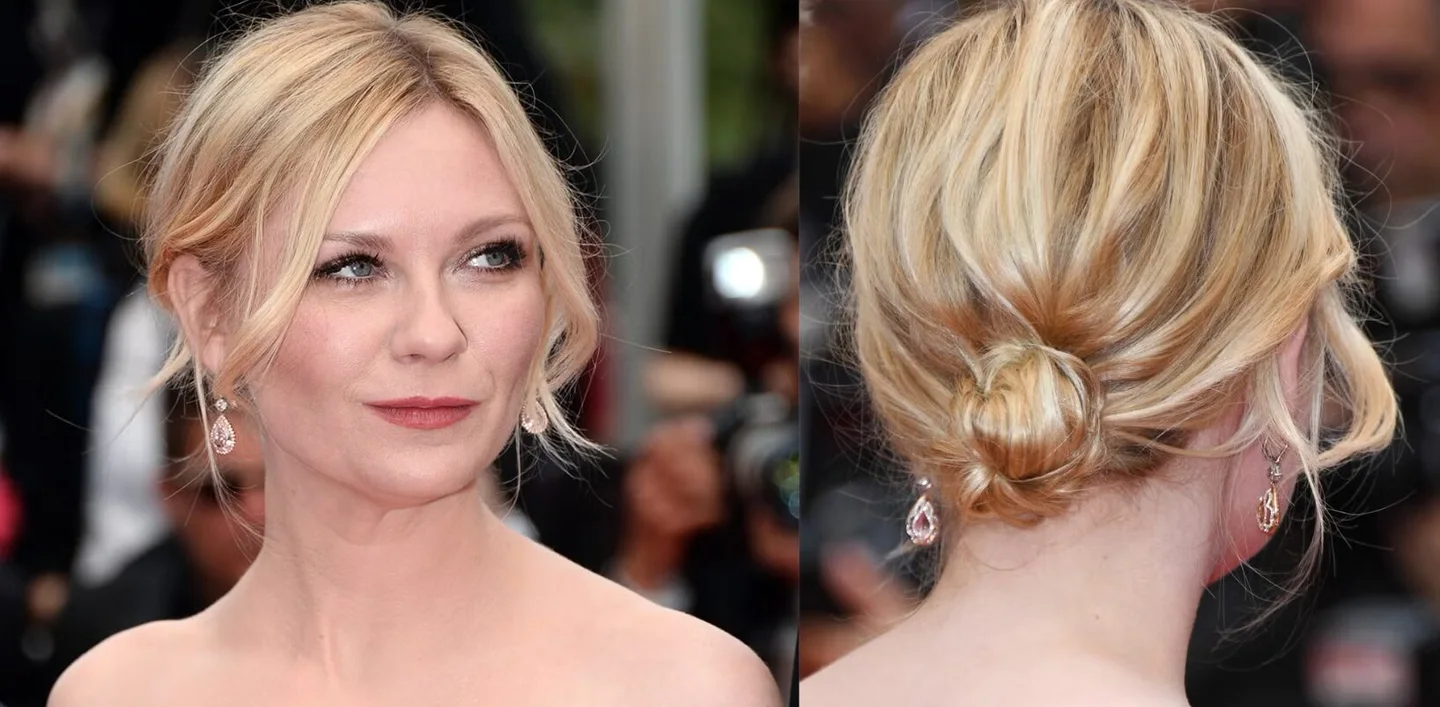
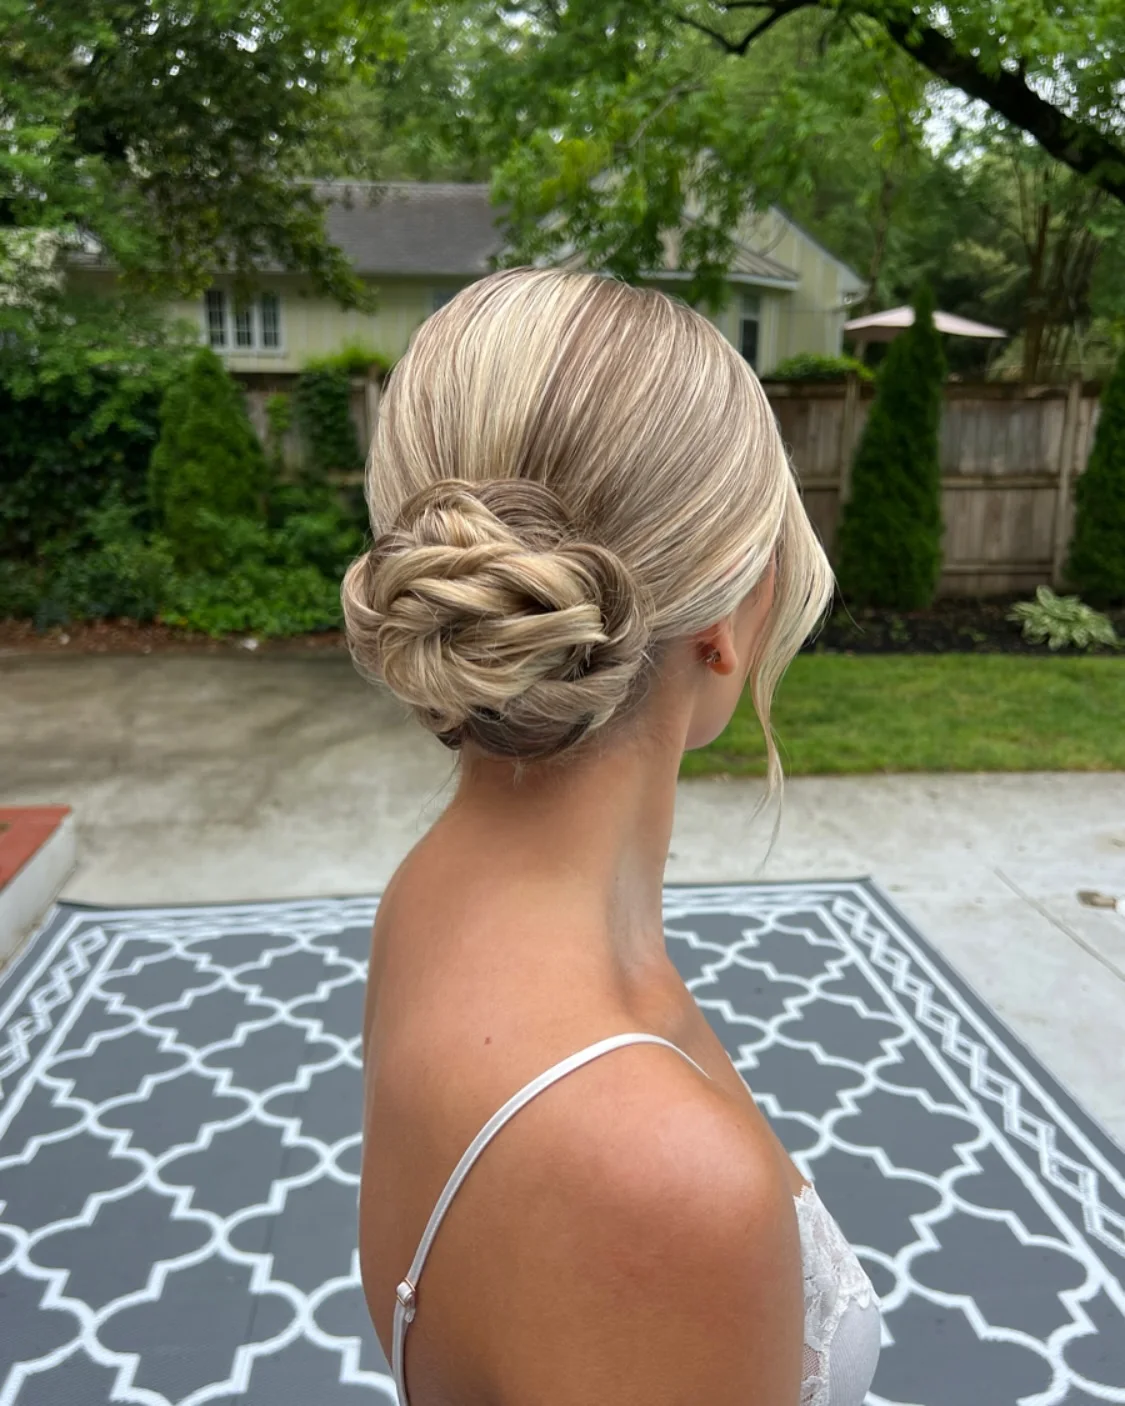
Elegant Blonde Low Chignon
An elegant blonde low chignon with a smooth tucked shape and soft side pieces.
- Style
- Updo
- Texture
- Wavy
- Finish
- Glossy
It is a classic choice for fine thin hair because the shape stays compact. A chignon gathers the ends into one polished area, which can make fine hair look denser from the back. Fine blonde hair, weddings, formal dinners, and simple elegant updos. The photo is most useful as a reference for polished finish, while the final amount of polish can be adjusted to suit an everyday routine.
Wearability note: Use U pins through the center of the chignon and keep the side pieces lightly sprayed.
How to make fine thin hair hold an updo
Fine thin hair usually needs grip before it needs shine. Use texture spray, powder, or mousse near the roots and middle lengths, then pin the updo in small sections so the shape has support.
Avoid heavy oil at the roots and avoid brushing the finished style too much. The best fine-hair updos look soft, but the base underneath should be secure.
Best updo shapes for fine thin hair
Low buns, chignons, braided buns, and soft high buns are usually the most reliable options. They gather the hair into a clear shape instead of spreading fine ends too thin.
Accessories can help when the bun is naturally small. Pearl pins, ribbons, small flowers, and braided sections add visual detail without forcing the hair into an unrealistic oversized shape.
What products help fine hair updos
The most useful products are lightweight: root lift spray, dry texture spray, volumizing powder, U pins, bobby pins, flexible hairspray, and a small amount of styling cream only for flyaways.
Use products by job. Texture creates grip, pins create structure, spray protects the finish, and accessories add visual fullness.

About the author
Bella Ross
Bella Ross is the hairstyle editor behind Latest Easy Hairstyles. She curates practical haircut, braid, color, and styling ideas with a focus on looks that are easy to browse, realistic to recreate, and useful for everyday hair decisions.