Haircut guide
30 Lob Haircuts for Thin Hair That Look Fuller
Updated June 13, 2026
A photo-first guide to lob haircuts for thin hair, with blunt long bobs, soft waves, curtain bangs, rooted color, and lightweight styling notes for fuller shape.
Long bobs that help thin hair look fuller
Lob haircuts for thin hair should make the ends look fuller before styling products do anything. The best versions sit around the shoulder or collarbone, keep a clean lower edge, and add movement only where the hair needs it.
If you are still comparing every length, start with haircuts for thin fine hair. If you already know you want the shoulder zone, this guide focuses on long bobs that keep fine hair shaped, light, and easy to style.
30 Lob Haircuts for Thin Hair That Look Fuller photo ideas
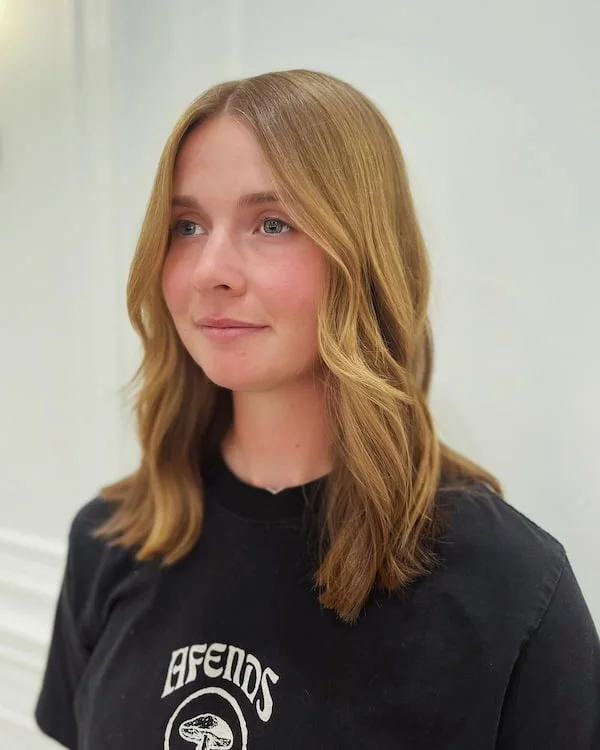
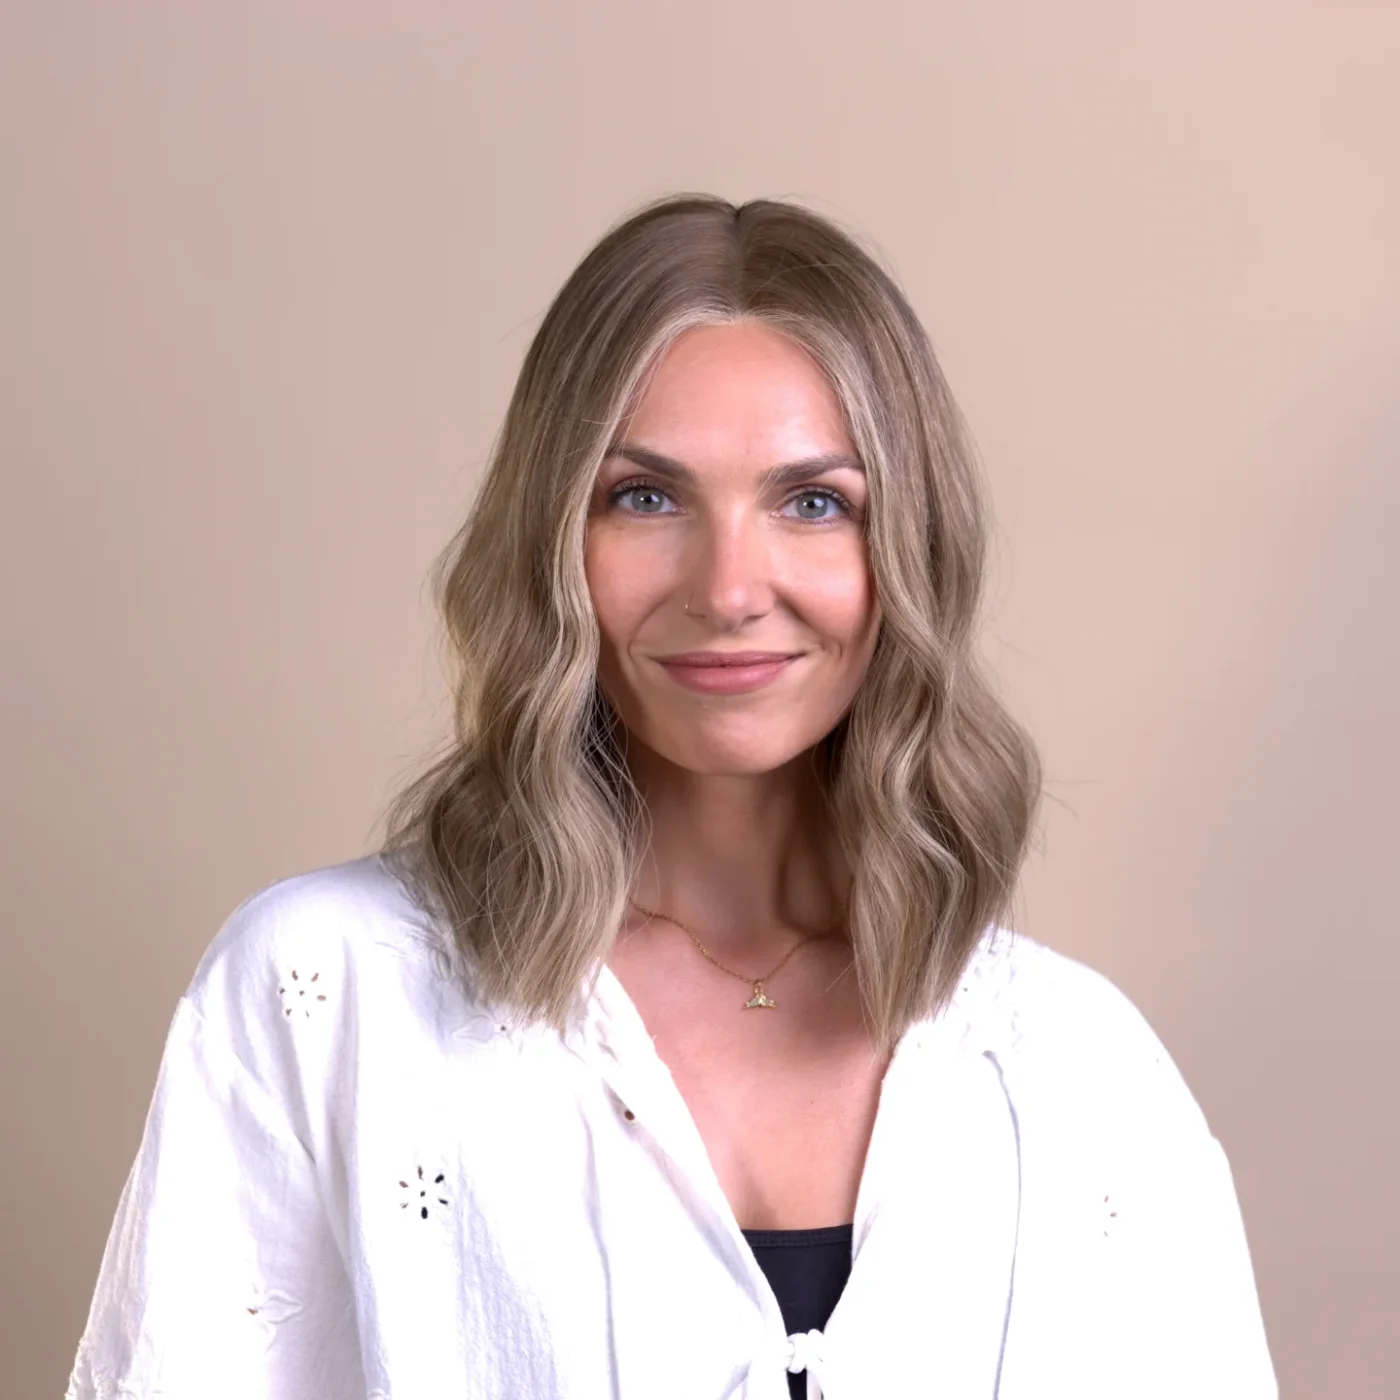
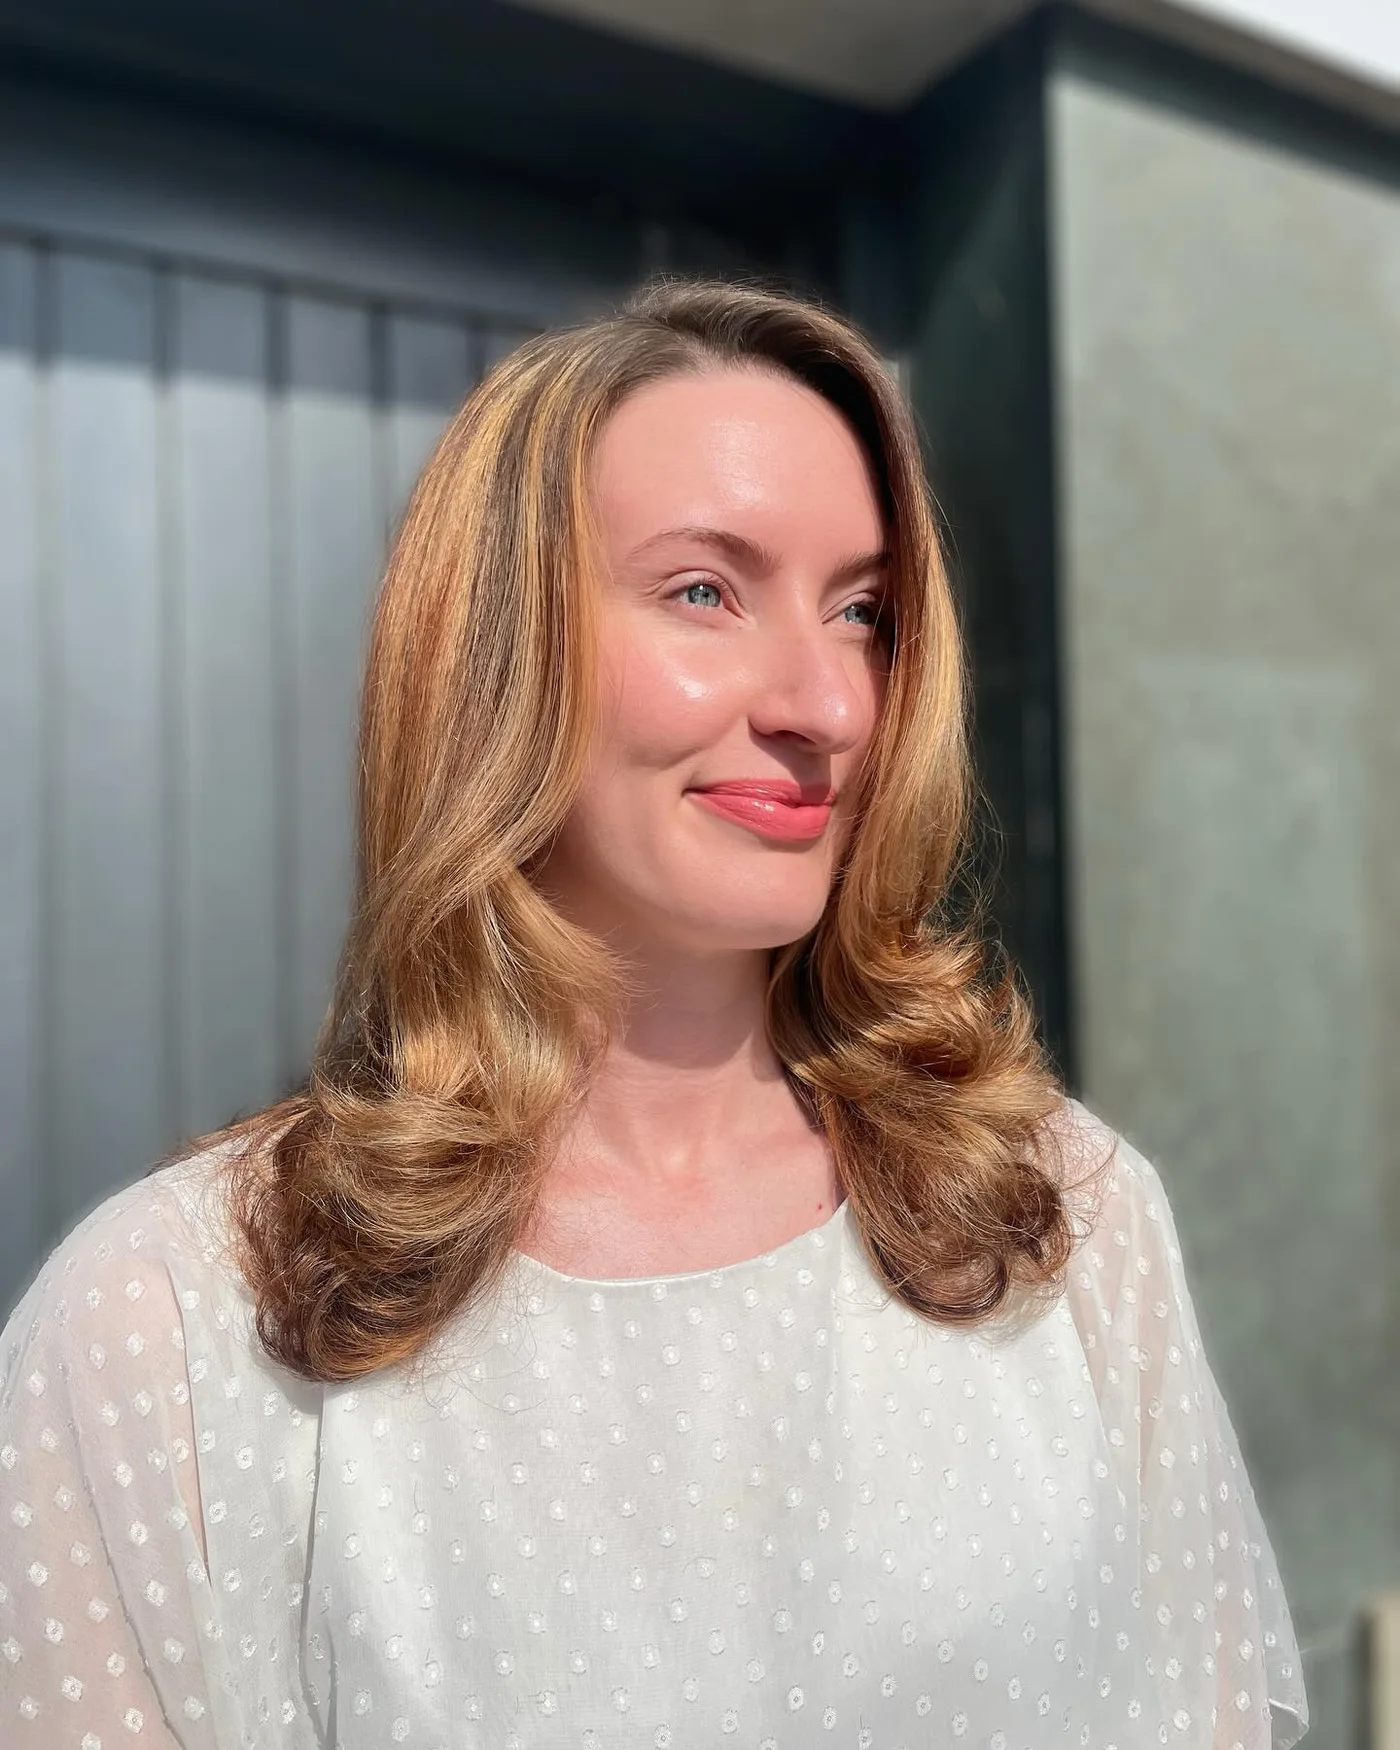
1. Soft Blonde Wavy Lob
Description
This soft blonde lob uses loose bends and a light shoulder length shape. The ends stay full enough for thin hair, while the waves add movement without looking heavy.
Why it works
Soft waves make fine hair look wider through the middle, and the lob length keeps the bottom from looking stretched.
Best for
Fine wavy hair, soft blonde color, and anyone who wants a fuller-looking everyday lob.
Maintenance
Keep the waves loose and refresh the roots with dry shampoo when the crown starts to fall.
Try it yourself for Soft Blonde Wavy Lob
How to DIY
- Prep the Soft Blonde Wavy Lob with dry shampoo at the roots so fine hair has grip before adding waves.
- Wrap the middle lengths of the Soft Blonde Wavy Lob around a 1 inch curling iron, leaving the ends softly finished.
- Mist texture spray through the sides of the Soft Blonde Wavy Lob, focusing where the lob needs width.
- Break up the waves of the Soft Blonde Wavy Lob with fingers instead of brushing away the volume.
- Leave the lower edge of the Soft Blonde Wavy Lob slightly grouped so the thin hair still reads as a lob.
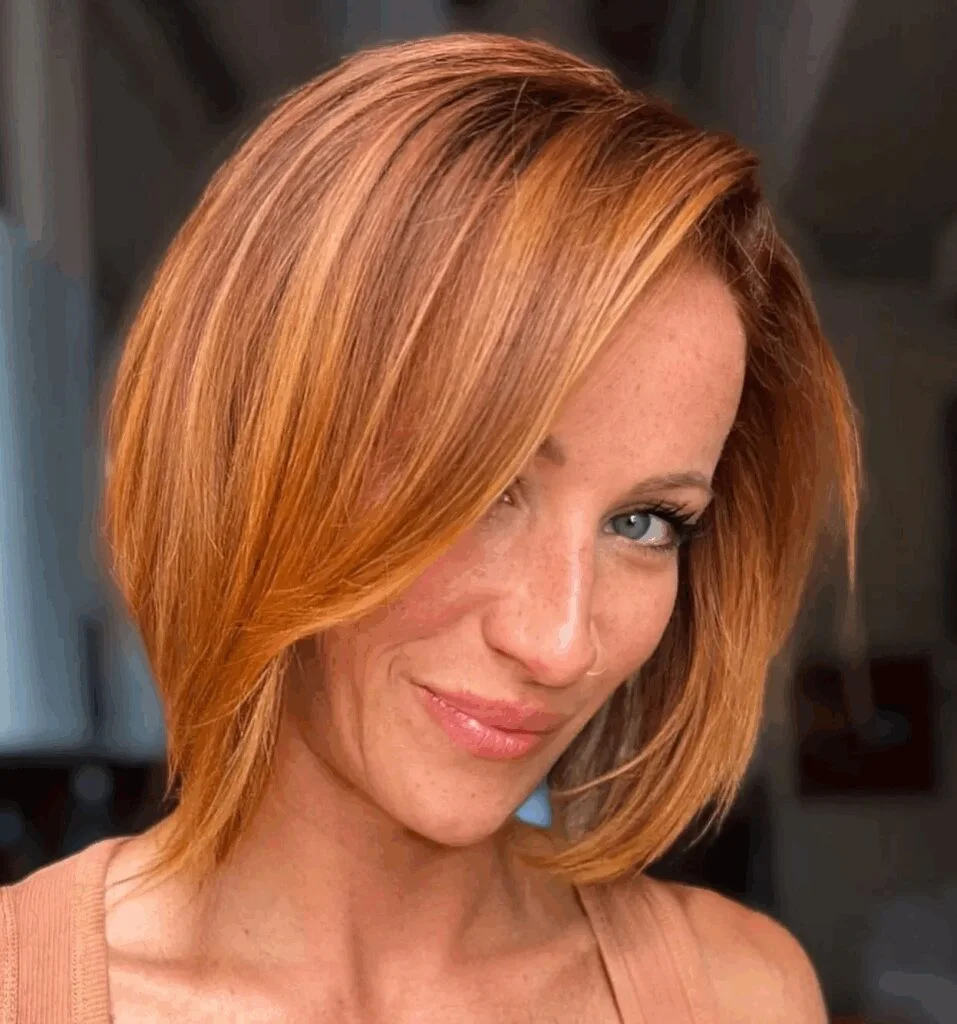
2. Copper Side-Part Lob
Description
A copper side part gives this lob instant lift at the front. The shape is smooth and full near the ends, which helps thin hair look stronger.
Why it works
The side part creates root height and the warm color makes the layers easier to see.
Best for
Straight to lightly wavy thin hair, warm color, and lobs that need front volume.
Maintenance
Dry the part line first and keep mousse near the roots instead of coating the ends.
Try it yourself for Copper Side-Part Lob
How to DIY
- Apply volumizing mousse through the upper half of the Copper Side-Part Lob, keeping the shoulder-skimming ends clean so thin hair does not separate.
- Aim root lift spray at the front hairline of the Copper Side-Part Lob, then dry that area before shaping the sides.
- Use a round brush to lift the front of the Copper Side-Part Lob and let the bend cool before touching it.
- Mist flexible hairspray under the top layer of the Copper Side-Part Lob, not directly on the face frame.
- Check the Copper Side-Part Lob from the side and smooth only the pieces that disrupt the fuller lob outline.
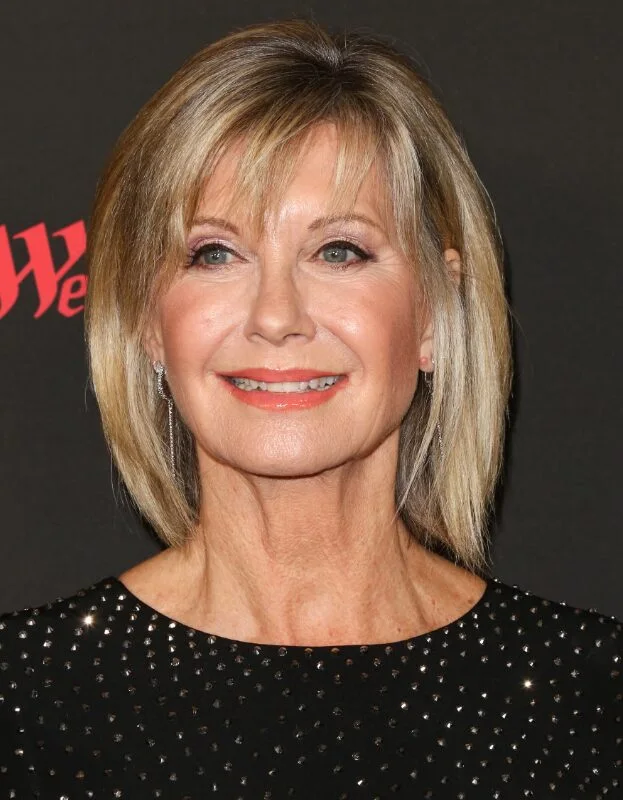
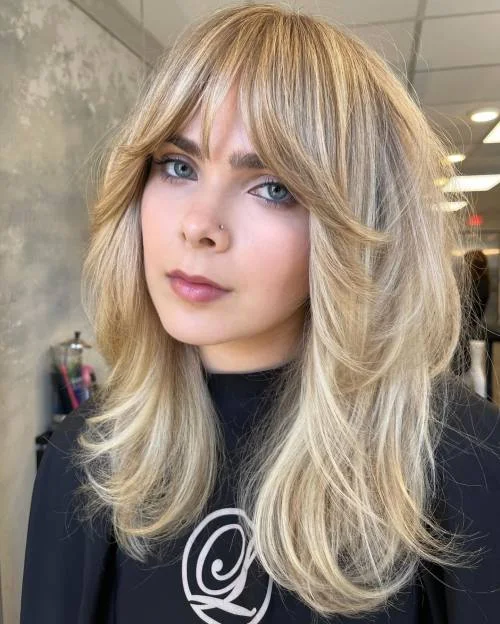
3. Feathered Blonde Lob With Bangs
Description
This feathered blonde lob has light bangs and soft shoulder length layers. The shape gives fine hair movement while keeping the lower edge visible.
Why it works
Feathered pieces around the face create fullness without removing too much weight from the ends.
Best for
Thin hair with bangs, mature hair, and polished shoulder length cuts.
Maintenance
Refresh the bangs first, then brush the side layers softly away from the face.
Try it yourself for Feathered Blonde Lob With Bangs
How to DIY
- Dry the bang area of the Feathered Blonde Lob With Bangs first because fine hair around the forehead sets quickly.
- Use a small round brush to bend the fringe of the Feathered Blonde Lob With Bangs without pulling too much hair forward.
- Tap dry shampoo at the bang roots of the Feathered Blonde Lob With Bangs so the front stays light through the day.
- Smooth light styling cream over the side layers of the Feathered Blonde Lob With Bangs, avoiding the scalp and part line.
- Check that the fringe and shoulder-skimming ends of the Feathered Blonde Lob With Bangs work together instead of competing for volume.
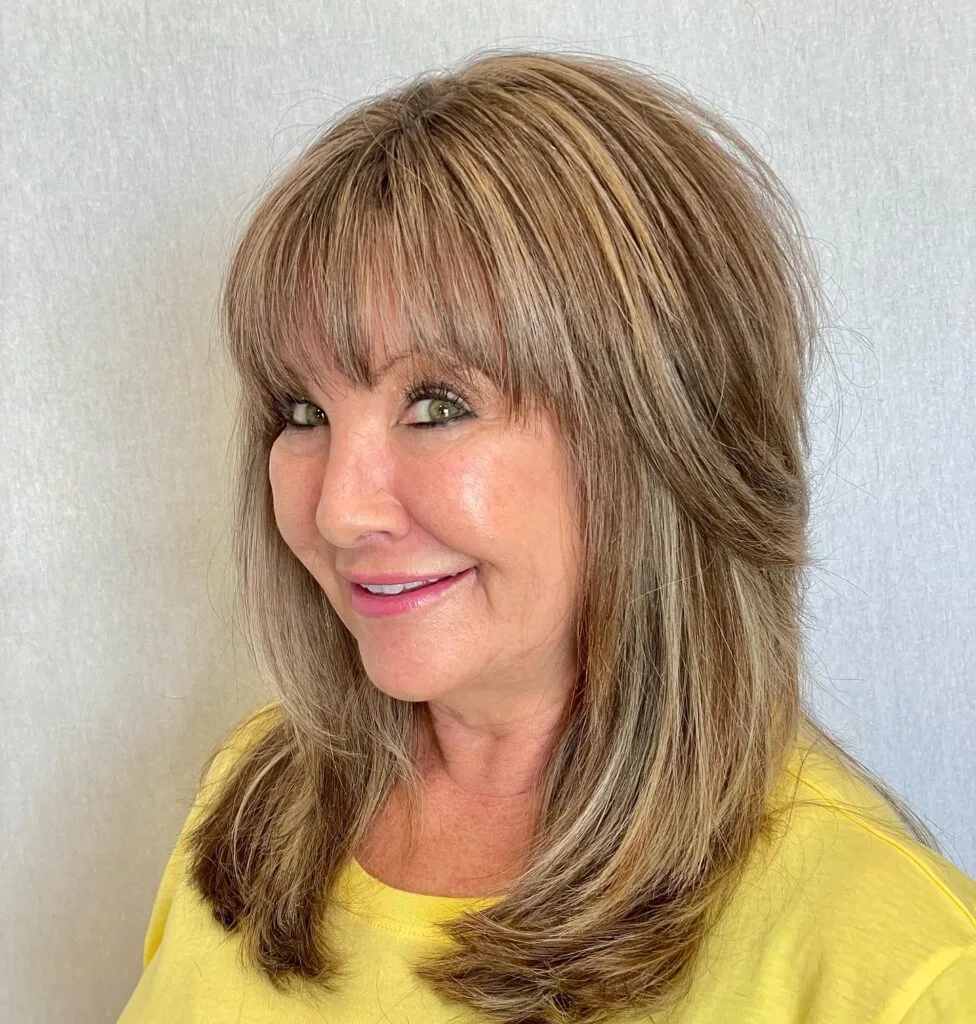
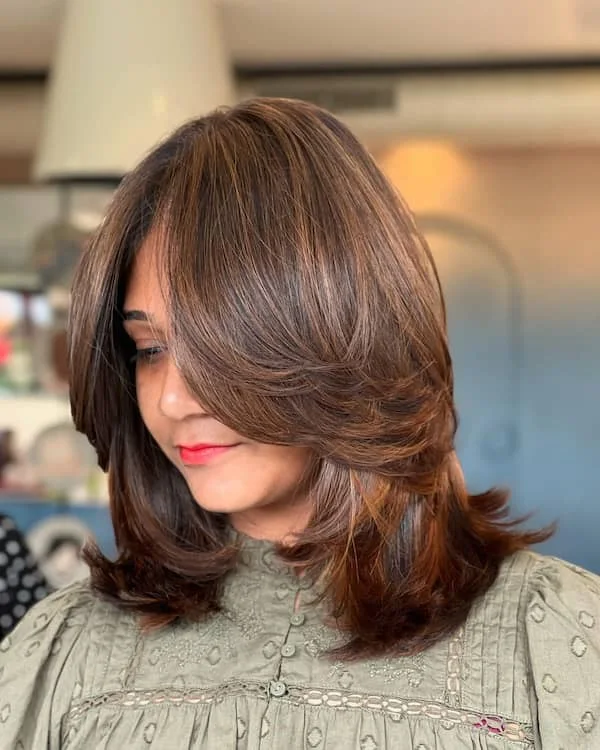
4. Layered Honey Lob
Description
Honey blonde layers make this lob look soft and dimensional. The bangs and face frame give the front shape, while the length still sits in a fuller shoulder zone.
Why it works
Layering starts high enough to add movement but not so high that the bottom looks sparse.
Best for
Fine to medium hair, soft bangs, and shoulder length cuts with gentle lift.
Maintenance
Use root lift at the crown and keep styling cream away from the lower edge.
Try it yourself for Layered Honey Lob
How to DIY
- Apply volumizing mousse through the upper half of the Layered Honey Lob, keeping the lower edge clean so thin hair does not separate.
- Aim root lift spray at the front hairline of the Layered Honey Lob, then dry that area before shaping the sides.
- Use a round brush to lift the front of the Layered Honey Lob and let the bend cool before touching it.
- Mist flexible hairspray under the top layer of the Layered Honey Lob, not directly on the face frame.
- Check the Layered Honey Lob from the side and smooth only the pieces that disrupt the fuller lob outline.
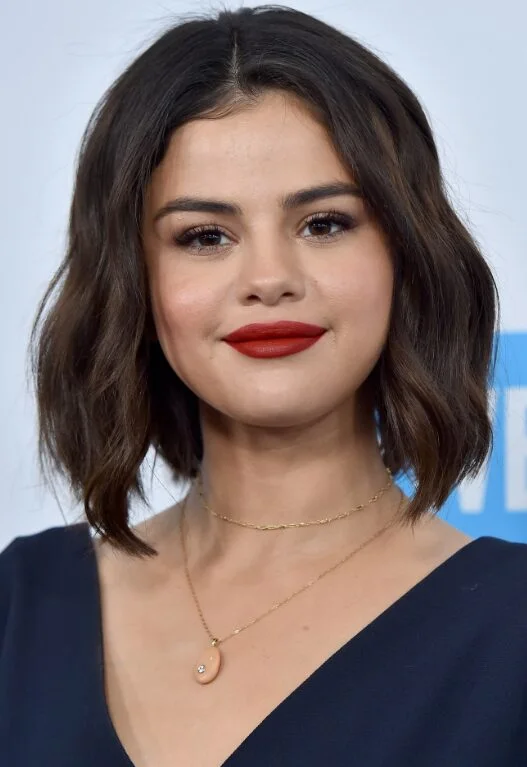
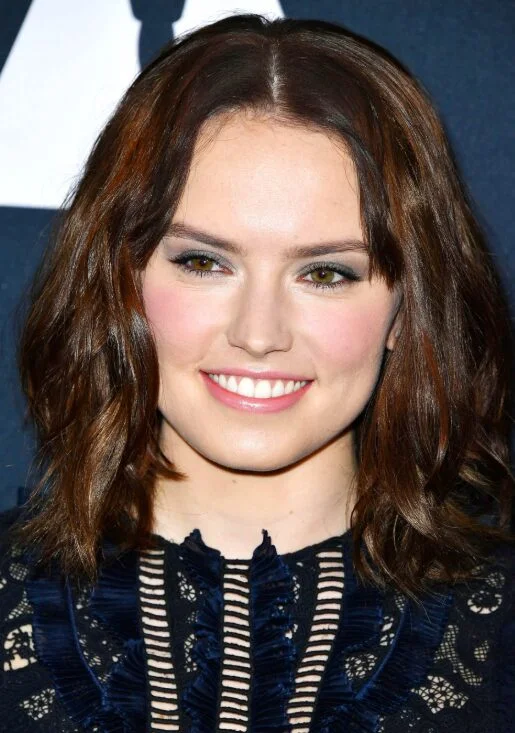
5. Glossy Brunette Wavy Lob
Description
This glossy brunette lob keeps the waves simple and controlled. The middle part looks clean, and the ends have enough density to keep thin hair from looking stringy.
Why it works
A smooth surface reflects light, while the soft wave gives the lob more body.
Best for
Fine straight or wavy hair, dark color, and polished lob styling.
Maintenance
Use serum only on the lower half so the roots stay lifted.
Try it yourself for Glossy Brunette Wavy Lob
How to DIY
- Mist heat protectant over the Glossy Brunette Wavy Lob before smoothing because thin hair shows heat damage quickly.
- Work in small sections on the Glossy Brunette Wavy Lob, keeping the tool movement light through the shoulder-skimming ends.
- Add light smoothing serum only to the lower half of the Glossy Brunette Wavy Lob so the roots keep their lift.
- Use shine spray from a distance on the Glossy Brunette Wavy Lob, focusing on the outside layer rather than the scalp.
- Comb the perimeter of the Glossy Brunette Wavy Lob into place so the lob ends look full and even.
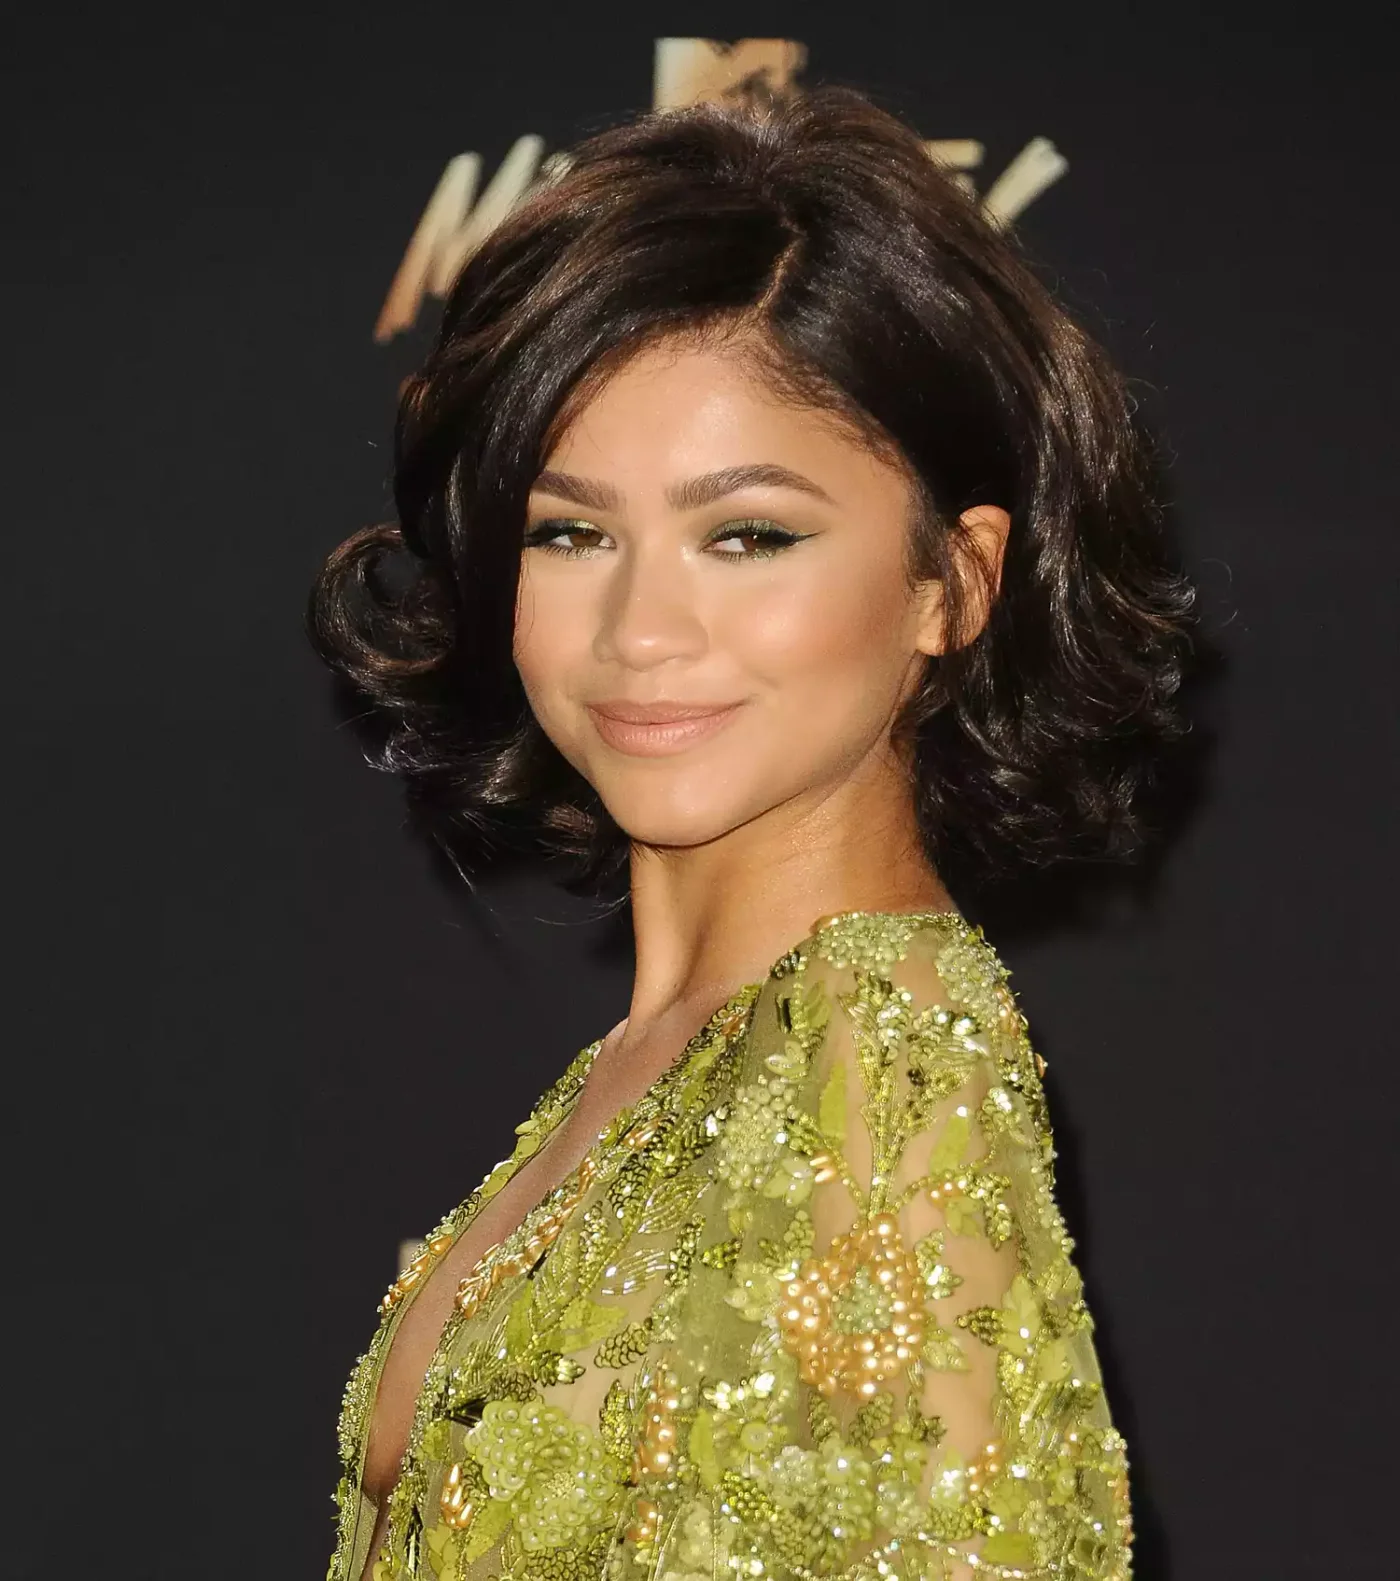
6. Side-Swept Glam Lob
Description
A side-swept front turns this lob into a fuller glam shape. The shoulder length keeps the haircut practical, while the front lift makes thin hair look thicker.
Why it works
Volume at the part creates height, and the side sweep gives fine hair a more styled outline.
Best for
Fine hair that can hold a blowout, evening styling, and soft shoulder length movement.
Maintenance
Set the side part while damp and use flexible hairspray after the front has cooled.
Try it yourself for Side-Swept Glam Lob
How to DIY
- Apply volumizing mousse through the upper half of the Side-Swept Glam Lob, keeping the shoulder-skimming ends clean so thin hair does not separate.
- Aim root lift spray at the front hairline of the Side-Swept Glam Lob, then dry that area before shaping the sides.
- Use a round brush to lift the front of the Side-Swept Glam Lob and let the bend cool before touching it.
- Mist flexible hairspray under the top layer of the Side-Swept Glam Lob, not directly on the face frame.
- Check the Side-Swept Glam Lob from the side and smooth only the pieces that disrupt the fuller lob outline.
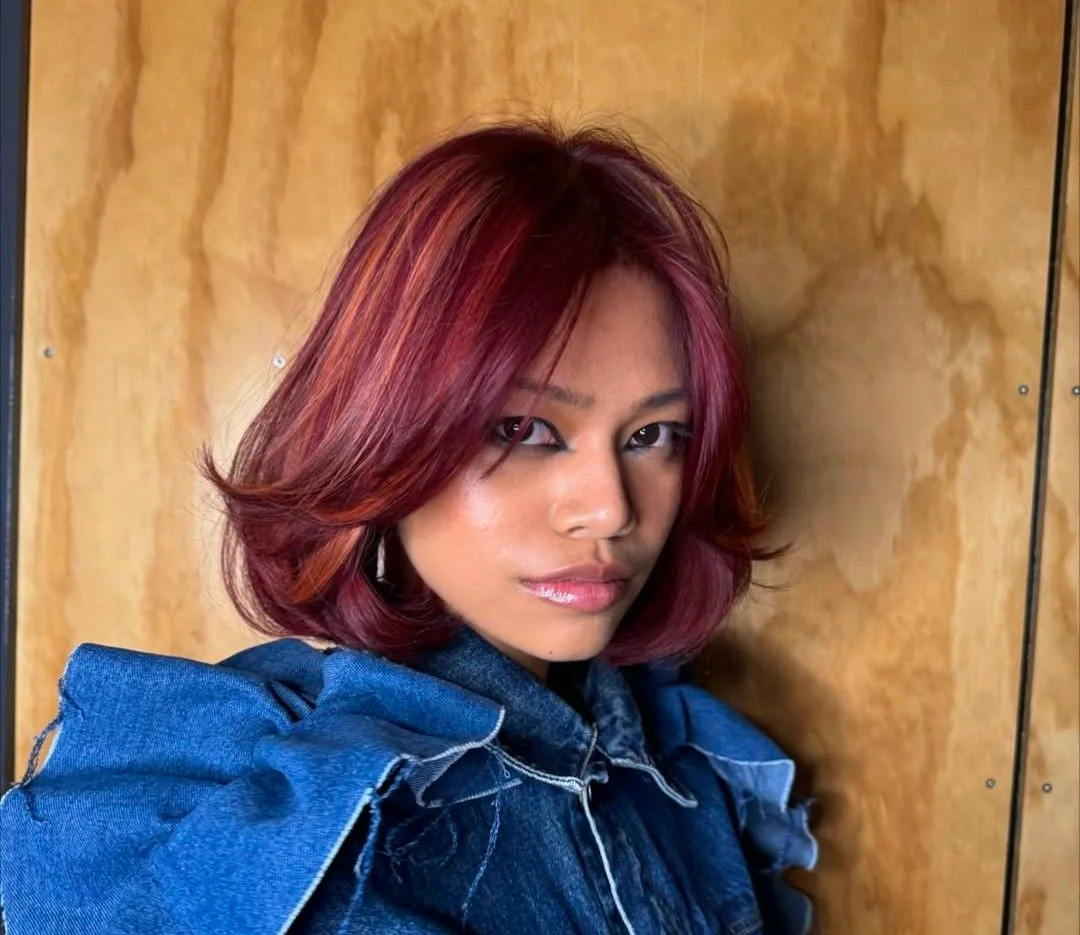
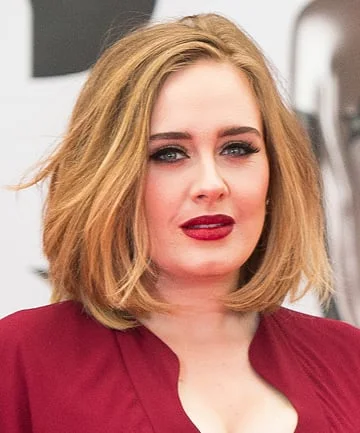
7. Berry Side-Part Lob
Description
This berry-toned lob has a side part and smooth layers that sit around the shoulders. The color adds depth, and the cut keeps the ends compact.
Why it works
Color dimension makes fine hair look less flat, and the side part adds shape at the front.
Best for
Color-treated fine hair, smooth lobs, and readers who want a stronger shade.
Maintenance
Use color-safe shampoo and add root lift before smoothing the side pieces.
Try it yourself for Berry Side-Part Lob
How to DIY
- Wash the Berry Side-Part Lob with color-safe shampoo so the highlights or vivid tone keep their dimension.
- Apply root lift spray at the crown of the Berry Side-Part Lob before drying the colored face frame.
- Mist texture spray through the lighter pieces of the Berry Side-Part Lob so thin hair shows more separation.
- Shape the lower edge of the Berry Side-Part Lob with fingers so the lob does not look over-smoothed.
- Finish the Berry Side-Part Lob by checking that the color still supports fullness rather than exposing sparse ends.
8. Polished Auburn Lob
Description
This auburn lob is smooth, simple, and neatly shaped through the ends. The blunt lower line helps thin hair look more substantial.
Why it works
A clean lob outline protects the density at the bottom, which is where fine hair often looks weakest.
Best for
Straight fine hair, polished color, and a low-drama long bob.
Maintenance
Smooth the outside layer only and avoid heavy oils near the roots.
Try it yourself for Polished Auburn Lob
How to DIY
- Mist heat protectant over the Polished Auburn Lob before smoothing because thin hair shows heat damage quickly.
- Work in small sections on the Polished Auburn Lob, keeping the tool movement light through the shoulder-skimming ends.
- Add light smoothing serum only to the lower half of the Polished Auburn Lob so the roots keep their lift.
- Use shine spray from a distance on the Polished Auburn Lob, focusing on the outside layer rather than the scalp.
- Comb the perimeter of the Polished Auburn Lob into place so the lob ends look full and even.
9. Orange Blonde Blunt Lob
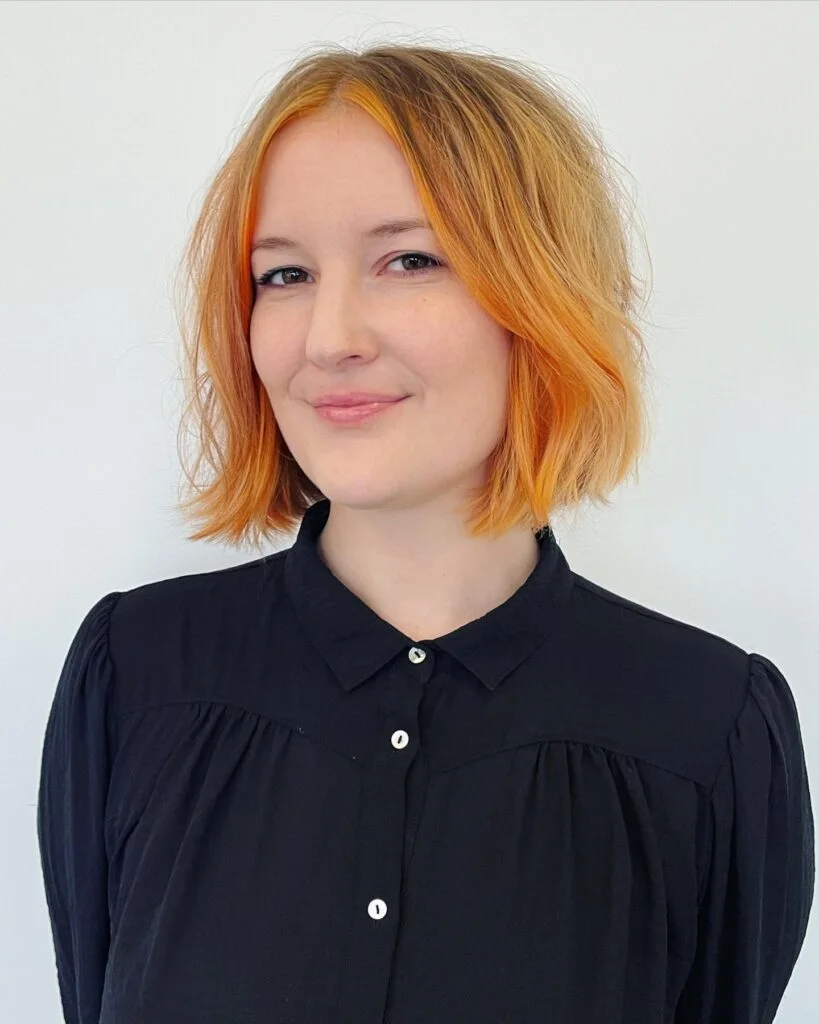
Description
A bright orange blonde tone makes this blunt lob feel modern. The compact length and clean lower edge are useful for thin hair that needs stronger ends.
Why it works
The blunt edge gives the haircut weight, while the color keeps the shape from looking plain.
Best for
Fine straight hair, bold color, and shoulder grazing lobs.
Maintenance
Protect the color and keep the ends smooth so the blunt line reads clearly.
Try it yourself for Orange Blonde Blunt Lob
How to DIY
- Wash the Orange Blonde Blunt Lob with color-safe shampoo so the highlights or vivid tone keep their dimension.
- Apply root lift spray at the crown of the Orange Blonde Blunt Lob before drying the colored face frame.
- Mist texture spray through the lighter pieces of the Orange Blonde Blunt Lob so thin hair shows more separation.
- Shape the shoulder-skimming ends of the Orange Blonde Blunt Lob with fingers so the lob does not look over-smoothed.
- Finish the Orange Blonde Blunt Lob by checking that the color still supports fullness rather than exposing sparse ends.
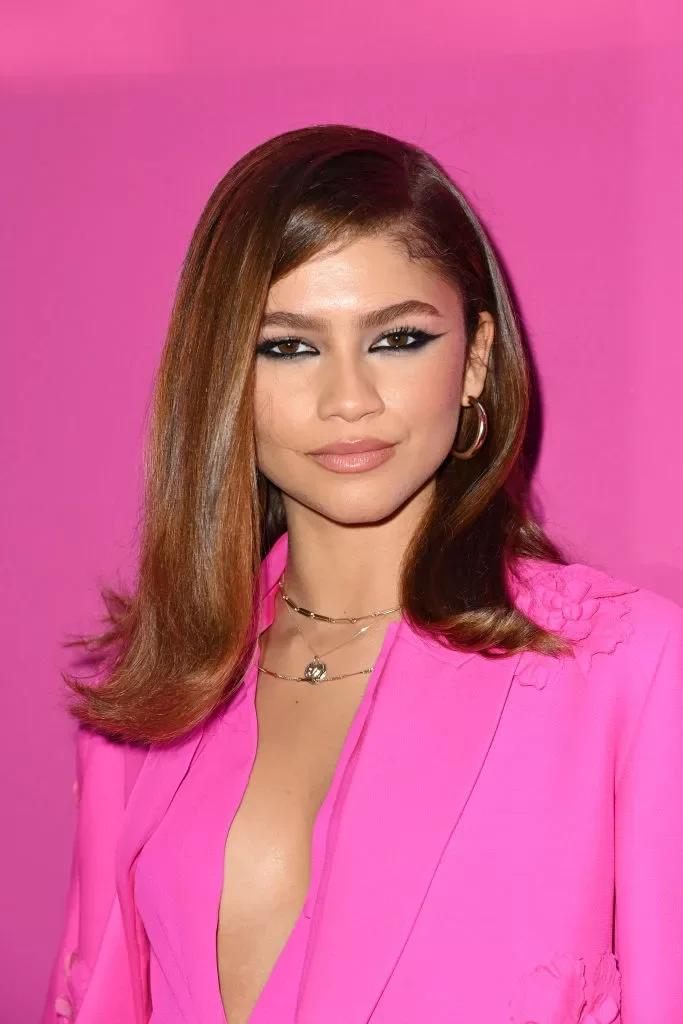
10. Asymmetric Highlighted Lob
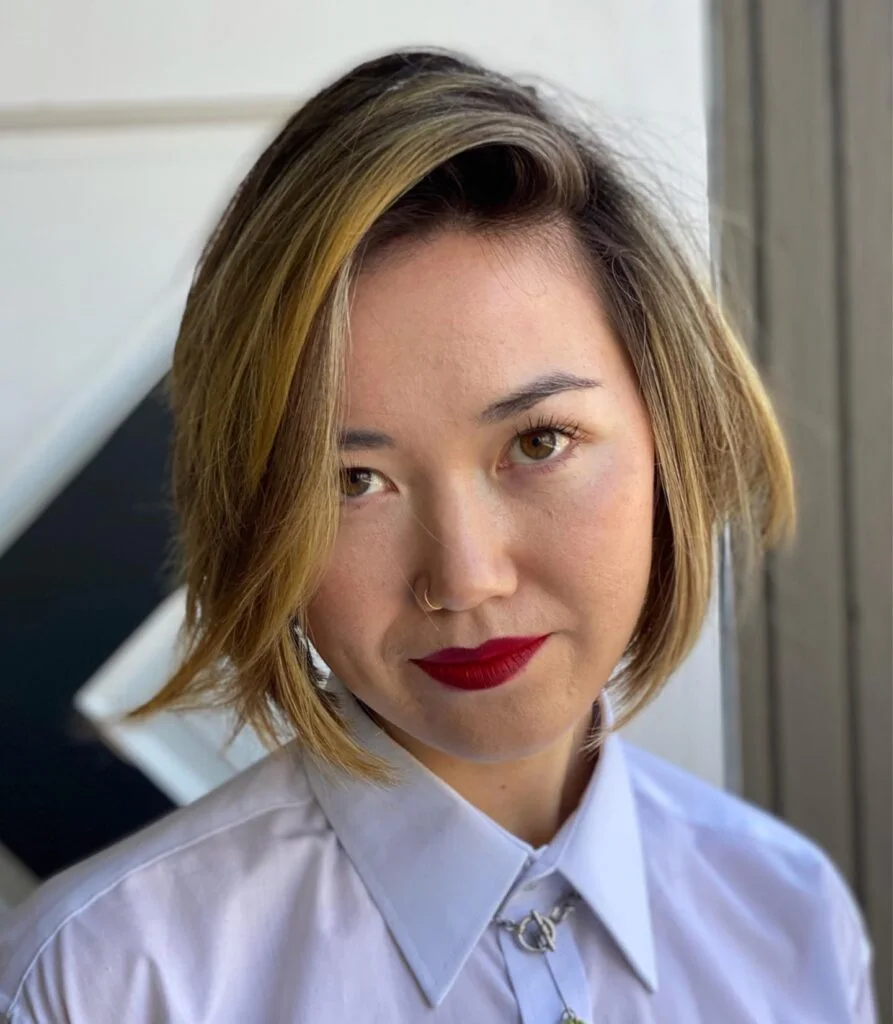
Description
This highlighted lob has an asymmetric front and a lifted side part. The slightly longer front gives thin hair a fuller, more intentional shape.
Why it works
Asymmetry adds movement without needing heavy layers, and highlights create visible depth.
Best for
Fine hair, side parts, and lobs that need a bit of edge.
Maintenance
Focus root lift near the part and keep the longer side smooth through the ends.
Try it yourself for Asymmetric Highlighted Lob
How to DIY
- Apply volumizing mousse through the upper half of the Asymmetric Highlighted Lob, keeping the lower edge clean so thin hair does not separate.
- Aim root lift spray at the front hairline of the Asymmetric Highlighted Lob, then dry that area before shaping the sides.
- Use a round brush to lift the front of the Asymmetric Highlighted Lob and let the bend cool before touching it.
- Mist flexible hairspray under the top layer of the Asymmetric Highlighted Lob, not directly on the face frame.
- Check the Asymmetric Highlighted Lob from the side and smooth only the pieces that disrupt the fuller lob outline.
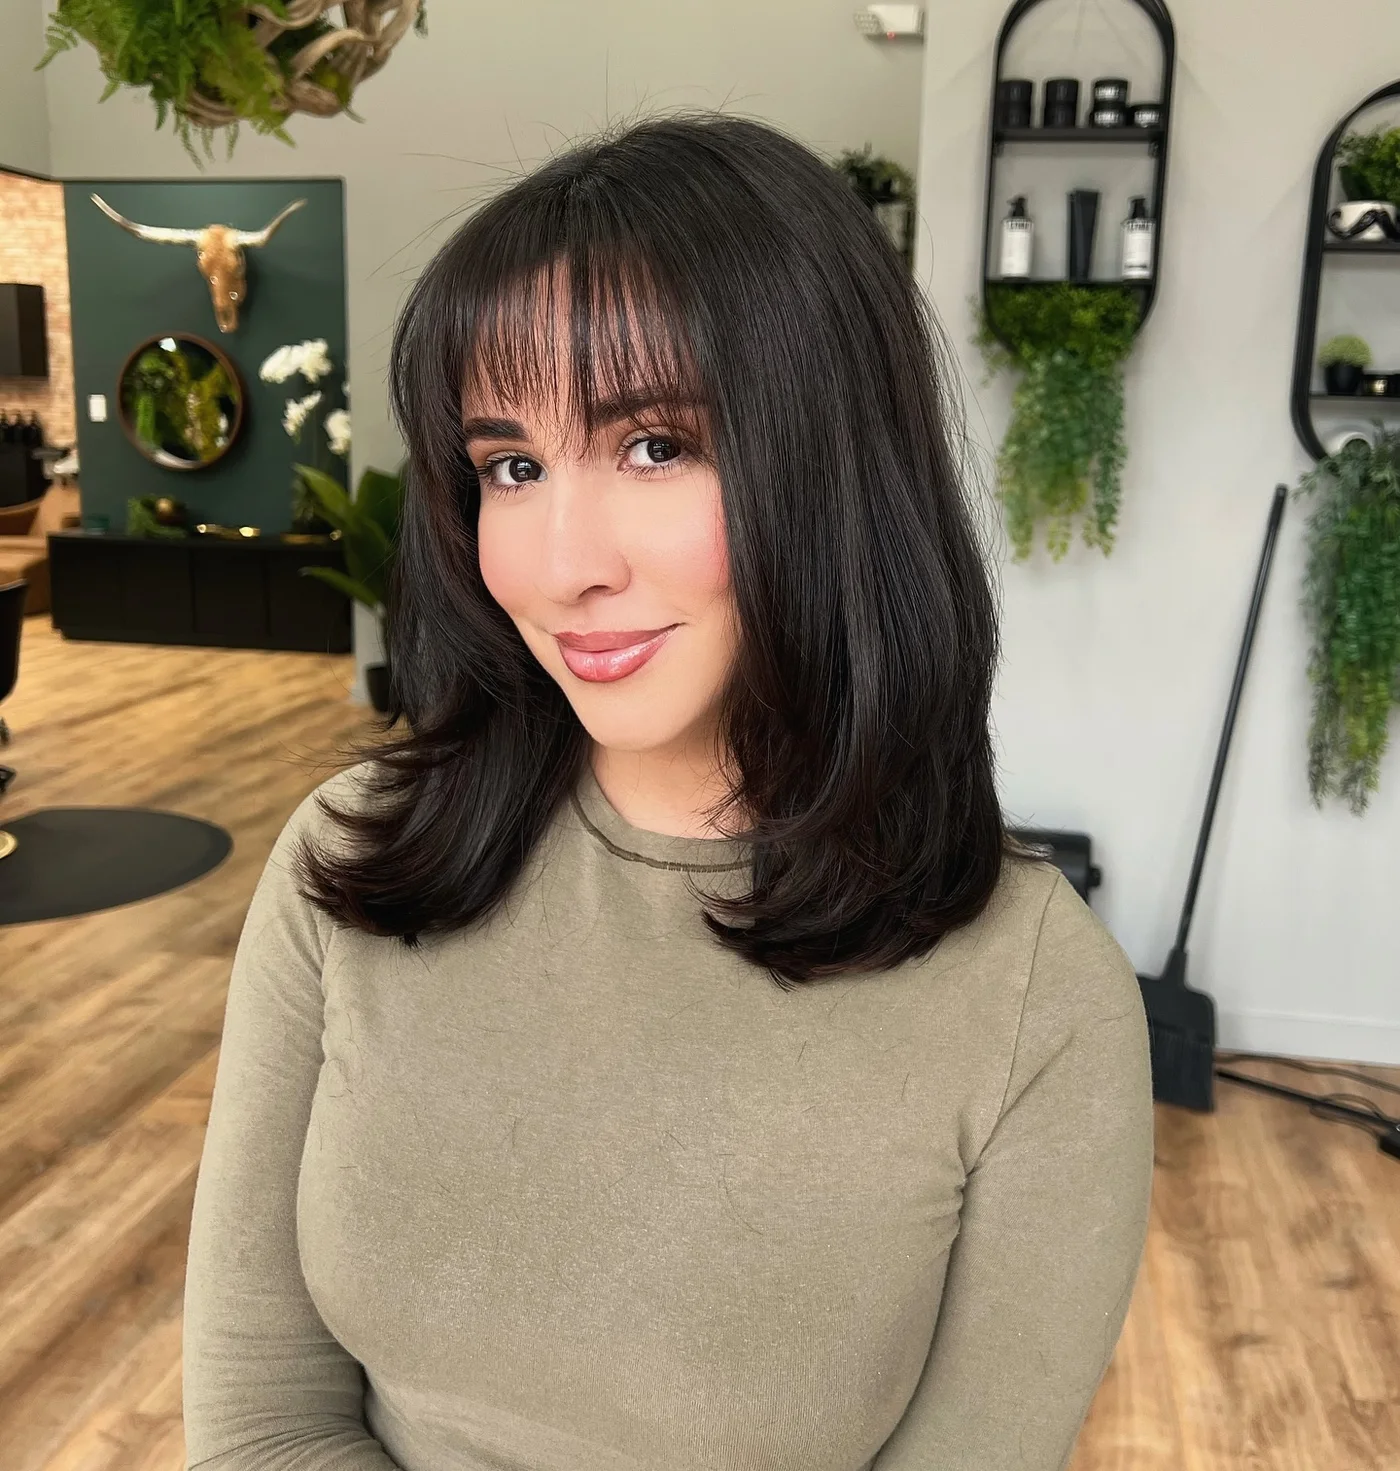
11. Curtain Bang Dark Lob
Description
Curtain bangs give this dark lob a soft face frame while the shoulder length keeps the bottom looking full. The style feels airy rather than heavy.
Why it works
Curtain bangs add shape at the front without taking too much density away from the sides.
Best for
Fine hair with bangs, dark color, and soft long bob shapes.
Maintenance
Dry the curtain split first and use dry shampoo only at the fringe roots.
Try it yourself for Curtain Bang Dark Lob
How to DIY
- Dry the bang area of the Curtain Bang Dark Lob first because fine hair around the forehead sets quickly.
- Use a small round brush to bend the fringe of the Curtain Bang Dark Lob without pulling too much hair forward.
- Tap dry shampoo at the bang roots of the Curtain Bang Dark Lob so the front stays light through the day.
- Smooth light styling cream over the side layers of the Curtain Bang Dark Lob, avoiding the scalp and part line.
- Check that the fringe and shoulder-skimming ends of the Curtain Bang Dark Lob work together instead of competing for volume.
12. Minimal Blonde Lob

Description
This minimal blonde lob keeps the shape clean and simple. The lack of heavy layering helps thin hair look healthier through the bottom.
Why it works
A simple line can be the best choice for fine hair because it keeps the ends from looking over-cut.
Best for
Straight fine hair, minimal styling, and classic blonde lobs.
Maintenance
Use heat protectant before smoothing and finish with a small amount of shine spray.
Try it yourself for Minimal Blonde Lob
How to DIY
- Mist heat protectant over the Minimal Blonde Lob before smoothing because thin hair shows heat damage quickly.
- Work in small sections on the Minimal Blonde Lob, keeping the tool movement light through the shoulder-skimming ends.
- Add light smoothing serum only to the lower half of the Minimal Blonde Lob so the roots keep their lift.
- Use shine spray from a distance on the Minimal Blonde Lob, focusing on the outside layer rather than the scalp.
- Comb the perimeter of the Minimal Blonde Lob into place so the lob ends look full and even.
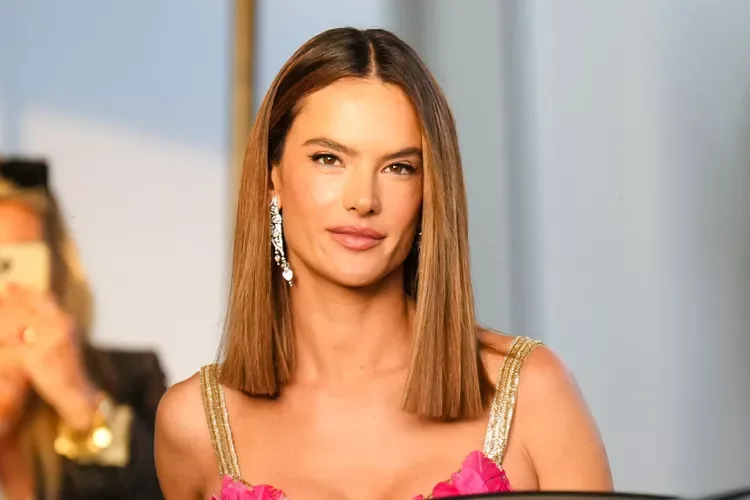
13. Caramel Sleek Lob
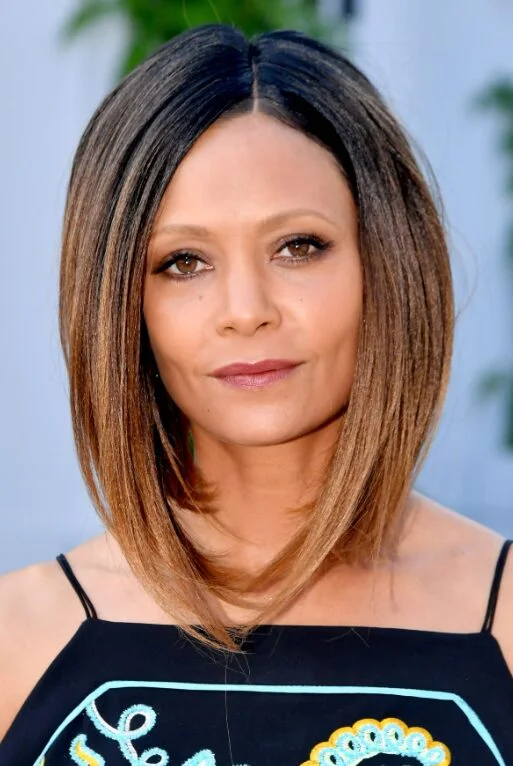
Description
This caramel sleek lob has a strong lower edge and soft color dimension. The length sits just long enough to feel elegant without thinning out.
Why it works
A blunt lob makes fine hair look denser, and the caramel tone adds depth around the face.
Best for
Straight thin hair, sleek styling, and polished long bobs.
Maintenance
Keep the ends beveled lightly and avoid too much serum at the crown.
Try it yourself for Caramel Sleek Lob
How to DIY
- Mist heat protectant over the Caramel Sleek Lob before smoothing because thin hair shows heat damage quickly.
- Work in small sections on the Caramel Sleek Lob, keeping the tool movement light through the lower edge.
- Add light smoothing serum only to the lower half of the Caramel Sleek Lob so the roots keep their lift.
- Use shine spray from a distance on the Caramel Sleek Lob, focusing on the outside layer rather than the scalp.
- Comb the perimeter of the Caramel Sleek Lob into place so the lob ends look full and even.
14. Soft Brunette Wavy Lob
Description
This brunette lob uses gentle waves to add movement through the sides. The shape stays close to shoulder length, which helps fine hair look balanced.
Why it works
Waves add visual body without needing thick layers, and the lob length keeps the ends grouped.
Best for
Fine wavy hair, brunette color, and soft everyday texture.
Maintenance
Curl only the middle lengths and leave the ends lightly finished.
Try it yourself for Soft Brunette Wavy Lob
How to DIY
- Prep the Soft Brunette Wavy Lob with dry shampoo at the roots so fine hair has grip before adding waves.
- Wrap the middle lengths of the Soft Brunette Wavy Lob around a 1 inch curling iron, leaving the ends softly finished.
- Mist texture spray through the sides of the Soft Brunette Wavy Lob, focusing where the lob needs width.
- Break up the waves of the Soft Brunette Wavy Lob with fingers instead of brushing away the volume.
- Leave the shoulder-skimming ends of the Soft Brunette Wavy Lob slightly grouped so the thin hair still reads as a lob.
15. Blonde Rooted Lob
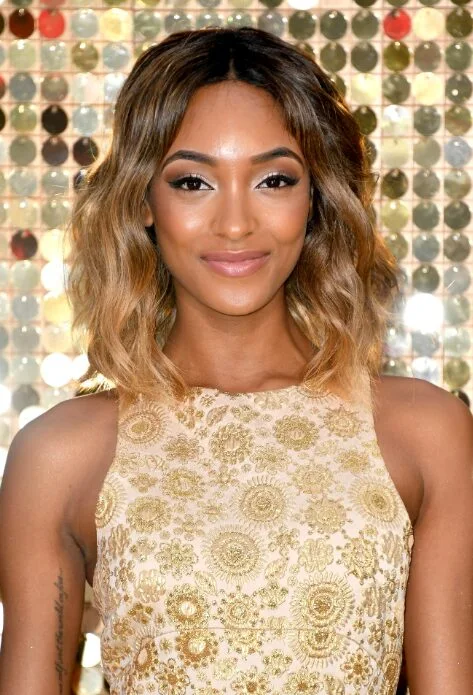
Description
A rooted blonde finish gives this lob extra depth near the scalp. The shoulder length and soft bends make thin hair look fuller without a heavy cut.
Why it works
Root contrast makes the hair appear denser, while loose shape keeps the lob easy to style.
Best for
Fine hair with highlights, soft waves, and natural-looking volume.
Maintenance
Use mousse through the upper half and leave the ends light.
Try it yourself for Blonde Rooted Lob
How to DIY
- Apply volumizing mousse through the upper half of the Blonde Rooted Lob, keeping the shoulder-skimming ends clean so thin hair does not separate.
- Aim root lift spray at the crown of the Blonde Rooted Lob, then dry that area before shaping the sides.
- Use a round brush to lift the front of the Blonde Rooted Lob and let the bend cool before touching it.
- Mist flexible hairspray under the top layer of the Blonde Rooted Lob, not directly on the face frame.
- Check the Blonde Rooted Lob from the side and smooth only the pieces that disrupt the fuller lob outline.
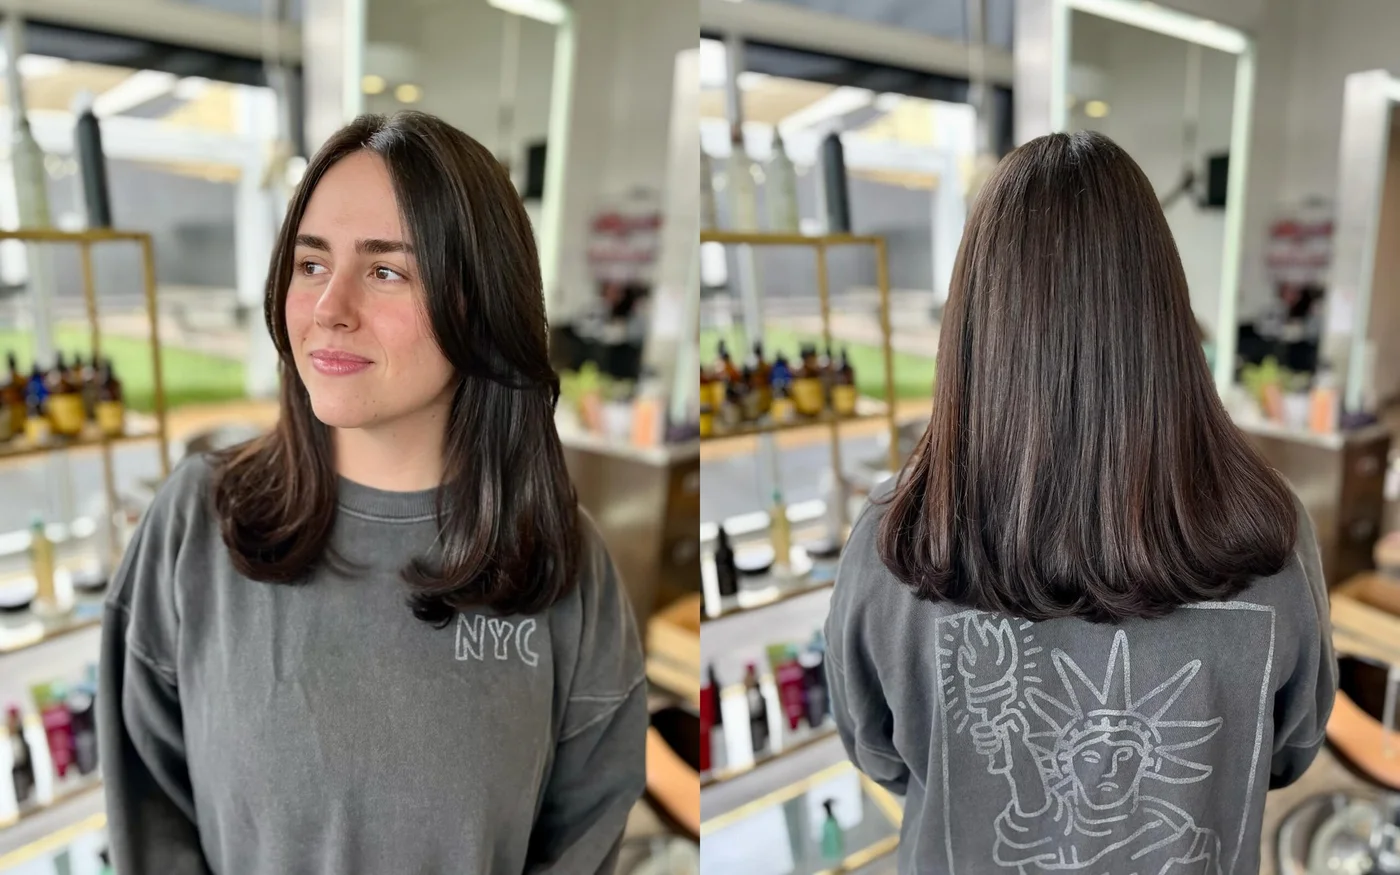
16. Straight Center-Part Lob
Description
This straight center-part lob keeps the sides sleek and the lower line strong. It is a clean option for thin hair that needs density at the ends.
Why it works
The straight finish shows off the blunt edge, which makes the lob look thicker.
Best for
Fine straight hair, center parts, and polished everyday cuts.
Maintenance
Smooth in small sections and finish with shine spray below the cheekbones.
Try it yourself for Straight Center-Part Lob
How to DIY
- Mist heat protectant over the Straight Center-Part Lob before smoothing because thin hair shows heat damage quickly.
- Work in small sections on the Straight Center-Part Lob, keeping the tool movement light through the lower edge.
- Add light smoothing serum only to the lower half of the Straight Center-Part Lob so the roots keep their lift.
- Use shine spray from a distance on the Straight Center-Part Lob, focusing on the outside layer rather than the scalp.
- Comb the perimeter of the Straight Center-Part Lob into place so the lob ends look full and even.
17. Glossy Black Lob
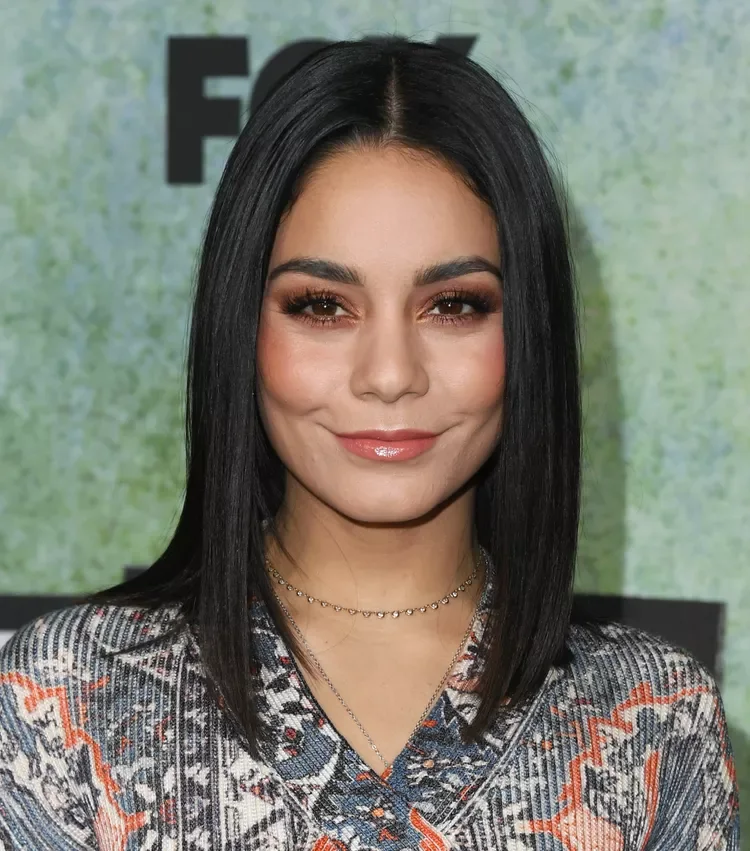
Description
This glossy black lob has a clean center part and a soft blunt outline. The shine makes the shape look deliberate while the length keeps the ends full.
Why it works
Fine hair often benefits from a simple outline, especially when the finish is smooth and reflective.
Best for
Straight thin hair, dark color, and low-layer lobs.
Maintenance
Use a small amount of smoothing serum on the ends only.
Try it yourself for Glossy Black Lob
How to DIY
- Mist heat protectant over the Glossy Black Lob before smoothing because thin hair shows heat damage quickly.
- Work in small sections on the Glossy Black Lob, keeping the tool movement light through the shoulder-skimming ends.
- Add light smoothing serum only to the lower half of the Glossy Black Lob so the roots keep their lift.
- Use shine spray from a distance on the Glossy Black Lob, focusing on the outside layer rather than the scalp.
- Comb the perimeter of the Glossy Black Lob into place so the lob ends look full and even.
18. Fine Straight Blonde Lob

Description
This straight blonde lob is a useful reference for fine hair because the shape is not over-layered. The ends sit together and make the haircut look fuller.
Why it works
Keeping the perimeter simple protects the lower density, while light root lift stops the top from going flat.
Best for
Thin straight hair, simple cuts, and low-maintenance lob styling.
Maintenance
Add root lift before drying and keep the ends clean rather than piecey.
Try it yourself for Fine Straight Blonde Lob
How to DIY
- Apply volumizing mousse through the upper half of the Fine Straight Blonde Lob, keeping the shoulder-skimming ends clean so thin hair does not separate.
- Aim root lift spray at the front hairline of the Fine Straight Blonde Lob, then dry that area before shaping the sides.
- Use a round brush to lift the front of the Fine Straight Blonde Lob and let the bend cool before touching it.
- Mist flexible hairspray under the top layer of the Fine Straight Blonde Lob, not directly on the face frame.
- Check the Fine Straight Blonde Lob from the side and smooth only the pieces that disrupt the fuller lob outline.
19. Soft Taupe Wavy Lob
Description
This taupe wavy lob has loose bends that make the hair look soft and fuller. The shape sits in the collarbone zone without looking stretched.
Why it works
Loose bends create side volume while the lob length keeps the bottom from separating too much.
Best for
Fine wavy hair, neutral color, and soft salon-inspired lobs.
Maintenance
Use texture spray through the middle lengths and keep dry shampoo near the roots.
Try it yourself for Soft Taupe Wavy Lob
How to DIY
- Prep the Soft Taupe Wavy Lob with dry shampoo at the roots so fine hair has grip before adding waves.
- Wrap the middle lengths of the Soft Taupe Wavy Lob around a 1 inch curling iron, leaving the ends softly finished.
- Mist texture spray through the sides of the Soft Taupe Wavy Lob, focusing where the lob needs width.
- Break up the waves of the Soft Taupe Wavy Lob with fingers instead of brushing away the volume.
- Leave the lower edge of the Soft Taupe Wavy Lob slightly grouped so the thin hair still reads as a lob.
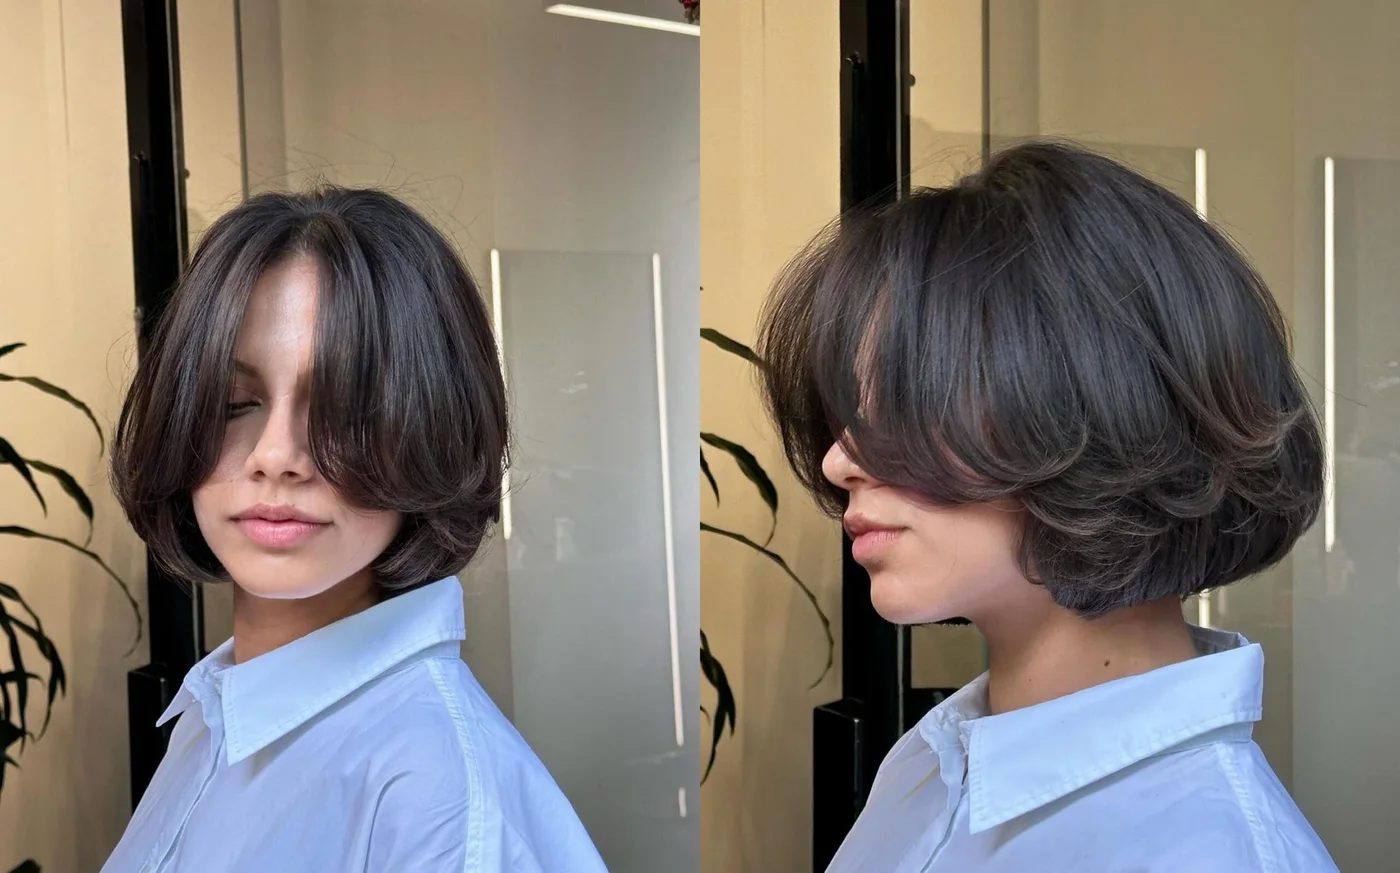
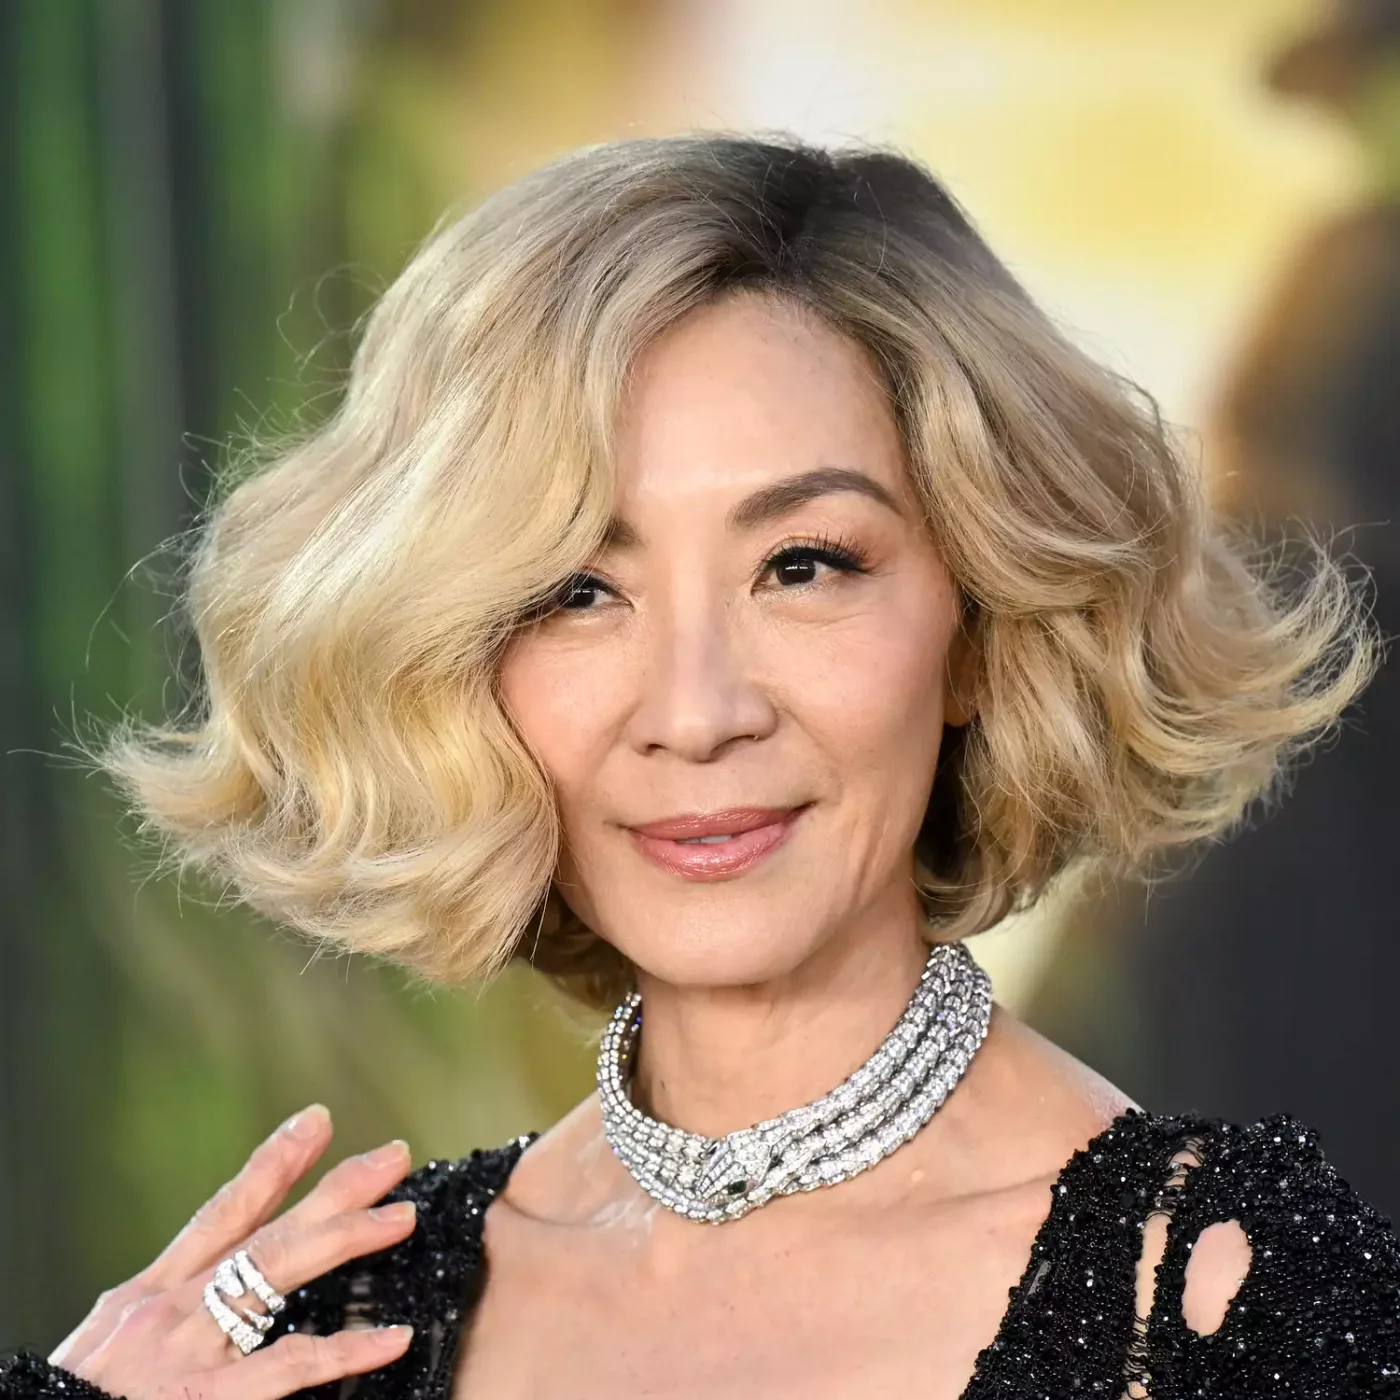
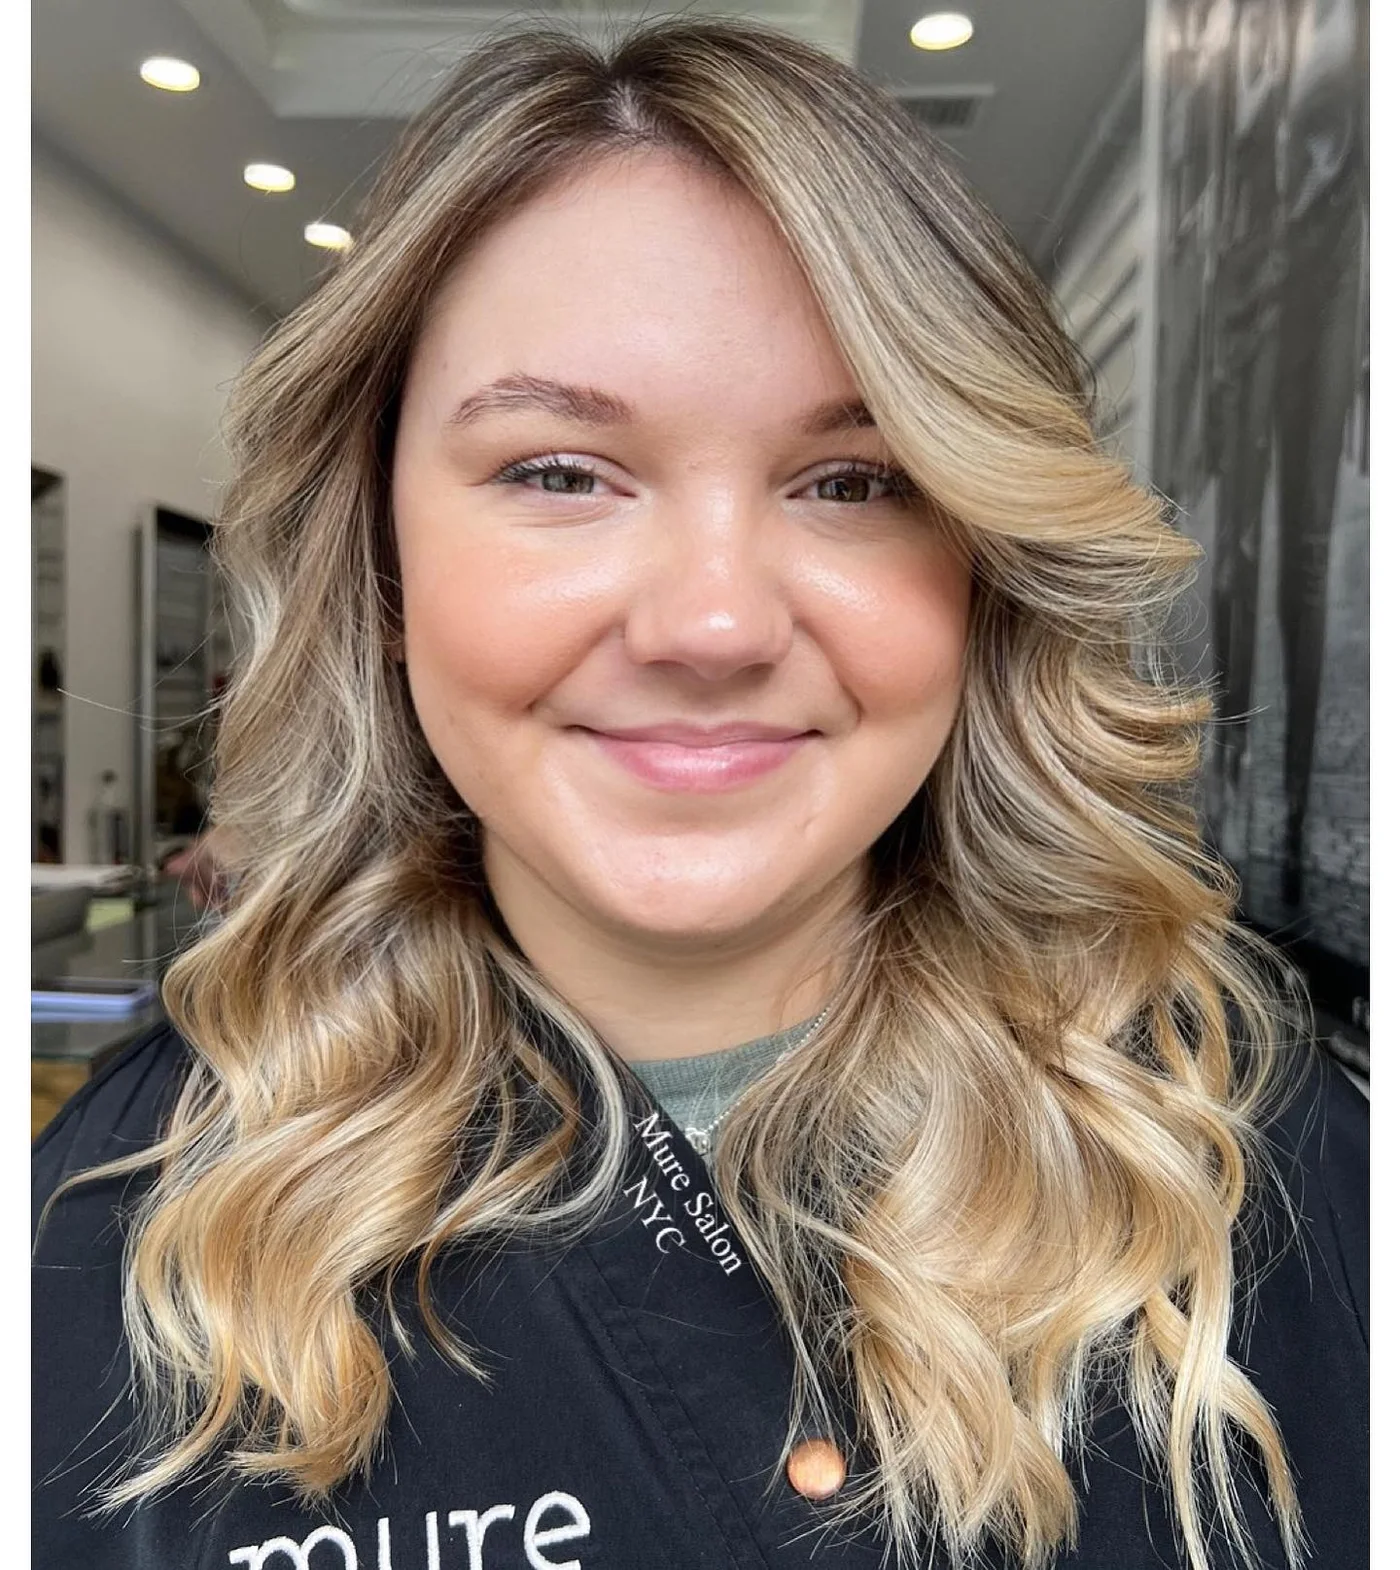
20. Rounded Blonde Lob
Description
A rounded blonde lob gives fine hair a fuller silhouette. The side volume is soft, but the bottom still has a clear long-bob shape.
Why it works
Rounded styling adds width where thin hair often collapses, while root lift keeps the crown from flattening.
Best for
Fine hair that holds a blowout, blonde color, and fuller lob shapes.
Maintenance
Let the round-brush shape cool before applying flexible hairspray.
Try it yourself for Rounded Blonde Lob
How to DIY
- Apply volumizing mousse through the upper half of the Rounded Blonde Lob, keeping the shoulder-skimming ends clean so thin hair does not separate.
- Aim root lift spray at the front hairline of the Rounded Blonde Lob, then dry that area before shaping the sides.
- Use a round brush to lift the front of the Rounded Blonde Lob and let the bend cool before touching it.
- Mist flexible hairspray under the top layer of the Rounded Blonde Lob, not directly on the face frame.
- Check the Rounded Blonde Lob from the side and smooth only the pieces that disrupt the fuller lob outline.
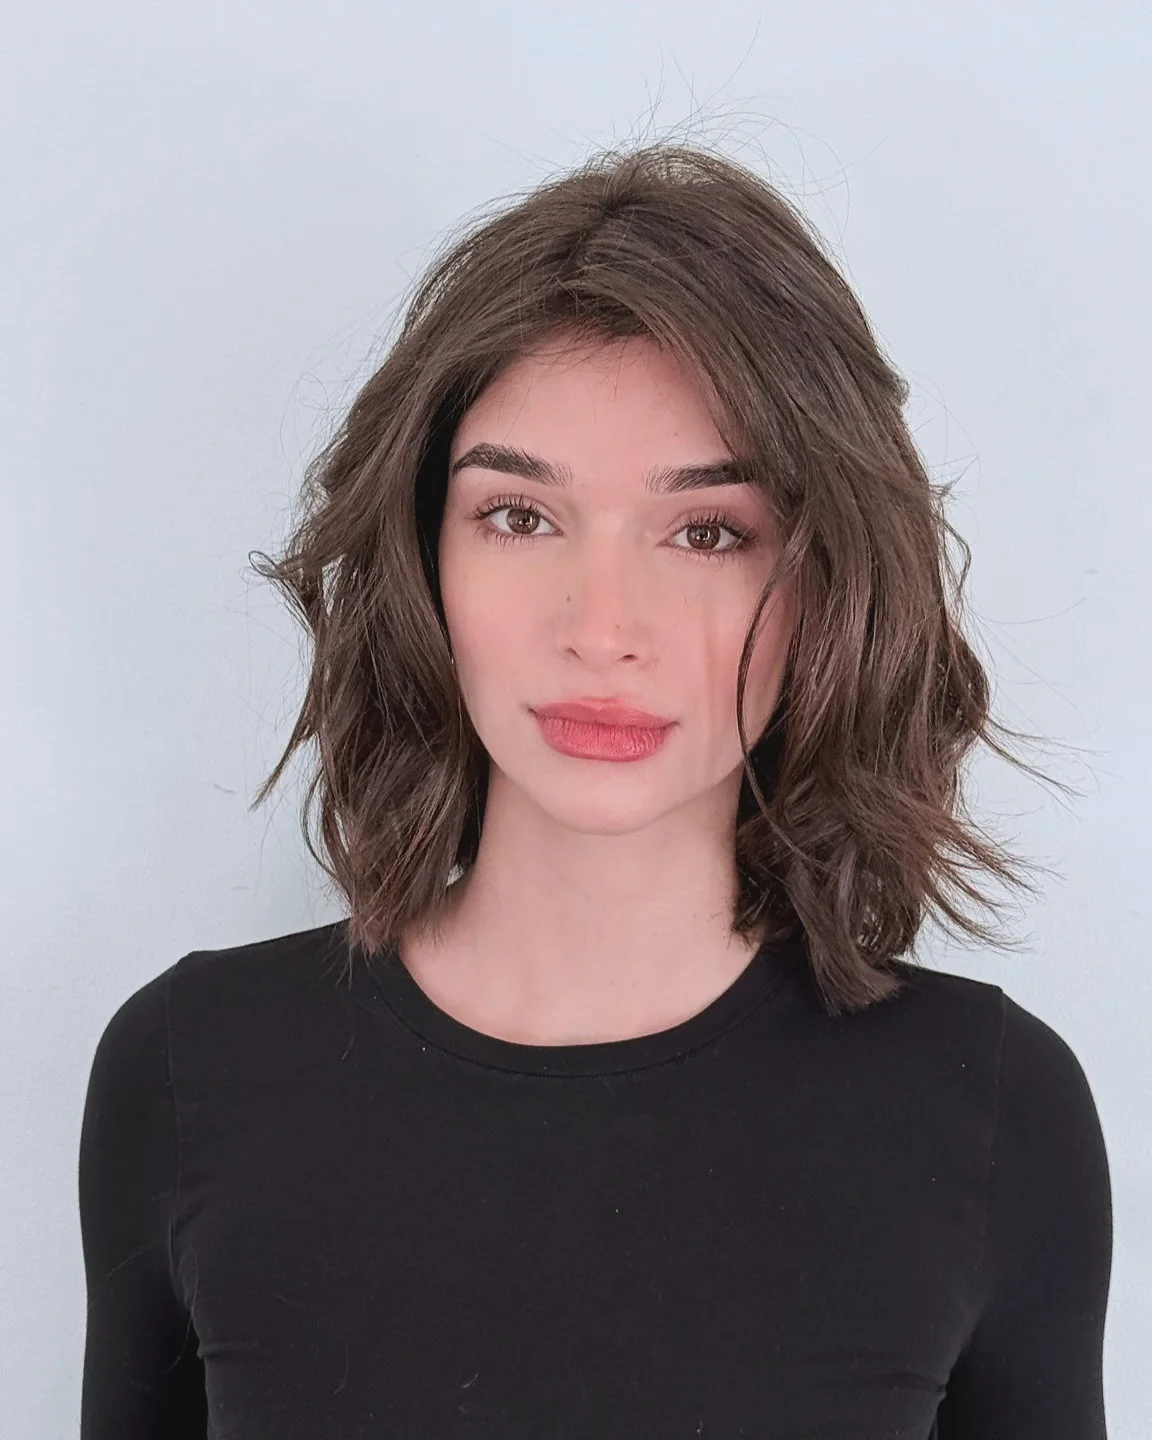
21. Textured Brunette Lob
Description
This brunette lob has airy texture and a soft shoulder length outline. The movement keeps thin hair from looking flat without needing heavy layers.
Why it works
Texture gives the sides more presence, while the length still reads as a neat lob.
Best for
Fine wavy hair, casual styling, and soft brunette lobs.
Maintenance
Refresh the waves with texture spray and avoid brushing them smooth.
Try it yourself for Textured Brunette Lob
How to DIY
- Prep the Textured Brunette Lob with dry shampoo at the roots so fine hair has grip before adding waves.
- Wrap the middle lengths of the Textured Brunette Lob around a 1 inch curling iron, leaving the ends softly finished.
- Mist texture spray through the sides of the Textured Brunette Lob, focusing where the lob needs width.
- Break up the waves of the Textured Brunette Lob with fingers instead of brushing away the volume.
- Leave the shoulder-skimming ends of the Textured Brunette Lob slightly grouped so the thin hair still reads as a lob.
22. Soft Blonde Wave Lob
Description
This blonde wave lob has soft bends around the cheekbones and a rounded lower shape. It gives thin hair a more dimensional look.
Why it works
The wave pattern creates fullness at the sides while the lob ends stay grouped.
Best for
Fine blonde hair, soft waves, and medium effort styling.
Maintenance
Curl alternate sections loosely and shake the hair out after it cools.
Try it yourself for Soft Blonde Wave Lob
How to DIY
- Prep the Soft Blonde Wave Lob with dry shampoo at the roots so fine hair has grip before adding waves.
- Wrap the middle lengths of the Soft Blonde Wave Lob around a 1 inch curling iron, leaving the ends softly finished.
- Mist texture spray through the sides of the Soft Blonde Wave Lob, focusing where the lob needs width.
- Break up the waves of the Soft Blonde Wave Lob with fingers instead of brushing away the volume.
- Leave the lower edge of the Soft Blonde Wave Lob slightly grouped so the thin hair still reads as a lob.
23. Blonde Fringe Lob
Description
This blonde fringe lob uses bangs and light layers to give thin hair more shape at the front. The shoulder length keeps the cut from looking too sparse.
Why it works
Bangs create a focal point, and the light side layers add movement without stealing too much density.
Best for
Fine hair with bangs, blonde color, and soft face framing.
Maintenance
Dry the fringe first and use styling cream only on the lower face frame.
Try it yourself for Blonde Fringe Lob
How to DIY
- Dry the bang area of the Blonde Fringe Lob first because fine hair around the forehead sets quickly.
- Use a small round brush to bend the fringe of the Blonde Fringe Lob without pulling too much hair forward.
- Tap dry shampoo at the bang roots of the Blonde Fringe Lob so the front stays light through the day.
- Smooth light styling cream over the side layers of the Blonde Fringe Lob, avoiding the scalp and part line.
- Check that the fringe and shoulder-skimming ends of the Blonde Fringe Lob work together instead of competing for volume.
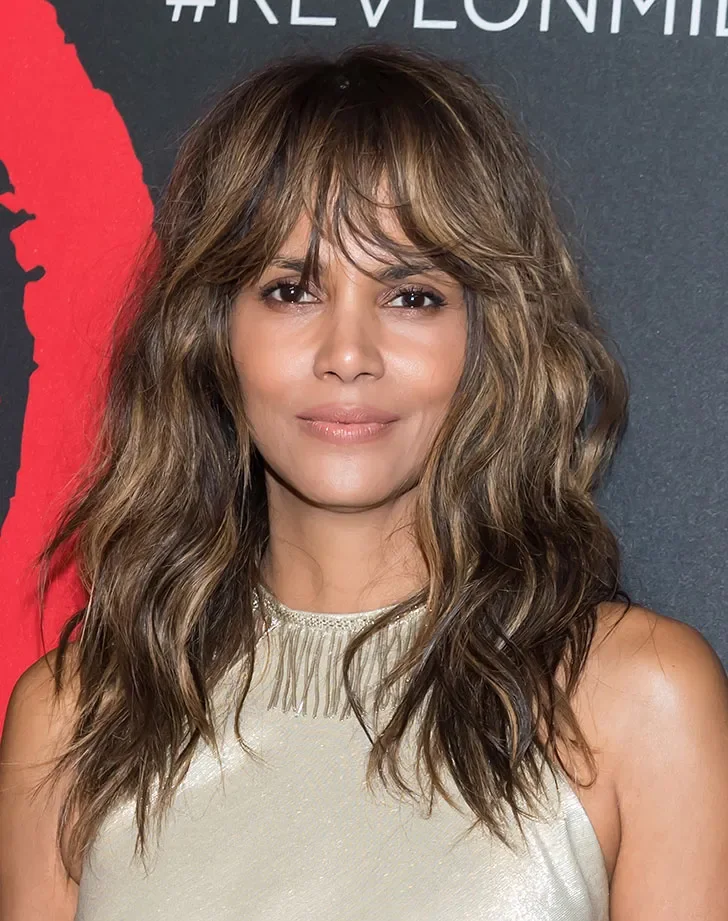
24. Highlighted Wavy Lob
Description
Highlighted waves make this lob look fuller through the sides. The light and dark pieces give fine hair more visual depth.
Why it works
Highlights create dimension, and the wave shape prevents the lob from falling flat.
Best for
Fine highlighted hair, soft waves, and photo-ready lobs.
Maintenance
Use color-safe shampoo and add texture spray only where the waves need lift.
Try it yourself for Highlighted Wavy Lob
How to DIY
- Wash the Highlighted Wavy Lob with color-safe shampoo so the highlights or vivid tone keep their dimension.
- Apply root lift spray at the front hairline of the Highlighted Wavy Lob before drying the colored face frame.
- Mist texture spray through the lighter pieces of the Highlighted Wavy Lob so thin hair shows more separation.
- Shape the shoulder-skimming ends of the Highlighted Wavy Lob with fingers so the lob does not look over-smoothed.
- Finish the Highlighted Wavy Lob by checking that the color still supports fullness rather than exposing sparse ends.
25. Tousled Brunette Lob
Description
This tousled brunette lob has loose texture and soft bangs. The shape gives thin hair a relaxed, fuller look without needing a very short cut.
Why it works
Bangs and waves add movement around the face, while the shoulder length keeps enough visual weight.
Best for
Fine to medium hair, casual texture, and lobs with bangs.
Maintenance
Use dry shampoo at the fringe and texture spray through the side pieces.
Try it yourself for Tousled Brunette Lob
How to DIY
- Prep the Tousled Brunette Lob with dry shampoo at the roots so fine hair has grip before adding waves.
- Wrap the middle lengths of the Tousled Brunette Lob around a 1 inch curling iron, leaving the ends softly finished.
- Mist texture spray through the sides of the Tousled Brunette Lob, focusing where the lob needs width.
- Break up the waves of the Tousled Brunette Lob with fingers instead of brushing away the volume.
- Leave the lower edge of the Tousled Brunette Lob slightly grouped so the thin hair still reads as a lob.
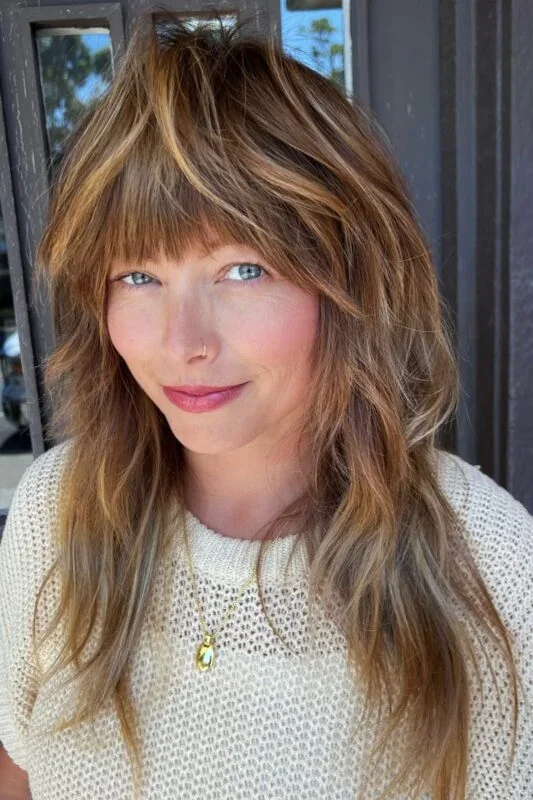
26. Wispy Bang Layered Lob
Description
Wispy bangs and soft layers make this lob feel light without losing its shape. The ends stay long enough to support thin hair.
Why it works
Wispy fringe uses less hair than a full bang, which helps preserve density around the sides.
Best for
Fine hair with bangs, soft layering, and relaxed daily styling.
Maintenance
Use dry shampoo on the bangs and a small amount of cream on the lower layers.
Try it yourself for Wispy Bang Layered Lob
How to DIY
- Dry the bang area of the Wispy Bang Layered Lob first because fine hair around the forehead sets quickly.
- Use a small round brush to bend the fringe of the Wispy Bang Layered Lob without pulling too much hair forward.
- Tap dry shampoo at the bang roots of the Wispy Bang Layered Lob so the front stays light through the day.
- Smooth light styling cream over the side layers of the Wispy Bang Layered Lob, avoiding the scalp and part line.
- Check that the fringe and shoulder-skimming ends of the Wispy Bang Layered Lob work together instead of competing for volume.
27. Shoulder-Skimming Blowout Lob
Description
This shoulder-skimming lob has a soft blowout shape with lift at the front. The rounded ends help thin hair look more finished.
Why it works
A blowout adds fullness without cutting away density, and the shoulder length keeps the shape practical.
Best for
Fine hair that needs polish, soft layers, and fuller-looking ends.
Maintenance
Apply mousse near the roots and round-brush the front away from the face.
Try it yourself for Shoulder-Skimming Blowout Lob
How to DIY
- Apply volumizing mousse through the upper half of the Shoulder-Skimming Blowout Lob, keeping the shoulder-skimming ends clean so thin hair does not separate.
- Aim root lift spray at the crown of the Shoulder-Skimming Blowout Lob, then dry that area before shaping the sides.
- Use a round brush to lift the front of the Shoulder-Skimming Blowout Lob and let the bend cool before touching it.
- Mist flexible hairspray under the top layer of the Shoulder-Skimming Blowout Lob, not directly on the face frame.
- Check the Shoulder-Skimming Blowout Lob from the side and smooth only the pieces that disrupt the fuller lob outline.
28. Chestnut Face-Framing Lob
Description
This chestnut lob has face-framing layers that start gently around the cheeks. The lower shape still holds together, which is important for thin hair.
Why it works
Face framing gives movement where people notice it first, while the bottom stays dense.
Best for
Fine hair, warm brunette color, and soft shoulder length styling.
Maintenance
Lift the roots at the crown and brush the face frame inward at the ends.
Try it yourself for Chestnut Face-Framing Lob
How to DIY
- Apply volumizing mousse through the upper half of the Chestnut Face-Framing Lob, keeping the lower edge clean so thin hair does not separate.
- Aim root lift spray at the front hairline of the Chestnut Face-Framing Lob, then dry that area before shaping the sides.
- Use a round brush to lift the front of the Chestnut Face-Framing Lob and let the bend cool before touching it.
- Mist flexible hairspray under the top layer of the Chestnut Face-Framing Lob, not directly on the face frame.
- Check the Chestnut Face-Framing Lob from the side and smooth only the pieces that disrupt the fuller lob outline.
29. Black Blunt Lob With Bangs
Description
This black blunt lob has bangs and a compact lower edge. The haircut looks full because the sides and ends are not overly thinned.
Why it works
A blunt lob gives fine hair a stronger outline, and the bangs make the front feel intentional.
Best for
Straight fine hair, blunt long bobs, and fringe lovers.
Maintenance
Keep the bangs light at the roots and smooth the lower edge with minimal serum.
Try it yourself for Black Blunt Lob With Bangs
How to DIY
- Dry the bang area of the Black Blunt Lob With Bangs first because fine hair around the forehead sets quickly.
- Use a small round brush to bend the fringe of the Black Blunt Lob With Bangs without pulling too much hair forward.
- Tap dry shampoo at the bang roots of the Black Blunt Lob With Bangs so the front stays light through the day.
- Smooth light styling cream over the side layers of the Black Blunt Lob With Bangs, avoiding the scalp and part line.
- Check that the fringe and shoulder-skimming ends of the Black Blunt Lob With Bangs work together instead of competing for volume.
30. Simple Brunette Lob
Description
This simple brunette lob keeps the focus on healthy-looking ends. The shape is easy to understand and works well when thin hair needs a clean reset.
Why it works
A simple lob can make fine hair look better by removing stringy length and keeping the perimeter tidy.
Best for
Straight thin hair, minimal layers, and low-fuss long bobs.
Maintenance
Use heat protectant before smoothing and keep shine spray on the lower half only.
Try it yourself for Simple Brunette Lob
How to DIY
- Mist heat protectant over the Simple Brunette Lob before smoothing because thin hair shows heat damage quickly.
- Work in small sections on the Simple Brunette Lob, keeping the tool movement light through the shoulder-skimming ends.
- Add light smoothing serum only to the lower half of the Simple Brunette Lob so the roots keep their lift.
- Use shine spray from a distance on the Simple Brunette Lob, focusing on the outside layer rather than the scalp.
- Comb the perimeter of the Simple Brunette Lob into place so the lob ends look full and even.
What lob haircut makes thin hair look thicker
A blunt or softly rounded lob usually makes thin hair look thicker because the bottom line stays visible. Too many short layers can make the ends look scattered, especially if the hair is already fine.
The safest approach is to keep the lower edge full and add movement near the face, crown, or middle lengths. That gives the haircut shape without sacrificing density.
Best lob lengths for thin hair
Shoulder-skimming and collarbone lobs are usually the most forgiving. They remove weak, stringy length but still leave enough hair to style smooth, waved, tucked, or softly blown out.
If the ends look thin at collarbone length, go slightly shorter. If the hair still looks full there, a longer lob with light face framing can work beautifully.
How to style a fine-hair lob
Use product placement carefully. Root lift belongs near the scalp, mousse works best through the upper half, and shine products should stay near the ends.
For waves, curl the middle lengths and leave the ends softly finished. For smooth lobs, protect the hair from heat and polish the outside layer without flattening the crown.

About the author
Bella Ross
Bella Ross is the hairstyle editor behind Latest Easy Hairstyles. She curates practical haircut, braid, color, and styling ideas with a focus on looks that are easy to browse, realistic to recreate, and useful for everyday hair decisions.